
Follow Me On Social Media!

Layered Oreo Icebox Cake: The No-Bake Dessert That Tastes Like You Spent Hours.
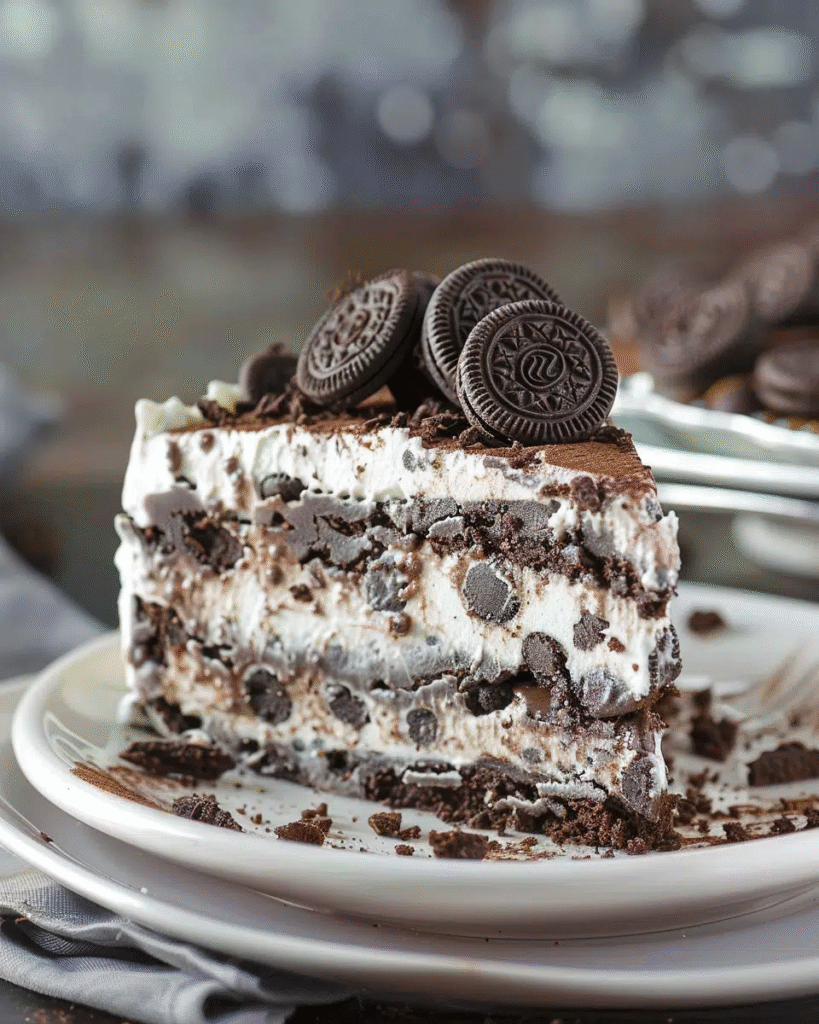
Some of the best desserts require no oven, no precision, and no advanced baking skills. This Oreo icebox cake is proof that sometimes the simplest recipes are the ones that get requested again and again. It’s just cookies and cream, layered and chilled until the Oreos soften into something that tastes almost like cake but better—richer, more chocolatey, and impossibly creamy.
I first made this dessert in college when I needed to bring something impressive to a potluck but had exactly zero baking equipment in my tiny apartment. A friend’s grandmother shared the basic concept: layer cookies with whipped cream, refrigerate overnight, and somehow magic happens. The cookies absorb moisture from the cream and transform from crunchy to tender, creating layers that slice like an elegant cake despite requiring nothing more than a bowl and a spatula.
What makes this Oreo icebox cake so appealing is how it looks like you put in serious effort when the actual work takes maybe fifteen minutes. The contrast between dark chocolate cookies and white cream creates dramatic layers that photograph beautifully, and every bite delivers that perfect cookies-and-cream flavor that’s universally loved. It’s cool and refreshing, making it perfect for summer gatherings, but rich enough to satisfy serious chocolate cravings any time of year.
This no-bake Oreo dessert is endlessly adaptable too. The basic technique works with different cookies, flavored creams, and various toppings, so once you’ve mastered the simple version, you can get creative with variations that suit your taste or occasion.
Ingredients
For the Cream Layers:
- 3 cups heavy whipping cream, very cold
- 1/2 cup powdered sugar
- 1 teaspoon vanilla extract
- 8 ounces cream cheese, softened to room temperature
- 1/4 cup sour cream (for stability and tang)
For the Cookie Layers:
- 2 packages (14.3 ounces each) Oreo cookies (about 72 cookies)
- 1/4 cup whole milk (for dipping, optional)
For Topping:
- 1/2 cup crushed Oreo cookies
- Chocolate shavings or mini chocolate chips
- Optional: chocolate sauce for drizzling
Equipment Needed:
- 9×13 inch baking dish or pan
- Electric mixer (stand or hand)
- Offset spatula or regular spatula
- Plastic wrap
Instructions
Start by making the cream filling, which is the glue that holds everything together and creates that fluffy, dreamy texture. In a large mixing bowl, beat the softened cream cheese with an electric mixer until smooth and fluffy, about 2 minutes. There should be no lumps—scrape down the sides of the bowl as needed. Add the sour cream and beat until combined. The sour cream adds tang and helps stabilize the whipped cream so it doesn’t deflate over time.
In a separate large bowl, combine the cold heavy cream, powdered sugar, and vanilla extract. Using clean beaters, whip the mixture on medium speed, gradually increasing to high. Beat until stiff peaks form—this means when you lift the beaters, the cream should stand up in peaks that hold their shape without drooping. This takes about 3-4 minutes, but watch carefully because you don’t want to overbeat and end up with butter.
Gently fold about one-third of the whipped cream into the cream cheese mixture to lighten it. Use a spatula and fold gently rather than stirring vigorously—you want to maintain all that airiness. Once combined, fold in the remaining whipped cream in two additions, being careful not to deflate the mixture. The result should be light, fluffy, and cloud-like.
Now comes the assembly, which is simple but requires a bit of patience. Spread about 1 cup of the cream mixture across the bottom of your 9×13 inch pan, creating a thin base layer. This prevents the bottom cookies from getting soggy in one spot.
For the first cookie layer, you have two options. You can lay the Oreos directly on the cream, or for slightly faster softening, quickly dip each cookie in milk for just one second before placing it. Don’t soak them—just a brief dip. Arrange the cookies in a single layer across the cream, breaking cookies as needed to fill gaps. You want complete coverage with no cream showing through.
Spread about one-third of the remaining cream mixture over the cookie layer, using an offset spatula to create an even layer. Don’t worry about being perfect—rustic works fine here. Add another layer of cookies, pressing gently into the cream. Continue alternating cream and cookies, ending with a final layer of cream on top. You should have about 4-5 layers of cookies depending on your pan depth.
Smooth the top layer of cream as evenly as possible. This is what people will see when you serve it, so take a moment to make it look nice. Cover the entire pan tightly with plastic wrap, pressing it directly onto the surface of the cream to prevent a skin from forming.
Refrigerate for at least 6 hours, but overnight is better—12 to 24 hours gives the cookies time to fully soften and meld with the cream. The waiting is the hardest part, but it’s essential for achieving that cake-like texture.
Before serving, remove the plastic wrap and sprinkle the top generously with crushed Oreo cookies. Add chocolate shavings or mini chocolate chips for visual appeal. If you’re feeling fancy, drizzle with chocolate sauce in a decorative pattern.
Flavor & Texture Notes
This Oreo icebox cake delivers an incredibly satisfying combination of flavors and textures that evolves as it sits. After the full chilling time, the cookies soften into layers that are tender but not mushy, creating a texture that’s remarkably similar to cake layers but denser and more substantial. The contrast between the dark, chocolatey cookie layers and the light, barely sweet cream creates a perfect balance.
The cream filling is fluffy and cloud-like with a subtle vanilla flavor that lets the chocolate cookies shine. The addition of cream cheese gives it body and a slight tang that prevents it from tasting one-dimensional or overly sweet. It’s rich but not heavy, and the lightness means you can eat a generous slice without feeling overwhelmed.
The chocolate flavor is pure Oreo—that distinctive cocoa taste that’s not quite like regular chocolate cake but somehow better in its own way. As the cookies soften, they release some of their chocolate essence into the cream, creating marbled swirls of flavor throughout.
What’s remarkable is how this dessert manages to be both refreshing and indulgent. It’s cold and creamy enough to be satisfying on a hot day, but chocolatey and rich enough to serve as a serious dessert for chocolate lovers. Each bite gives you that perfect cookies-and-cream experience without being cloying.
Tips & Variations
Cookie Options: While Oreos are classic, this technique works with almost any sandwich cookie. Try mint Oreos for a grasshopper pie flavor, peanut butter Oreos, or even vanilla Golden Oreos for a different look. Chocolate graham crackers or chocolate wafer cookies create a more traditional icebox cake.
Flavor Variations: Add 2 tablespoons of coffee liqueur or instant espresso powder to the cream for a mocha version. Fold in 1/2 cup of mini chocolate chips for extra texture. A tablespoon of peppermint extract creates a refreshing mint chocolate version perfect for holidays.
Make It Fancy: Create individual servings in mason jars or clear cups by layering crushed Oreos with cream. These look impressive and eliminate the need for slicing. For special occasions, pipe the cream in decorative swirls instead of spreading it.
Lighter Version: Use reduced-fat cream cheese and substitute half the heavy cream with Greek yogurt for a lighter texture. It won’t be quite as rich, but it’s still delicious and has more protein.
Extra Indulgent: Add a layer of chocolate ganache between some of the cream layers. Fold in chopped peanut butter cups or crushed candy bars. Drizzle caramel sauce between layers for a turtle-inspired version.
Texture Control: For softer cookies, dip each one briefly in milk before layering. For cookies that maintain more structure, skip the dipping and just rely on the cream to soften them. The timing of when you serve it also affects texture—at 6 hours the cookies are softer but still distinct, while at 24 hours they’re fully integrated into the cream.
Storage & Make-Ahead
This is the ultimate make-ahead dessert. It actually requires advance preparation, which means you can have it completely ready before guests arrive. The icebox cake keeps beautifully in the refrigerator for up to 3 days, though it’s usually gone much faster than that.
Store covered tightly with plastic wrap or in an airtight container to prevent the cream from absorbing refrigerator odors. The texture continues to soften over time—by day three, the cookies are completely integrated with the cream into an almost mousse-like consistency that’s different but still delicious.
This dessert can be frozen for up to a month, though the texture changes slightly. The cream becomes a bit icier, almost like ice cream cake. Some people actually prefer it frozen and serve it that way intentionally. If freezing, wrap very tightly in plastic wrap and then aluminum foil. Thaw in the refrigerator for several hours before serving, or serve it frozen for an ice cream cake experience.
For the best texture and flavor, make it at least 12 hours before serving but no more than 2 days ahead. This gives the cookies time to soften perfectly while the cream maintains its fluffy texture.
Serving Suggestions
This Oreo icebox cake is stunning enough to be a showstopper dessert at parties, potlucks, and family gatherings. The dramatic black and white layers look impressive when sliced, especially if you wipe your knife clean between cuts for neat edges.
Serve slices on white plates to maximize the visual contrast. A small dollop of whipped cream on the side and a few fresh berries add color and freshness. The slight tartness of raspberries or strawberries pairs beautifully with the sweet chocolate.
For casual gatherings, serve directly from the pan, letting guests scoop their own portions. Provide extra crushed Oreos, chocolate sauce, and whipped cream on the side so people can customize their servings.
This dessert pairs well with coffee or cold milk, obviously. For adult gatherings, serve with Irish cream liqueur, coffee-flavored cocktails, or a sweet dessert wine. The richness can handle bold drink pairings.
Consider making this for summer barbecues, birthday parties, or any time you need a crowd-pleasing dessert that travels well and doesn’t require last-minute attention. It’s also perfect for potlucks since it’s easy to transport and everyone recognizes and loves Oreos.
FAQ
How long do the cookies need to soften? Minimum 6 hours, but 12-24 hours is ideal for that perfect cake-like texture. At 6 hours, cookies are softened but still have some structure. By 24 hours, they’re fully integrated with the cream. You’ll know it’s ready when you can easily slice through the cookies without them crumbling.
Can I use store-bought whipped topping instead of making whipped cream? You can use Cool Whip or similar products, but the texture won’t be quite as good and the flavor will be sweeter and less natural-tasting. If using store-bought, you’ll need about 16 ounces (two 8-ounce containers) and you should still beat in the cream cheese and sour cream for better stability and flavor.
Why did my whipped cream deflate or separate? This usually happens from overbeating the cream or not folding gently enough when combining with the cream cheese. Make sure the cream is very cold before whipping, stop beating as soon as stiff peaks form, and fold (don’t stir) when combining components. The sour cream and cream cheese also help stabilize the mixture.
Do I have to use the whole Oreo cookie, or should I scrape out the filling? Use the whole cookie—filling and all. The cream filling adds sweetness and helps the cookies soften properly. Scraping them would be time-consuming and unnecessary. The filling essentially melts into the layers as the dessert chills.
Can I make this in a different shaped pan? Absolutely. Use a 9-inch springform pan for a tall, impressive presentation that you can easily unmold. A trifle dish or glass bowl shows off the layers beautifully. Individual portions in cups or jars work great too. Just adjust the number of cookie layers based on your container depth.
Why are my layers uneven or messy-looking? Don’t worry too much about perfection—this is a rustic dessert by nature. To improve appearance, use an offset spatula for spreading cream, take your time with each layer, and make sure the final top layer is as smooth as possible. Once you add the crushed cookie topping, minor imperfections disappear completely.
There’s real satisfaction in making desserts that look impressive but don’t require special skills or equipment. This Oreo icebox cake is one of those rare recipes that delivers bakery-worthy results with minimal effort and maximum reward. The combination of chocolate cookies and fluffy cream is timeless for a reason—it just works. Whether you’re feeding a crowd, need a make-ahead dessert, or simply want something cold and chocolatey on a warm day, this no-bake wonder has you covered. Mix it up, layer it together, let time do its magic in the refrigerator, and prepare to accept compliments on your “baking” skills.