
Follow Me On Social Media!

Garlic Parmesan Crispy Chicken Tenders Recipe: Restaurant-Quality at Home.
There’s something magical about the combination of crispy coating and tender chicken that makes even the pickiest eaters happy. I discovered this particular version of garlic parmesan chicken tenders during a particularly challenging week when I needed something comforting yet satisfying for my family. What started as a simple weeknight dinner experiment has become our go-to recipe whenever we want something that feels special without the restaurant price tag.
The secret lies in the double coating method and the perfect balance of garlic and parmesan that creates an incredibly crispy exterior while keeping the chicken juicy inside. Unlike many chicken tender recipes that rely heavily on deep frying, this version achieves that coveted crunch through a combination of panko breadcrumbs, fresh parmesan, and the right oven temperature. The result is chicken tenders that rival your favorite restaurant’s version, but with the satisfaction of making them in your own kitchen.
What makes these garlic parmesan chicken tenders particularly appealing is their versatility. They work equally well as a main dish for dinner, cut up over salads for lunch, or even as an appetizer for game day gatherings. The garlic adds warmth without being overwhelming, while the parmesan brings that savory, nutty flavor that makes each bite satisfying.
Ingredients
For the Chicken:
- 2 pounds chicken breast, cut into 1-inch wide strips
- 1 teaspoon salt
- 1/2 teaspoon black pepper
- 1/2 teaspoon paprika
For the Coating:
- 1 cup all-purpose flour
- 3 large eggs, beaten
- 2 cups panko breadcrumbs
- 1 cup freshly grated parmesan cheese
- 4 cloves garlic, minced very fine
- 1 teaspoon garlic powder
- 1 teaspoon dried Italian seasoning
- 1/2 teaspoon onion powder
- 1/4 teaspoon cayenne pepper (optional)
For Finishing:
- 4 tablespoons butter, melted
- 2 tablespoons fresh parsley, chopped
- Extra parmesan for serving
Instructions
Start by setting your oven to 425°F and positioning a rack in the center. Line a large baking sheet with parchment paper and place a wire cooling rack on top if you have one. This setup helps air circulate around the tenders for even crispiness.
Cut your chicken breasts into strips that are roughly the same size so they cook evenly. Pat each piece completely dry with paper towels, then season with salt, pepper, and paprika. Let the seasoned chicken sit at room temperature for about 15 minutes while you prepare your coating stations.
Set up three shallow dishes for your breading station. In the first dish, place the flour. In the second, beat the eggs until smooth. In the third dish, combine the panko breadcrumbs, grated parmesan, minced garlic, garlic powder, Italian seasoning, onion powder, and cayenne if using. Mix this coating thoroughly so the garlic and seasonings are evenly distributed.
Now comes the coating process that creates that perfect crust. Take each chicken strip and coat it completely in flour, shaking off any excess. Next, dip it in the beaten eggs, making sure it’s well coated. Finally, press it firmly into the breadcrumb mixture, turning to coat all sides and pressing gently so the coating adheres well. Place each coated tender on your prepared baking sheet with space between each piece.
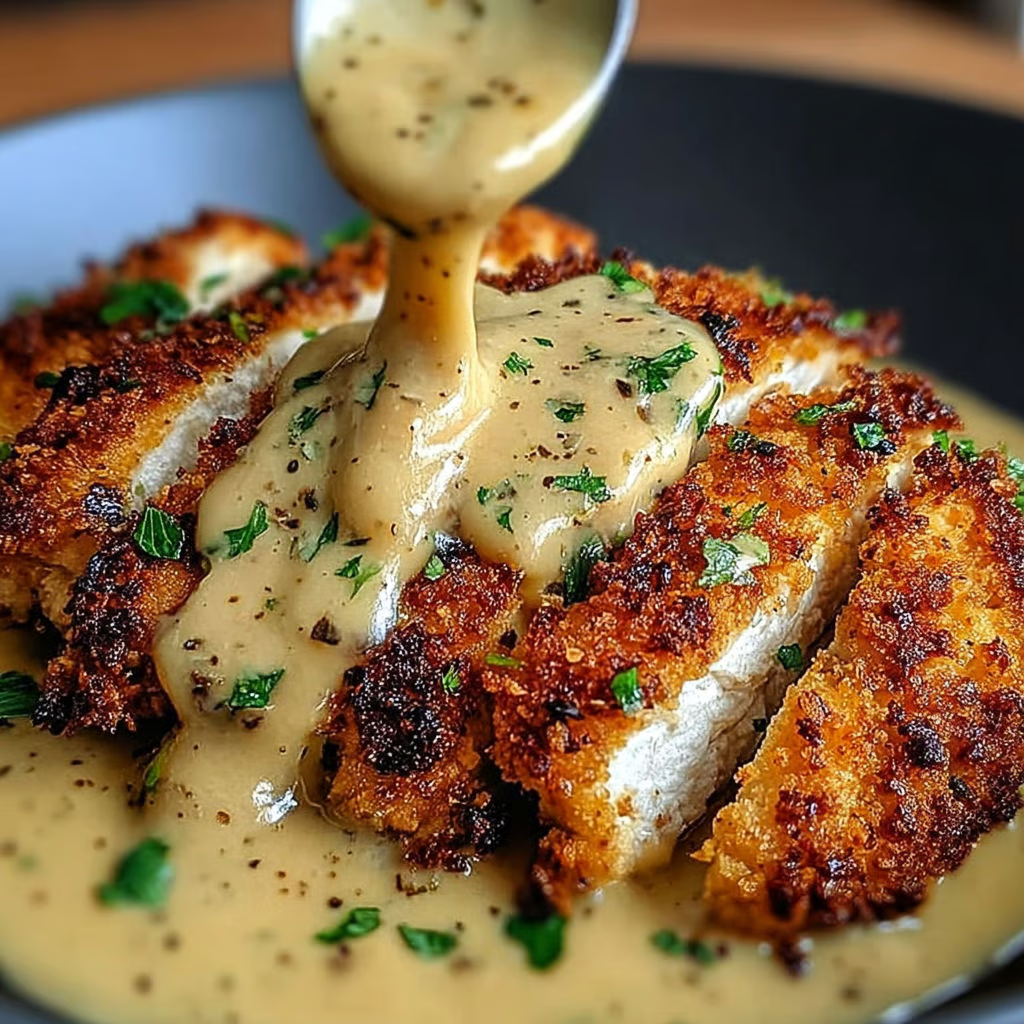
Once all tenders are coated, drizzle the melted butter evenly over the top. This step is crucial for achieving that golden, crispy exterior that makes these tenders so appealing. The butter helps the coating brown beautifully and adds richness to every bite.
Bake for 18-22 minutes, flipping once halfway through cooking. The tenders are done when they reach an internal temperature of 165°F and the coating is golden brown and crispy. If you want extra browning, turn on the broiler for the last 2-3 minutes, watching carefully to prevent burning.
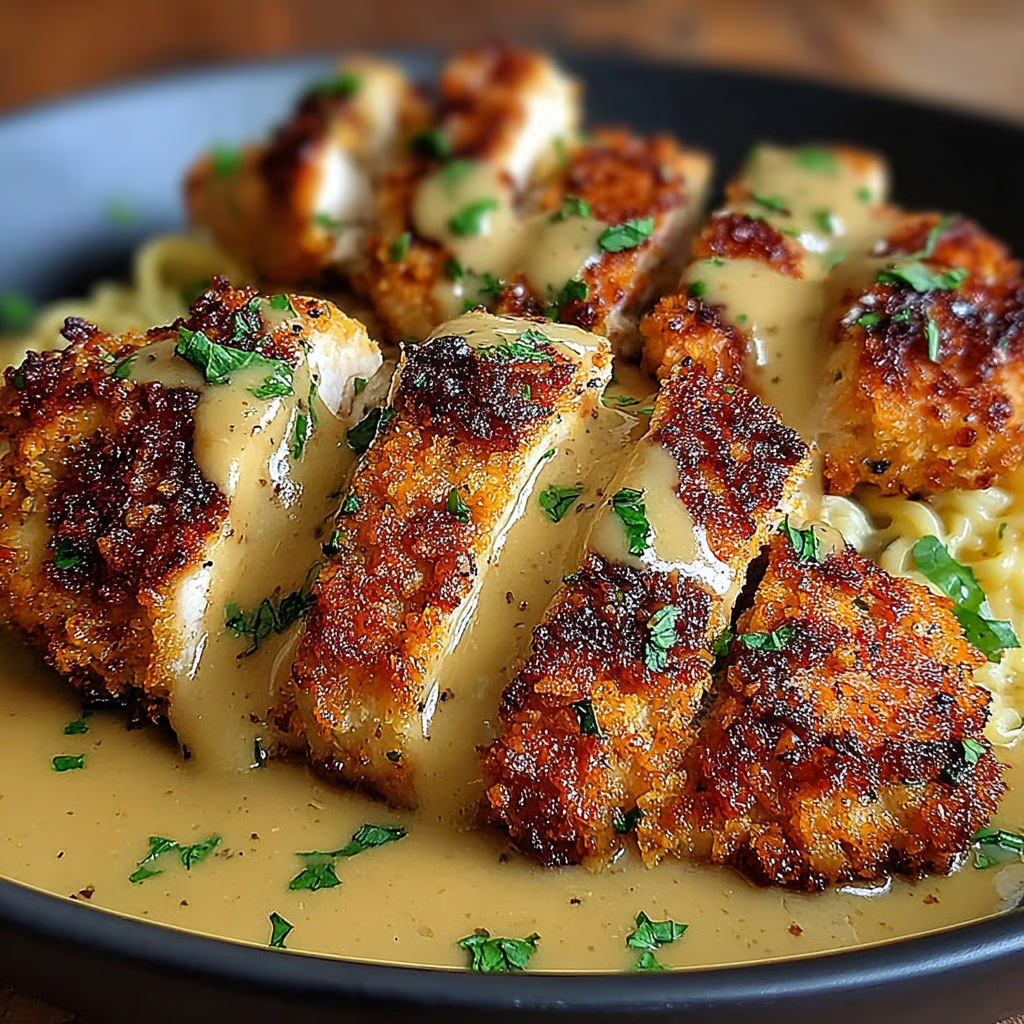
Remove from the oven and immediately sprinkle with fresh parsley and additional parmesan cheese while the tenders are still hot. Let them rest for 5 minutes before serving to allow the juices to redistribute.
Flavor & Texture Notes
These garlic parmesan chicken tenders deliver a perfect balance of flavors and textures that make them genuinely satisfying. The exterior provides a substantial crunch that gives way to incredibly tender, juicy chicken inside. The panko creates a lighter, more textured coating than regular breadcrumbs, while the parmesan adds depth and a slightly nutty flavor that complements the garlic beautifully.
The garlic presence is noticeable but not overpowering, offering warmth and aroma that makes the kitchen smell amazing while they bake. Fresh garlic combined with garlic powder creates layers of garlic flavor without any harsh bite. The Italian seasoning adds subtle herb notes that round out the overall taste profile.
What’s particularly appealing about the texture is how the coating stays crispy even after cooling slightly, making these tenders excellent for meal prep or serving at gatherings where they might sit for a few minutes before being eaten.
Tips & Variations
For the crispiest results, make sure your chicken is completely dry before starting the coating process. Any excess moisture will prevent the coating from adhering properly and can make the final result less crispy.
If you don’t have panko breadcrumbs, you can make your own by pulsing day-old bread in a food processor until you get coarse crumbs. Regular breadcrumbs work too, though the texture won’t be quite as light and crispy.
For a gluten-free version, substitute the flour with a gluten-free flour blend and use gluten-free panko breadcrumbs. The recipe works just as well with these substitutions.
To add more heat, increase the cayenne pepper or add a pinch of red pepper flakes to the coating mixture. For a more herb-forward version, add fresh thyme or oregano to the breadcrumb mixture.
If you prefer to use chicken thighs instead of breasts, they work wonderfully in this recipe and actually stay even more tender. Just adjust the cooking time slightly since thighs can take a few minutes longer to cook through.
For an extra layer of flavor, marinate the chicken strips in buttermilk for 2-4 hours before coating. This adds tenderness and a slight tang that pairs beautifully with the garlic and parmesan.
Storage & Make-Ahead
These chicken tenders are best served fresh from the oven when the coating is at its crispiest. However, they store quite well for meal prep purposes. Leftover tenders can be refrigerated for up to 3 days in an airtight container.
To reheat and restore some crispiness, place them on a baking sheet and warm in a 375°F oven for 8-10 minutes rather than using the microwave, which will make the coating soggy.
For make-ahead preparation, you can bread the chicken tenders up to 24 hours in advance. Place the coated tenders on a baking sheet, cover with plastic wrap, and refrigerate. When ready to cook, remove from the refrigerator 15 minutes before baking and proceed with the recipe as written.
These tenders also freeze well after cooking. Let them cool completely, then freeze in a single layer on a baking sheet before transferring to freezer bags. They’ll keep for up to 2 months. Reheat from frozen in a 375°F oven for 12-15 minutes.
Serving Suggestions
These garlic parmesan chicken tenders are incredibly versatile and pair well with numerous sides and sauces. For a classic approach, serve them with honey mustard, ranch dressing, or a simple marinara sauce for dipping.
They make an excellent main dish alongside roasted vegetables like broccoli, Brussels sprouts, or asparagus. A simple caesar salad provides a nice contrast to the rich, crispy coating, while mashed potatoes or rice pilaf rounds out a more substantial meal.
For a casual gathering, cut the tenders into bite-sized pieces and serve as appetizers with various dipping sauces. They’re also fantastic sliced over a fresh garden salad or tucked into wraps with lettuce and tomatoes.
Consider serving them with pasta tossed in olive oil and herbs for an Italian-inspired meal, or alongside sweet potato fries for a combination that both kids and adults love.
FAQ
Can I use frozen chicken for this recipe? Yes, but make sure to thaw it completely and pat it very dry before seasoning and coating. Frozen chicken often releases more moisture, so extra drying time is important for achieving the crispy coating.
Why isn’t my coating staying crispy? The most common cause is excess moisture on the chicken before coating, or not using enough butter on top before baking. Also, make sure your oven is properly preheated and avoid overcrowding the baking sheet.
Can I make these in an air fryer? Absolutely! Cook at 400°F for 12-15 minutes, flipping halfway through. You may need to work in batches depending on your air fryer size. The cooking time might vary slightly based on your specific model.
What’s the best way to get the coating to stick? Make sure each piece is thoroughly coated in flour first, then completely covered in egg, and finally pressed firmly into the breadcrumb mixture. Don’t rush this step, as proper coating is key to the final result.
Can I double this recipe? Yes, this recipe doubles easily. Just make sure you have enough baking sheet space to avoid overcrowding, which can cause steaming instead of crisping. You may need to use two baking sheets and rotate them halfway through cooking.
Making restaurant-quality garlic parmesan chicken tenders at home is easier than you might think, and the results are incredibly rewarding. The combination of the perfectly seasoned coating and tender chicken creates something that feels special enough for company but simple enough for a weeknight dinner. Once you try this method, you’ll find yourself reaching for this recipe whenever you want something comforting and satisfying. The best part is watching everyone’s face light up when they take that first crispy, flavorful bite.