
Follow Me On Social Media!

Easy Stovetop Chicken and Gravy Recipe.
My grandmother used to make chicken and gravy every Sunday, and the smell alone could bring the whole family to the table before she even called us. Years later, when I got my first apartment and a tiny kitchen, I realized her secret wasn’t fancy equipment or complicated techniques – it was just good chicken, proper browning, and a simple pan gravy made from the drippings. This stovetop version captures all that comfort without needing an oven or hours of cooking time.
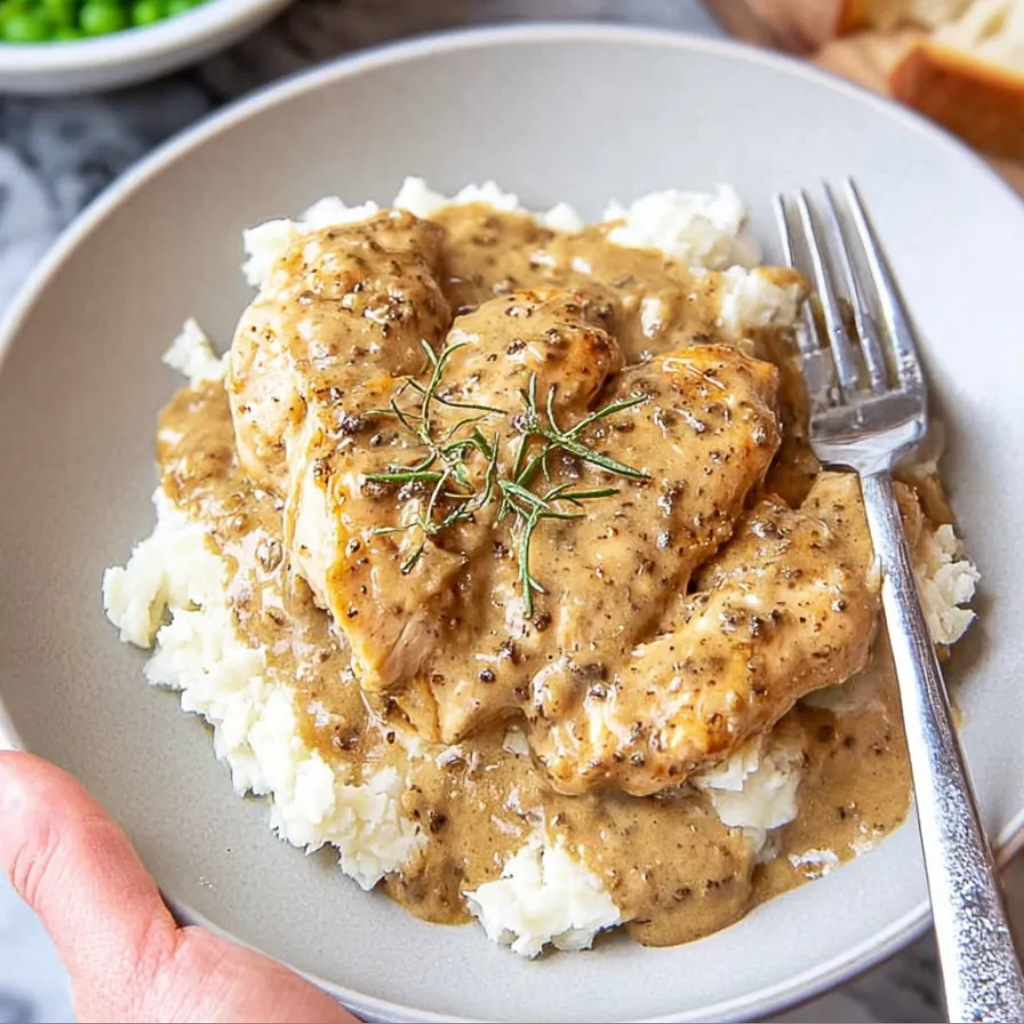
This stovetop chicken and gravy recipe delivers juicy, perfectly cooked chicken with a rich, savory gravy that tastes like you’ve been working on it all day. The chicken gets a beautiful golden crust from searing, then finishes cooking in the gravy, which keeps it moist while building incredible flavor. The gravy itself is smooth, well-seasoned, and has that deep chicken flavor that only comes from pan drippings.
What makes this chicken with gravy on the stovetop so practical is the speed and simplicity. Everything happens in one skillet, there’s minimal cleanup, and you can have dinner on the table in about 45 minutes. It’s the kind of home-cooked meal that feels nostalgic and comforting, perfect for weeknight dinners when you want something satisfying without the fuss.
Ingredients
For the Chicken:
- 4-6 bone-in, skin-on chicken thighs (about 2-2.5 pounds)
- 1 teaspoon salt
- 1/2 teaspoon black pepper
- 1/2 teaspoon garlic powder
- 1/2 teaspoon paprika
- 1/4 teaspoon onion powder
- 2 tablespoons vegetable oil or olive oil
For the Gravy:
- 3 tablespoons unsalted butter
- 3 tablespoons all-purpose flour
- 2 1/2 cups chicken broth (low sodium preferred)
- 1/2 cup whole milk or heavy cream
- 1 teaspoon Worcestershire sauce
- 1/2 teaspoon dried thyme
- 1/4 teaspoon dried sage (optional)
- Salt and black pepper to taste
- 1 bay leaf
For Serving:
- Fresh parsley, chopped (optional)
- Additional black pepper for garnish
Instructions
Start by preparing your chicken. Pat each piece completely dry with paper towels – this is essential for achieving crispy skin. Any moisture will cause the skin to steam rather than brown. Mix together the salt, black pepper, garlic powder, paprika, and onion powder in a small bowl. Season both sides of each chicken thigh generously with this mixture, making sure to get the seasoning under any loose flaps of skin.
Heat a large, deep skillet or sauté pan over medium-high heat. Add the oil and let it heat until it shimmers but doesn’t smoke. Place the chicken thighs in the pan skin-side down, making sure not to crowd them. You want space between each piece for proper browning. If your pan isn’t large enough, cook in batches.
Let the chicken cook undisturbed for 6-8 minutes. Resist the urge to move or peek at them – patience here rewards you with beautifully golden, crispy skin. You’ll know they’re ready to flip when the skin releases easily from the pan. If it’s sticking, give it another minute. Flip the chicken and cook for another 5-6 minutes on the second side until browned.
Transfer the browned chicken to a plate. It won’t be fully cooked yet, which is fine – it will finish cooking in the gravy. Look at your skillet – you should see lovely browned bits stuck to the bottom. This fond is liquid gold for your gravy.
Reduce the heat to medium and carefully pour off all but about 1 tablespoon of the fat from the pan. Don’t pour it down your sink – collect it in a heat-safe container to discard once cooled. If there are any really dark, burnt bits in the pan, wipe them out, but keep all the good brown stuff.
Add the butter to the pan and let it melt, swirling to coat the bottom. Once the butter is melted and foaming, sprinkle the flour evenly over the surface. Whisk immediately and constantly for about 2-3 minutes. This is your roux, and cooking it properly removes the raw flour taste while creating a base that will thicken your gravy. The mixture should turn a light golden color and smell nutty.
Slowly pour in about 1 cup of the chicken broth while whisking constantly. The mixture will seize up and look lumpy at first – this is normal. Keep whisking and it will smooth out. Once the first cup is incorporated and smooth, gradually add the remaining broth, whisking constantly.
Add the milk or cream, Worcestershire sauce, thyme, sage if using, and the bay leaf. Whisk everything together until smooth. Bring the gravy to a simmer, then reduce the heat to medium-low. Let it simmer for about 3-4 minutes, whisking occasionally, until it thickens slightly. It should coat the back of a spoon but still be pourable – remember, it will thicken more as it continues to cook with the chicken.
Taste the gravy and season with salt and pepper as needed. Be mindful that the chicken is already seasoned, so you may not need much salt.
Nestle the chicken thighs back into the skillet, skin-side up, along with any accumulated juices from the plate. Spoon some gravy over each piece, but leave the skin exposed so it stays somewhat crispy. Reduce the heat to low, cover the skillet with a lid (leaving it slightly ajar to allow steam to escape), and let everything simmer gently for 20-25 minutes.
Check the chicken after 20 minutes by inserting an instant-read thermometer into the thickest part without touching bone – it should register 165°F. If it’s not quite there, continue cooking for another 5 minutes and check again.
Once the chicken is cooked through, remove it to a serving platter. Remove and discard the bay leaf from the gravy. If the gravy seems too thick, whisk in a splash of chicken broth or milk. If it’s too thin, simmer it uncovered for a few minutes to reduce and thicken, whisking occasionally.
Taste the gravy one final time and adjust seasoning. Pour some gravy over the chicken, serve the rest on the side, and garnish with fresh parsley if desired.
Flavor & Texture Notes
This stovetop chicken and gravy delivers classic comfort food flavors that feel familiar and satisfying. The chicken skin becomes golden and slightly crispy from the initial searing, though it softens somewhat during the simmering process. The meat itself stays incredibly moist and tender, falling easily from the bone when you cut into it. Each bite is seasoned throughout, not just on the surface.
The gravy is where this dish really shines. It has a rich, savory chicken flavor that comes from the pan drippings, enhanced by the Worcestershire sauce which adds subtle depth without being identifiable. The texture is smooth and velvety, thick enough to coat the chicken and whatever sides you’re serving without being gloppy or paste-like. It should flow easily from a spoon but not be watery.
You’ll taste hints of thyme and sage, which provide that classic “gravy” flavor profile without tasting overly herby. The garlic and onion powder in the chicken seasoning come through subtly, adding complexity to each bite. The combination of butter and cream gives the gravy a luxurious richness that makes it taste indulgent.
The overall effect is warming and nostalgic – it’s the kind of meal that makes you feel taken care of. The chicken is substantial and satisfying, while the gravy adds moisture and brings everything together into a cohesive, comforting dish.
Tips & Variations
While chicken thighs are ideal for this recipe because they stay moist and flavorful, you can use chicken breasts if you prefer white meat. Cut large breasts in half horizontally to create thinner cutlets that cook more evenly, and reduce the cooking time to 15-18 minutes. Be extra careful not to overcook them, as breast meat dries out more easily.
For even more flavor, add a splash of white wine or sherry to the pan after removing the chicken and before making the roux. Let it bubble and reduce by half, then proceed with the butter and flour. This adds acidity and depth to the gravy.
Mushrooms make an excellent addition to this dish. Slice 8 ounces of mushrooms and sauté them in the pan after removing the chicken and before making the gravy. They add earthiness and make the dish more substantial.
If you want a darker, more intensely flavored gravy, cook the roux for an extra 2-3 minutes until it turns a deeper brown color. This creates a richer taste, though be careful not to burn it.
For a dairy-free version, use olive oil instead of butter for the roux (the texture will be slightly different) and substitute the milk with additional chicken broth or unsweetened coconut milk.
Some people like to add minced garlic or diced onions to the pan before making the roux. Sauté them for 2-3 minutes until softened, then proceed with the butter and flour. This adds aromatic depth to the gravy.
For a lighter gravy, you can reduce or skip the cream and use all chicken broth instead. The gravy won’t be quite as rich, but it will still be tasty.
Storage & Make-Ahead
This chicken and gravy stores well and reheats beautifully, making it excellent for meal prep or leftovers. Let everything cool completely, then transfer the chicken and gravy to an airtight container. Store in the refrigerator for up to 3 days.
The gravy will thicken considerably as it cools, which is normal. When reheating, warm the chicken and gravy together in a covered skillet over medium-low heat, stirring the gravy occasionally and adding splashes of chicken broth or milk to return it to the right consistency. You can also reheat individual portions in the microwave, though the stovetop method gives better results.
This dish freezes reasonably well for up to 2 months. Portion the chicken and gravy into freezer-safe containers, making sure the chicken is covered with gravy to prevent freezer burn. Thaw overnight in the refrigerator before reheating.
For make-ahead preparation, you can brown the chicken and make the gravy earlier in the day. Store them separately in the refrigerator, then combine and simmer when ready to serve. This works well if you’re entertaining and want to minimize last-minute cooking.
You can also season the chicken up to 24 hours ahead and store it covered in the refrigerator. Letting seasoned chicken sit actually improves the flavor as the salt penetrates the meat.
Serving Suggestions
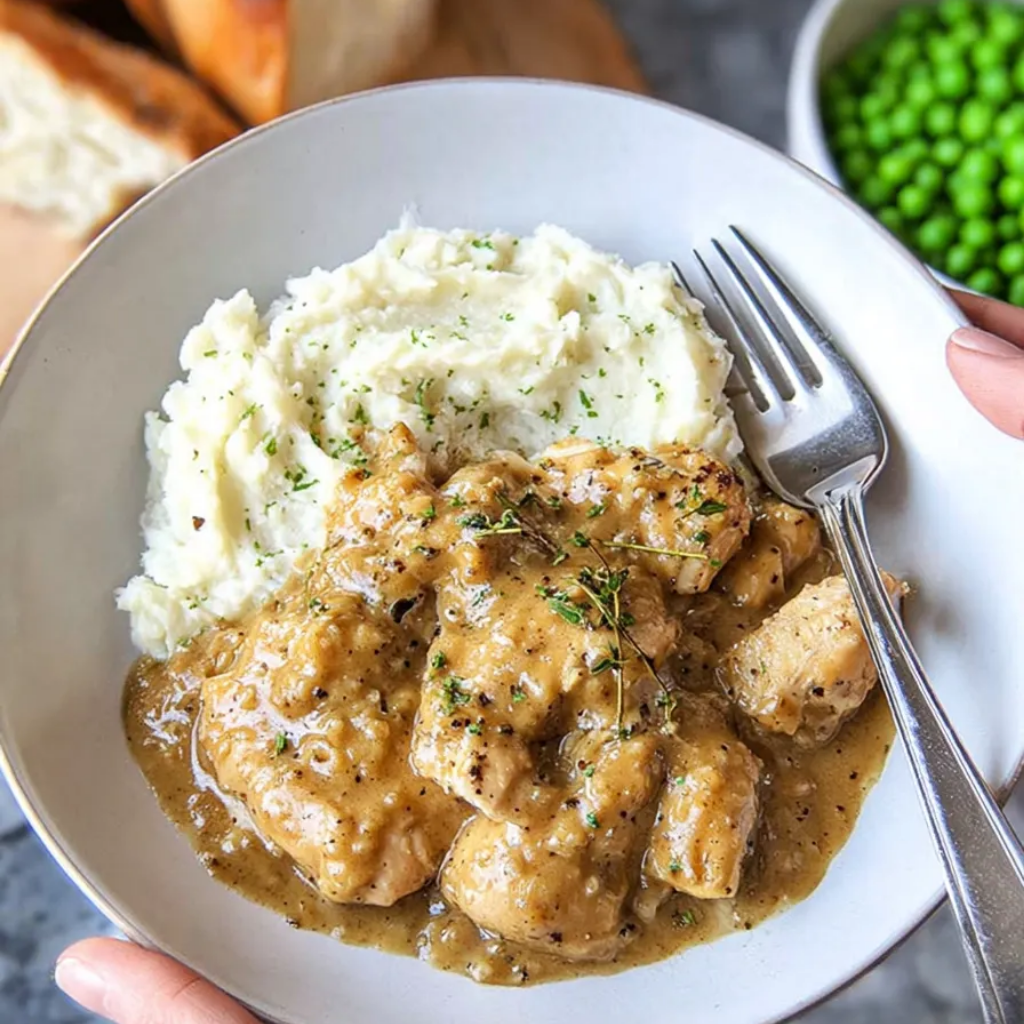
This chicken and gravy practically begs to be served over something that can soak up all that sauce. Fluffy mashed potatoes are the classic choice and for good reason – they’re perfect for creating little pools of gravy in every spoonful. Buttered egg noodles work wonderfully too, as does rice, whether white, brown, or wild.
Biscuits are another excellent option, particularly if you’re going for a Southern-style dinner. Split warm biscuits and spoon chicken and gravy over the top for an incredibly satisfying meal. Creamy polenta or mashed cauliflower are good alternatives if you’re looking for something different.
For vegetables, keep them simple so they don’t compete with the rich gravy. Steamed green beans, roasted Brussels sprouts, glazed carrots, or sautéed spinach all work well. A simple side salad with a tangy vinaigrette provides refreshing contrast.
This meal is perfect for Sunday dinner with family, served family-style with everyone helping themselves. It’s also ideal for comfort-food cravings on cold evenings when you want something warm and satisfying.
For a complete comfort food dinner, start with a simple soup, serve the chicken and gravy as the main course with mashed potatoes and a vegetable, and finish with something classic like apple pie or bread pudding.
Leftovers make outstanding chicken pot pie filling, chicken and biscuits, or can be shredded and used in sandwiches with extra gravy on the side for dipping.
FAQ
Can I use boneless, skinless chicken thighs? Yes, though you’ll lose the rich flavor that comes from browning the skin and the fat that renders from it. Brown the chicken well on both sides to build flavor, and consider adding an extra tablespoon of butter to the gravy for richness. Reduce the cooking time to about 15 minutes.
My gravy is lumpy. How do I fix it? Pour the gravy through a fine-mesh strainer into a clean pot, pressing the lumps through with a spoon or whisk. Alternatively, use an immersion blender to smooth it out. To prevent lumps in the first place, make sure you whisk constantly when adding the liquid to the roux.
Can I make this with chicken stock instead of broth? Yes, they’re interchangeable. Stock tends to be richer and may have more gelatin, which can make your gravy even more luxurious. If using store-bought stock, check the sodium content as some are quite salty.
Why is my gravy too thick? Gravies thicken as they cool and as they continue to simmer. If it’s too thick, simply whisk in chicken broth or milk a few tablespoons at a time until you reach your desired consistency. The gravy should coat a spoon but still pour easily.
Can I add vegetables to cook with the chicken? Absolutely. Quartered onions, thick carrot slices, or halved small potatoes can all go into the pan with the chicken. They’ll cook in the gravy and absorb wonderful flavor. Just make sure they’re in large enough pieces that they won’t dissolve during the 20-25 minute cooking time.
This stovetop chicken and gravy has become my answer to those evenings when I want real comfort food without complicated techniques or long cooking times. It’s straightforward, forgiving, and delivers exactly what you hope for – tender chicken, rich gravy, and that satisfied feeling that comes from a home-cooked meal. Whether you’re cooking for your family on a Tuesday or hosting Sunday dinner, this recipe delivers consistent results and genuine satisfaction. Make it once, and you’ll understand why simple chicken and gravy has remained a classic for generations.