
Follow Me On Social Media!

Easy Chicken Bacon Ranch Quesadillas Recipe – Crispy, Cheesy Comfort Food.
There’s something about the combination of tender chicken, crispy bacon, and tangy ranch that just works. I discovered this winning trio years ago during a particularly hectic weeknight when I was staring into my fridge, trying to figure out how to turn leftover rotisserie chicken into something my family would actually get excited about. That’s when inspiration struck – why not wrap all these flavors in a warm, golden tortilla with plenty of melted cheese?
These chicken bacon ranch quesadillas have become our go-to solution for busy evenings, lazy weekend lunches, and even late-night cravings. The beauty lies in their simplicity – you probably already have most of the ingredients in your kitchen right now. Unlike complicated recipes that require specialty ingredients or advanced techniques, this one relies on the magic that happens when familiar flavors meet a hot skillet and a little patience.
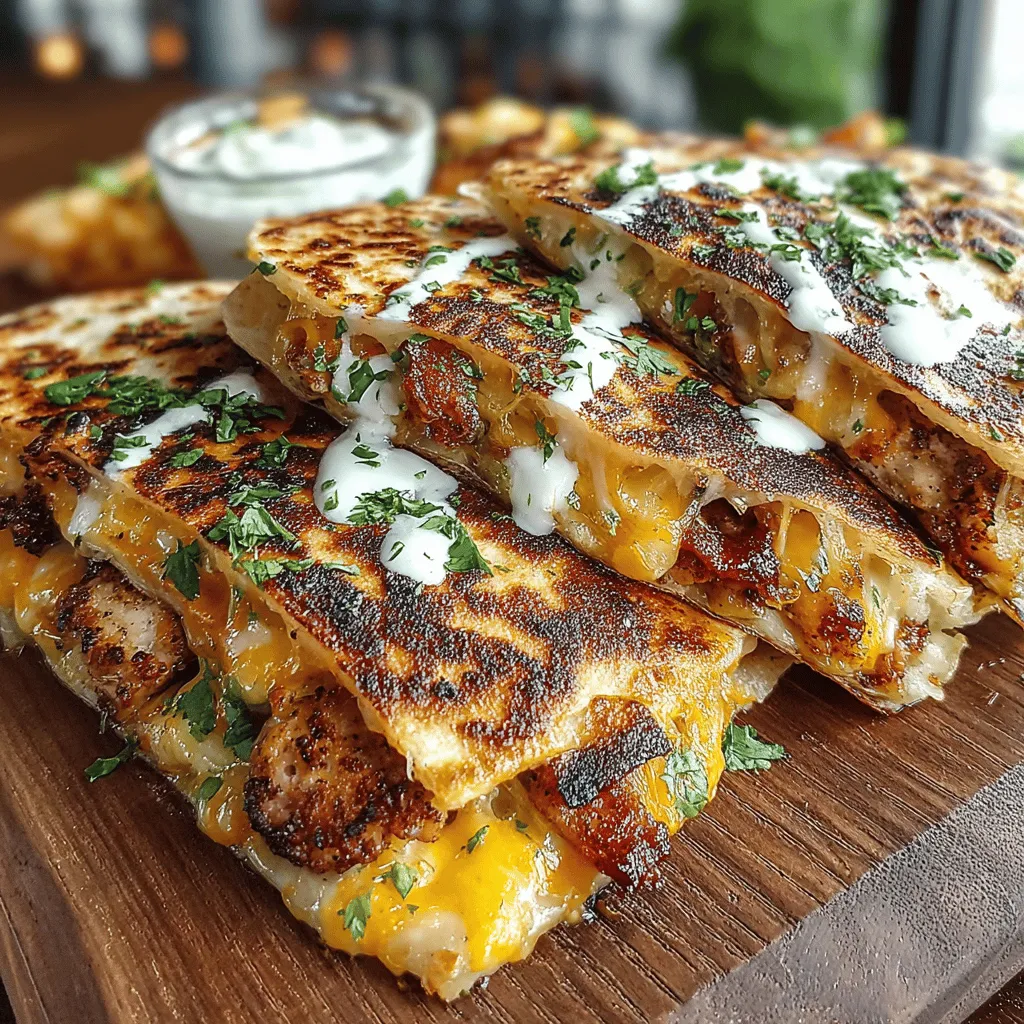
What makes these quesadillas special isn’t just the classic flavor combination, but how the textures play together. The crispy exterior gives way to gooey melted cheese, tender chicken pieces, and those perfect little pockets of smoky bacon crunch. The ranch adds a creamy tang that ties everything together without overwhelming the other ingredients.
Whether you’re feeding hungry teenagers, looking for a quick lunch solution, or wanting to elevate your weeknight dinner game, these quesadillas deliver satisfaction in every bite. They’re also incredibly versatile – once you master the basic technique, you can customize them with different vegetables, spices, or cheese varieties to suit your family’s preferences.
Ingredients
For the Filling:
- 2 cups cooked chicken, diced or shredded (rotisserie chicken works perfectly)
- 6 strips bacon, cooked and crumbled
- 1 cup shredded sharp cheddar cheese
- 1 cup shredded Monterey Jack cheese
- 3 tablespoons ranch dressing (plus extra for serving)
- 2 green onions, thinly sliced
- 1 small bell pepper, finely diced (optional)
- 1/4 teaspoon garlic powder
- 1/4 teaspoon black pepper
For Assembly:
- 4 large flour tortillas (10-inch works best)
- 2 tablespoons butter or olive oil
- Additional ranch dressing for dipping
- Sour cream for serving (optional)
- Fresh cilantro for garnish (optional)
Instructions
Start by preparing your bacon if you haven’t already. Cook the strips in a large skillet over medium heat until they’re crispy and golden. Transfer to a paper towel-lined plate and let them cool before crumbling into bite-sized pieces. Don’t discard the bacon fat – you can use a tablespoon of it in place of butter when cooking the quesadillas for extra flavor.
While the bacon cools, prepare your chicken filling. In a medium mixing bowl, combine the diced chicken, crumbled bacon, both types of shredded cheese, ranch dressing, sliced green onions, and diced bell pepper if using. Season with garlic powder and black pepper, then gently mix everything together until well combined. The ranch should coat all the ingredients lightly – you want enough to bind everything together but not so much that it makes the filling soggy.
Heat a large skillet or griddle over medium heat. This temperature is crucial – too hot and the tortilla will burn before the cheese melts, too low and you won’t get that perfect golden crisp. Lightly butter one side of each tortilla, or brush with olive oil if you prefer.
Place one tortilla in the skillet, buttered side down. Spread half of the chicken mixture evenly over the tortilla, leaving about a half-inch border around the edges. This border helps prevent the filling from spilling out when you flip the quesadilla. Top with a second tortilla, buttered side up.
Cook for 3-4 minutes, pressing gently with a spatula to help the tortilla adhere to the filling. You’ll know it’s ready to flip when the bottom tortilla is golden brown and crispy. Carefully flip the quesadilla using a large spatula – don’t worry if it’s not perfect, the key is to keep the filling contained.
Cook the second side for another 3-4 minutes until golden brown and the cheese is completely melted. The quesadilla should feel firm when you press it gently, and you might see a little melted cheese bubbling around the edges.
Transfer to a cutting board and let it rest for 2-3 minutes before slicing. This brief cooling period helps the cheese set slightly, making it much easier to cut clean wedges without all the filling spilling out. Repeat the process with the remaining ingredients to make the second quesadilla.
Flavor & Texture Notes
The first bite of these quesadillas delivers exactly what you’d hope for – a satisfying crunch that gives way to warm, gooey cheese and perfectly seasoned chicken. The bacon adds little bursts of smoky saltiness throughout, while the ranch provides a cooling, herby contrast that keeps each bite interesting. The green onions contribute a mild sharpness that brightens the overall flavor without competing with the main ingredients.
The texture contrast is particularly satisfying. The exterior develops a beautiful golden crust that shatters slightly when you bite into it, revealing the molten cheese interior. The chicken stays tender and juicy, especially if you’re using rotisserie chicken that’s already been seasoned and slow-cooked. The bacon maintains its crispness even after being heated through, providing those delightful textural pops that make each bite more engaging than the last.
The ranch flavor is present but not overwhelming – it acts more like a creamy sauce that binds all the ingredients together rather than dominating the taste profile. This balance is what makes these quesadillas appealing to both ranch lovers and those who are typically more cautious about creamy dressings.
Tips & Variations
For the best results, use freshly shredded cheese rather than pre-shredded varieties. Fresh cheese melts more smoothly and creates that perfect stretchy pull when you take a bite. If you only have pre-shredded cheese on hand, it will still work – just expect slightly less dramatic cheese pulls in your photos.
Rotisserie chicken is ideal for this recipe because it’s already seasoned and incredibly tender. However, you can absolutely use leftover grilled chicken, baked chicken breasts, or even chicken thighs. Just make sure the chicken is fully cooked and seasoned to your liking before adding it to the filling mixture.
If you’re looking to add more vegetables, finely diced tomatoes, corn kernels, or jalapeños all work beautifully. Just be mindful of moisture content – pat tomatoes dry with paper towels to prevent soggy quesadillas, and use frozen corn that’s been thawed and drained.
For those following specific dietary needs, these quesadillas are surprisingly adaptable. Use whole wheat or low-carb tortillas, swap in turkey bacon, or try a lighter ranch dressing. Greek yogurt-based ranch dressings work particularly well and add extra protein to the filling.
Want to kick up the heat? Add a pinch of cayenne pepper to the chicken mixture, use pepper jack cheese instead of Monterey Jack, or serve with hot sauce alongside the ranch for dipping. For a smoky twist, try using chipotle ranch instead of regular ranch dressing.
The cheese combination of sharp cheddar and Monterey Jack provides the perfect balance of flavor and meltability, but feel free to experiment with other varieties. Colby Jack, Mexican cheese blends, or even a touch of cream cheese can create different flavor profiles while maintaining that essential gooey texture.
Storage & Make-Ahead
These quesadillas are best enjoyed fresh and hot from the skillet, but they can be stored and reheated with good results. Let cooked quesadillas cool completely before wrapping them individually in plastic wrap or aluminum foil. They’ll keep in the refrigerator for up to 3 days.
To reheat, avoid the microwave if possible – it tends to make the tortilla chewy and the filling soggy. Instead, heat them in a dry skillet over medium-low heat for 2-3 minutes per side until warmed through and crispy again. You can also reheat them in a 350°F oven for about 10 minutes, which is perfect if you’re reheating multiple quesadillas at once.
For make-ahead convenience, you can prepare the chicken filling mixture up to 2 days in advance and store it covered in the refrigerator. This actually helps the flavors meld together nicely. You can also assemble the quesadillas completely and store them uncooked in the refrigerator for up to 24 hours – just cook them straight from the fridge, adding an extra minute or two to each side.
If you want to freeze them, wrap cooked and cooled quesadillas tightly and freeze for up to 2 months. Thaw overnight in the refrigerator before reheating using the skillet method described above.
Serving Suggestions
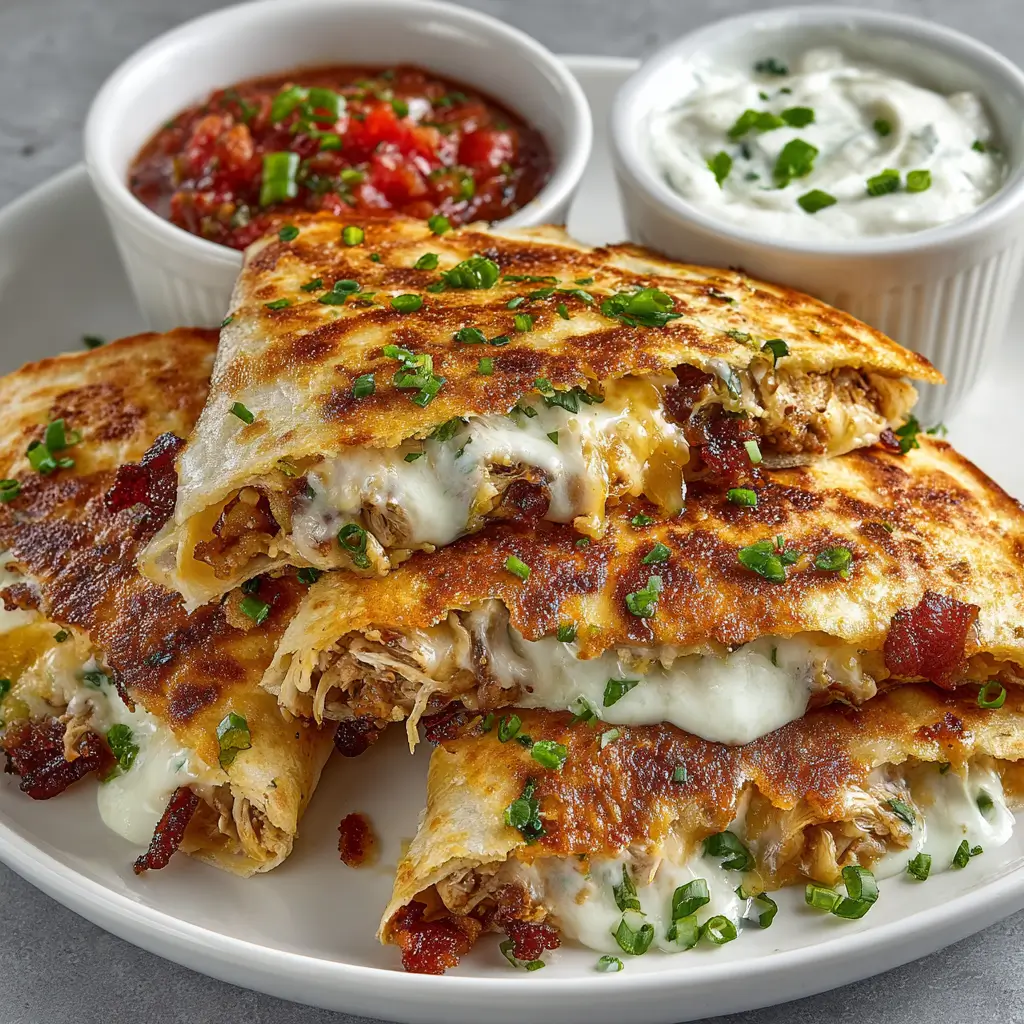
While these quesadillas are satisfying enough to stand alone, a few simple accompaniments can turn them into a more complete meal. A fresh green salad with lime vinaigrette provides a nice acidic contrast to the rich, cheesy filling. Mexican street corn salad or a simple tomato and avocado salad also pair beautifully.
For dipping options beyond ranch, consider guacamole, salsa verde, or even a spicy chipotle aioli. Sour cream mixed with a squeeze of lime juice and a pinch of cumin creates another delicious dipping sauce that complements the flavors perfectly.
If you’re serving these for a casual gathering, cut each quesadilla into 6 wedges instead of 4 to create more shareable portions. They make excellent appetizers this way, especially when served with a variety of dipping sauces.
For a heartier meal, serve alongside Mexican rice, refried beans, or a warm black bean salad. The quesadillas also pair surprisingly well with a simple soup – tomato basil or chicken tortilla soup both complement the flavors nicely.
FAQ
Can I use a different type of ranch dressing? Absolutely! Any ranch variety will work in this recipe. Greek yogurt ranch, avocado ranch, or even homemade ranch all taste great. Just keep in mind that thinner dressings might make the filling slightly more liquidy, while thicker versions will help hold everything together better.
What’s the best way to prevent the filling from leaking out? The key is not overfilling the quesadillas and leaving that half-inch border around the edges. Also, make sure your heat isn’t too high – cooking over medium heat gives the cheese time to melt and act as a “glue” to hold everything together before the bottom tortilla gets too crispy.
Can I make these without bacon? Of course! While bacon adds great flavor and texture, you can easily omit it or substitute with diced ham, turkey bacon, or even seasoned black beans for a vegetarian option. You might want to add a pinch of smoked paprika to the filling to maintain some of that smoky flavor profile.
How do I know when the cheese is fully melted? Look for visual cues like slight bubbling around the edges and a firm feel when you gently press the top of the quesadilla. The quesadilla should hold together when you carefully lift one edge with a spatula. If it feels loose or floppy, give it another minute or two.
Can I cook these in the oven instead of on the stovetop? While stovetop cooking gives the best texture, you can bake them at 425°F for about 10-12 minutes, flipping halfway through. Place them on a baking sheet and brush both sides with melted butter before baking. The results won’t be quite as crispy, but they’ll still be delicious and this method lets you cook multiple quesadillas at once.
There’s something deeply satisfying about creating a meal that brings together simple ingredients in such a perfect way. These chicken bacon ranch quesadillas prove that comfort food doesn’t need to be complicated to be absolutely crave-worthy. The combination of familiar flavors, satisfying textures, and the simple pleasure of melted cheese makes them an instant favorite for anyone who tries them. Give this recipe a try tonight – I have a feeling it might just become your new go-to comfort food solution.