
Follow Me On Social Media!

Chili Garlic Crispy Chickpeas | Easy Roasted Chickpea Recipe
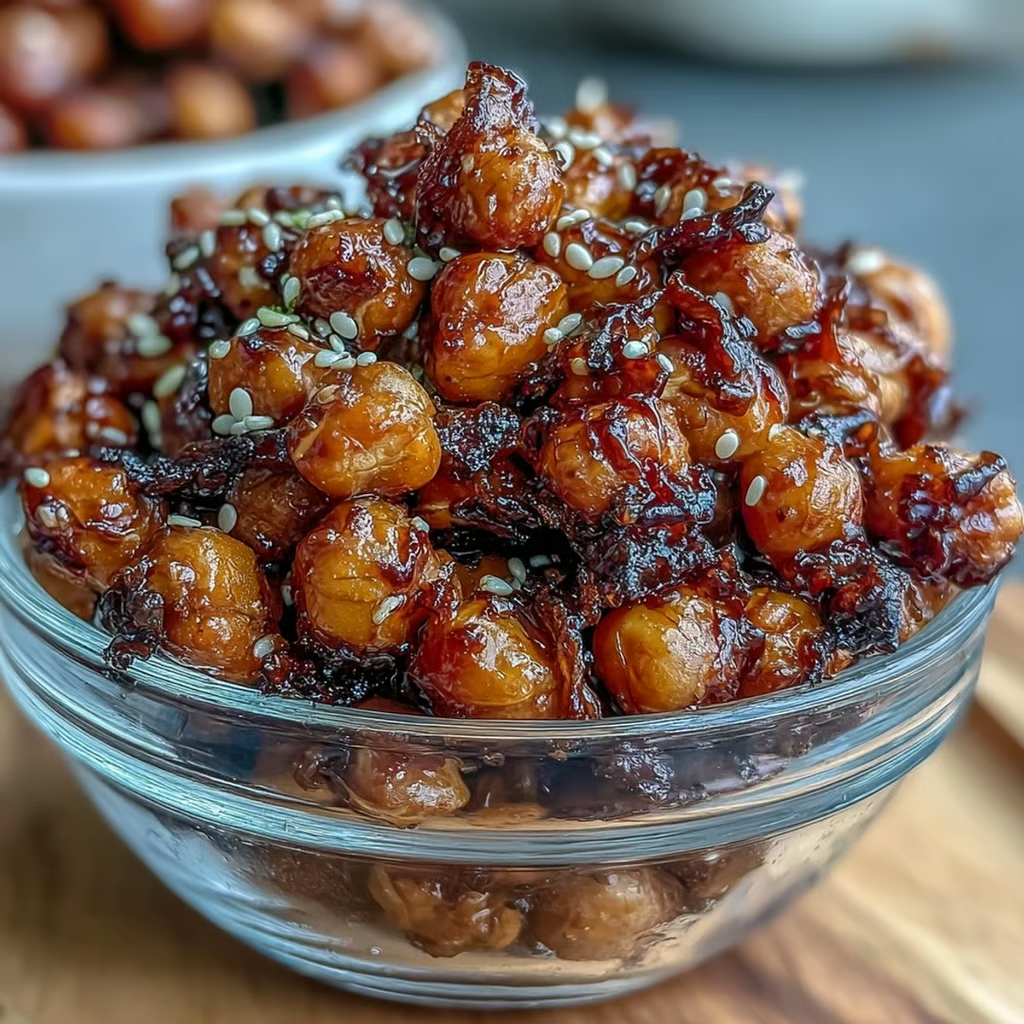
There’s something genuinely satisfying about a snack that crunches when you bite it, doesn’t leave your fingers greasy, and gives you actual energy instead of a sugar crash twenty minutes later. Chili garlic crispy chickpeas check all those boxes and then some.
I started making these a few years ago when I was trying to cut back on chips but kept reaching for something crunchy in the late afternoon. Most “healthy snacks” felt like punishment—rice cakes that taste like styrofoam, sad little bags of unsalted nuts that cost seven dollars. But roasted chickpeas? They’re different. They’re savory, spicy, genuinely crispy when done right, and they cost next to nothing to make at home.
This chili garlic version has become my go-to. The garlic gets toasty and almost sweet in the oven, while the chili powder adds a warm kick without being aggressive. If you’re looking for a high-protein snack recipe that’s naturally vegan, gluten-free, and actually worth eating, you’ve found it. The whole process takes about 40 minutes, and most of that time is just letting the oven do its work.
Ingredients
- 2 cans (15 oz each) chickpeas, drained and rinsed
- 2 tablespoons olive oil
- 1 teaspoon garlic powder
- 1 teaspoon chili powder
- ½ teaspoon smoked paprika
- ½ teaspoon ground cumin
- ½ teaspoon salt (adjust to taste)
- ¼ teaspoon black pepper
- ¼ teaspoon cayenne pepper (optional, for extra heat)
- 1 teaspoon nutritional yeast (optional, adds a savory depth)
Optional Finish
- Fresh lime juice
- Chopped fresh cilantro
- Extra flaky sea salt
Instructions
Step 1: Dry the Chickpeas Thoroughly
This is the single most important step for getting truly crispy chickpeas. After draining and rinsing your chickpeas, spread them out on a clean kitchen towel or several layers of paper towels. Pat them dry, then let them air-dry for about 10 to 15 minutes. You want them as dry as possible before they hit the oil and oven.
While they’re drying, you can gently rub off any loose skins that come away easily. You don’t need to be obsessive about this—some skins will stay on, and that’s fine—but removing the really loose ones helps with even crisping.
Step 2: Preheat and Prep
Set your oven to 400°F (200°C). Line a large baking sheet with parchment paper or use a bare sheet lightly brushed with oil. Parchment makes cleanup easier, but some people swear that direct contact with the metal gets chickpeas crispier. Try both and see what works best in your oven.
Step 3: Season the Chickpeas
In a medium bowl, toss the dried chickpeas with olive oil until they’re evenly coated. Add the garlic powder, chili powder, smoked paprika, cumin, salt, black pepper, and cayenne if using. Toss again until every chickpea is covered with spices. The oil helps the seasonings stick and encourages browning.
If you’re using nutritional yeast, add it now. It brings an almost cheesy, umami quality that makes these chickpeas hard to stop eating.
Step 4: Roast Low and Slow
Spread the seasoned chickpeas in a single layer on your prepared baking sheet. Don’t crowd them—give them space so they roast rather than steam. If you need to use two baking sheets, do it.
Roast for 35 to 40 minutes, shaking the pan every 10 to 12 minutes. This regular shaking ensures even browning and prevents any from burning on one side while staying soft on the other. You’ll know they’re done when they’re golden brown, firm to the touch, and make a slight rattling sound when you shake the pan.
Step 5: Cool Completely
Here’s the trick: chickpeas continue to crisp up as they cool. Pull them from the oven when they feel almost crispy but not quite there yet. Let them cool completely on the baking sheet—at least 10 minutes, but 20 is better. They’ll firm up significantly during this time.
If you want an extra layer of flavor, hit them with a squeeze of fresh lime juice and a sprinkle of flaky salt right after they come out of the oven while they’re still hot.
Flavor and Texture Notes
When you first bite into a properly roasted chickpea, there’s an audible crunch—it’s almost like a corn nut but lighter, less dense. The outside is crispy and slightly toasted, while the inside has a firm, almost mealy texture that’s not quite as dry as you’d expect.
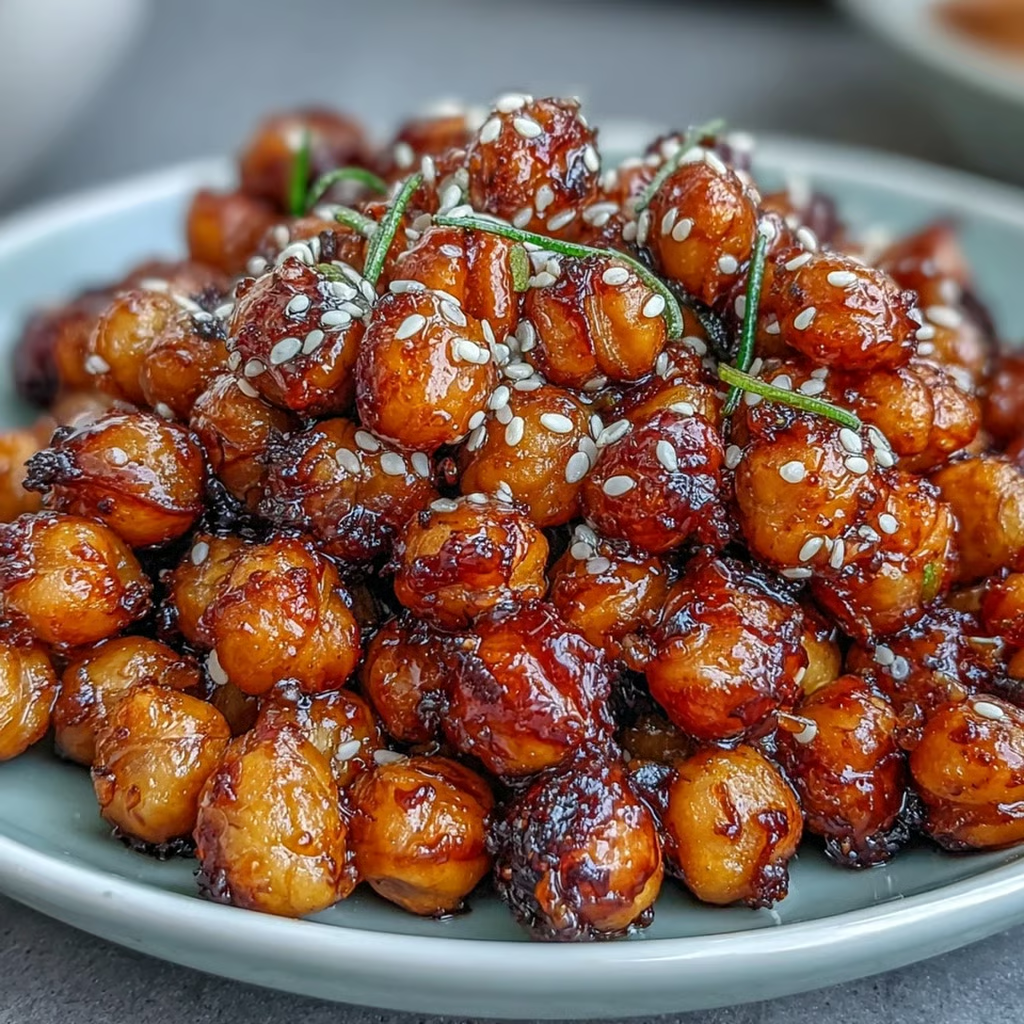
The chili and garlic flavors hit immediately. The garlic is roasted and mellow rather than sharp, and the chili powder brings warmth without outright heat. The smoked paprika adds a subtle background smokiness that rounds everything out, while the cumin gives it an earthy, slightly Middle Eastern character.
There’s a pleasant saltiness that makes you reach for another handful, and if you added the nutritional yeast, there’s this unexpected savory quality that’s hard to place but really good. They’re not oily or heavy—just intensely flavored and genuinely satisfying in a way that most snacks aren’t.
Tips and Variations
Make them extra crispy: Some people roast at a lower temperature (350°F) for a longer time (up to 50 minutes) for maximum crunch. The tradeoff is slightly less golden color, but if crispiness is your priority, try this method.
Different spice blends: This base recipe is endlessly adaptable. Try ranch seasoning (dill, garlic powder, onion powder, parsley), taco seasoning, curry powder, or even cinnamon and sugar for a sweet version. Just keep the oil and salt ratios the same.
Air fryer method: Toss dried, seasoned chickpeas in your air fryer basket and cook at 390°F for 12 to 15 minutes, shaking every 5 minutes. Keep a close eye on them—air fryers vary widely, and chickpeas can go from perfect to burnt quickly.
Add citrus zest: Toss the hot chickpeas with lemon or lime zest right after roasting for a bright, fresh lift.
Make them buffalo-style: Skip the chili spices and toss the roasted chickpeas with a mixture of hot sauce and melted butter (or vegan butter) after they come out of the oven.
Use different beans: This technique works with other legumes too. Try black beans, white beans, or even edamame. Cooking times may vary slightly.
Storage and Make-Ahead
Room temperature storage is best for maintaining crispness. Once completely cooled, transfer the chickpeas to an airtight container or jar. They’ll stay crispy for 3 to 5 days at room temperature. Do not refrigerate them—the moisture in the fridge will make them soggy within hours.
If they do lose their crispness after a day or two (it happens, especially in humid climates), you can re-crisp them by spreading them on a baking sheet and warming them in a 350°F oven for 5 to 8 minutes.
Prep ahead: You can season the chickpeas and refrigerate them (unroasted) for up to a day before baking. Just make sure they’re thoroughly dried first, and let them come to room temperature before roasting for the most even cooking.
Freezing isn’t recommended. The texture changes too much when thawed, and they lose their crispness entirely.
If you’re making these for a party or gathering, roast them the morning of and leave them out in a bowl. They’ll be perfect by the time guests arrive.
Serving Suggestions
As a standalone snack: Keep a jar on your counter or desk. They’re great for when you need something crunchy between meals without reaching for chips.
Salad topper: Scatter crispy chickpeas over green salads, grain bowls, or roasted vegetable salads for added texture and protein. They’re especially good on Caesar salads as a plant-based crouton alternative.
Soup garnish: Float a handful on top of tomato soup, butternut squash soup, or creamy vegetable soups. The contrast between the smooth soup and crunchy chickpeas is excellent.
Trail mix addition: Mix them with nuts, seeds, dried fruit, and dark chocolate chips for a savory-sweet trail mix with more substance than the usual version.
Buddha bowls: Use them as one of your protein components in grain bowls with quinoa, roasted vegetables, tahini sauce, and greens.
On a cheese board: Add a small bowl of spiced chickpeas to your next cheese and charcuterie board. They’re a great vegetarian option that adds variety to the usual nuts and crackers.
With drinks: Serve them in small bowls alongside cocktails or beer, the way you’d serve roasted nuts or olives. They’re particularly good with crisp white wine or light beer.
Frequently Asked Questions
Why aren’t my chickpeas getting crispy? The most common culprits are excess moisture and overcrowding. Make sure you dry the chickpeas thoroughly before seasoning, and don’t skip the air-drying step. Give them plenty of space on the baking sheet, and shake the pan regularly during roasting. Also, remember they continue to crisp as they cool—don’t judge them straight from the oven.
Can I make these oil-free? You can, but the results are noticeably different. Without oil, the spices won’t adhere as well, and the chickpeas will take longer to crisp up and brown. If you want to try it, use aquafaba (the liquid from the chickpea can) to help the spices stick, but expect a lighter color and slightly drier texture.
What if I only have canned chickpeas with added salt? Rinse them extra thoroughly under cold water to remove excess sodium, then reduce or eliminate the added salt in the recipe. Taste a few chickpeas after roasting and adjust seasoning if needed.
How do I know when they’re done? They should be golden brown, firm when you press one between your fingers (once cooled slightly), and they should make a rattling sound when you shake the pan. If they’re still soft in the middle, give them another 5 minutes and check again.
Can I use dried chickpeas instead of canned? Yes, but you’ll need to cook them first. Soak dried chickpeas overnight, then simmer until tender but not mushy—about 45 minutes to an hour. Drain, dry thoroughly (this is even more important with home-cooked beans), and proceed with the recipe as written.
Wrapping Up
Chili garlic crispy chickpeas are one of those recipes that seem almost too simple to be as good as they are. There’s no complicated technique, no special equipment, and no expensive ingredients—just chickpeas, some spices you probably already have, and a little bit of patience.
What makes them worth making is that they actually solve a problem. They’re the snack you can feel good about eating at three in the afternoon, the thing you can put out when people come over that accommodates most dietary restrictions without tasting like it, and the crunchy element that turns a decent salad into something you’ll actually want to eat.
Make a batch this week. Keep them in a jar on your counter. See how long they last. (Spoiler: probably not as long as you think.)