
Follow Me On Social Media!

Blackstone Crispy Camping Pizza: Outdoor Cooking That Beats Most Pizzerias.
There’s something almost rebellious about making pizza while camping. You’re supposed to be roughing it, eating beans from a can and hot dogs on sticks, right? But when you discover what your Blackstone griddle can do with a simple pizza dough, those camping food rules go right out the tent window. This Blackstone camping pizza delivers a crispy, golden crust that rivals your favorite pizzeria, all while you’re sitting around a campfire under the stars.
I stumbled onto this technique during a weekend camping trip when we’d packed way too much food and not enough planning. Someone had brought pizza dough thinking we’d figure out how to cook it later. The camp store pizza looked sad, the fire wasn’t quite right for a cast iron approach, but the Blackstone griddle was sitting there practically begging for an experiment. What happened next changed how I think about outdoor cooking entirely.
The key to perfect Blackstone pizza lies in understanding how the griddle’s even heat distribution creates an incredibly crispy bottom while the covered cooking method melts the cheese and warms the toppings perfectly. Unlike trying to balance a cast iron pan over coals or dealing with the uneven heat of a camp stove, the Blackstone gives you restaurant-level control over your cooking surface.
This camping pizza recipe works whether you’re car camping with all your gear or just cooking in your backyard. The technique is simple enough for beginners but produces results that will have experienced outdoor cooks asking for your secret. Plus, it’s endlessly customizable based on what you’ve packed in your cooler or what’s available at the local camp store.
Ingredients
For the Pizza:
- 1 pound pizza dough (store-bought or homemade, at room temperature)
- 2 tablespoons olive oil, divided
- 1/2 cup pizza sauce or marinara sauce
- 8 ounces mozzarella cheese, shredded
- 1/4 cup Parmesan cheese, grated
- Your choice of toppings (see variations below)
- Salt and freshly ground black pepper
- Italian seasoning or dried oregano
Popular Topping Combinations:
- Classic: Pepperoni, Italian sausage, mushrooms
- Veggie: Bell peppers, red onion, black olives, mushrooms
- Meat Lovers: Pepperoni, sausage, bacon, ham
- Margherita: Fresh mozzarella, tomatoes, fresh basil
- BBQ Chicken: Cooked chicken, red onion, BBQ sauce, cilantro
Essential Equipment:
- Blackstone griddle or large flat-top grill
- Large metal spatula or pizza peel
- Dome or large metal bowl for covering
- Cooking spray or additional oil for griddle
Instructions
Start by preheating your Blackstone griddle to medium heat—around 350-375°F if your griddle has temperature controls. If you’re working without temperature gauges, you should be able to hold your hand about 5 inches above the surface for 4-5 seconds comfortably. Too hot and your crust will burn before the top cooks; too cool and you won’t get that crispy bottom everyone craves.
While the griddle heats, prepare your pizza dough by letting it come to room temperature if it’s been chilled. Cold dough is difficult to stretch and will shrink back stubbornly. Lightly oil your hands and gently stretch the dough into a rough circle or rectangle—don’t worry about perfect shapes. The rustic look is part of camping pizza’s charm, and trying to achieve perfection will likely result in torn dough.
Clean and lightly oil a section of your griddle surface. The oil prevents sticking and contributes to that golden-brown crust. Place the stretched dough directly onto the oiled griddle surface. You’ll hear a gentle sizzle—that’s the sound of the bottom starting to crisp. Let the dough cook for 2-3 minutes without moving it. This initial cooking sets the bottom and makes it much easier to work with.
After the bottom has set, use a large spatula to carefully flip the dough. This is the trickiest part, but don’t panic if it’s not perfect—you can reshape it slightly after flipping. The cooked side should be golden brown and crispy. If it’s still pale, let it cook a bit longer before flipping.
Now comes the fun part—building your pizza. Working quickly while the dough continues to cook on the second side, brush the cooked top with a light coating of olive oil. This prevents the sauce from making the crust soggy and adds flavor. Spread your pizza sauce evenly, leaving about a half-inch border for the crust.
Add your cheese first, creating an even layer that covers most of the sauce. The mozzarella will melt and bubble, creating a barrier that prevents other toppings from making the crust soggy. Add your chosen toppings, but resist the urge to overload—too many toppings will prevent even cooking and make the pizza difficult to handle.
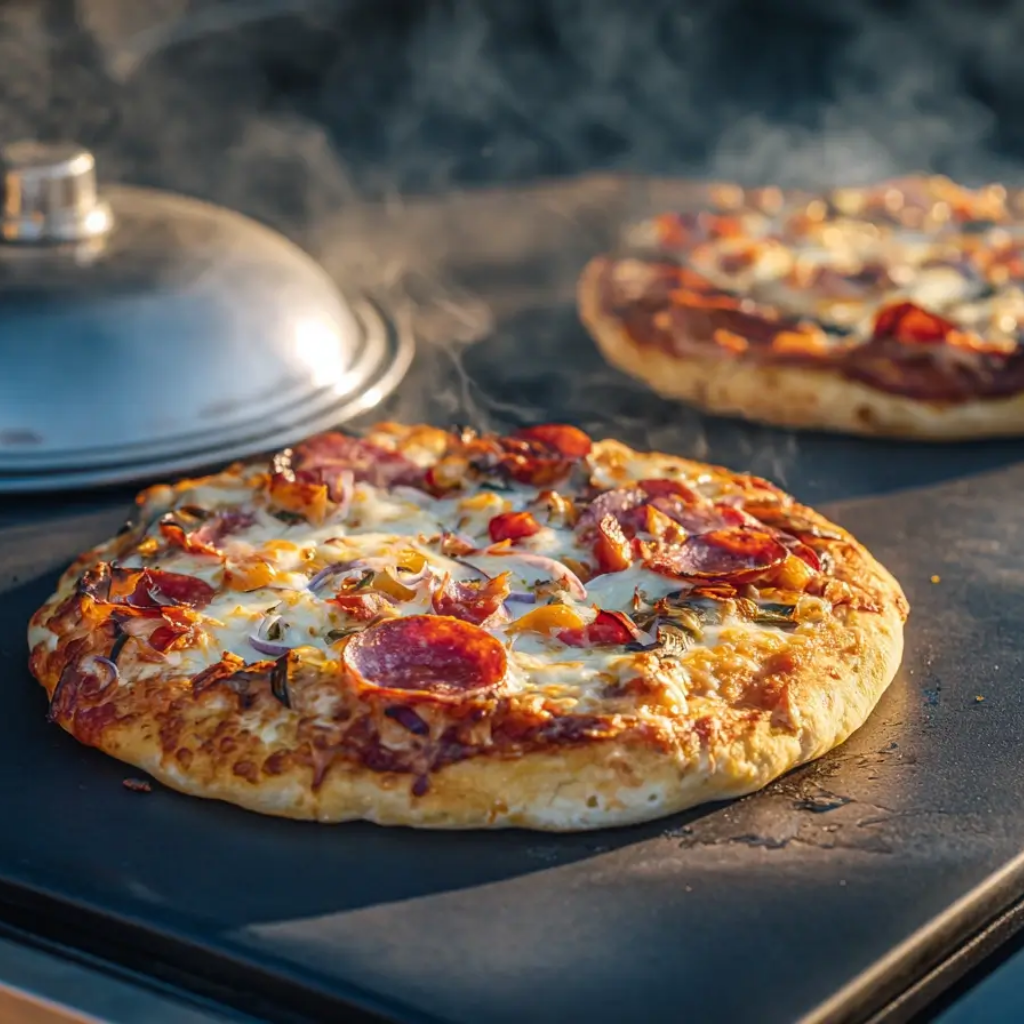
Cover the pizza with a large dome, metal bowl, or even a disposable aluminum pan. This creates an oven effect that melts the cheese and heats the toppings while the bottom continues to crisp. Cook for another 4-6 minutes, checking occasionally by lifting one edge with your spatula. The cheese should be melted and bubbly, and the bottom should be golden brown and crispy.
Remove the cover and let the pizza cook for another minute or two to ensure the bottom is perfectly crisp. Use your spatula to slide the finished pizza off the griddle onto a cutting board. Let it cool for just a minute—the cheese will be molten hot—then slice and serve immediately.
Flavor & Texture Notes
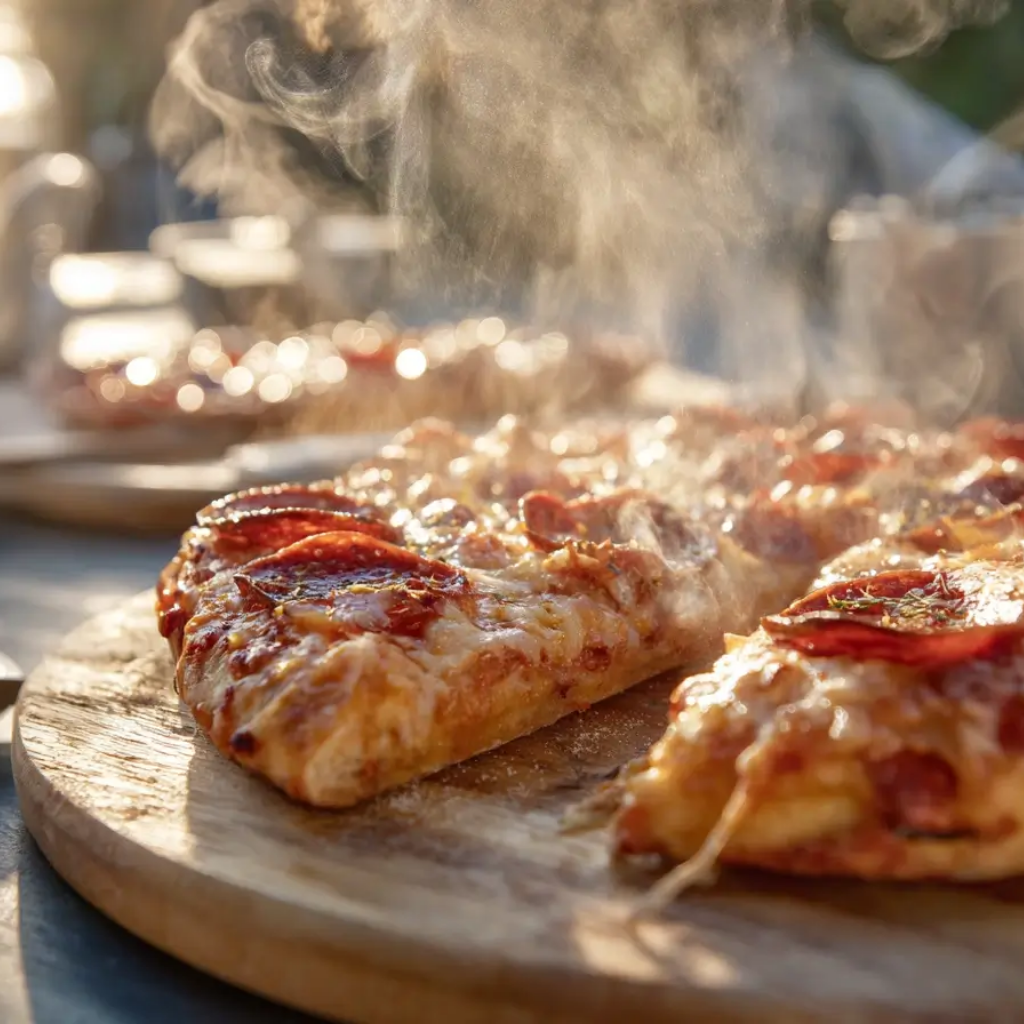
Blackstone camping pizza achieves a texture that’s surprisingly similar to wood-fired pizza, with a crispy, slightly charred bottom that provides a satisfying crunch with each bite. The crust develops beautiful golden-brown spots and a subtle smoky flavor from the griddle, while maintaining a tender interior that’s not dense or chewy.
The cheese melts perfectly under the dome, creating those satisfying cheese pulls that make pizza photos so appealing. The even heat distribution means no cold spots or unmelted cheese patches that sometimes plague oven-baked pizzas. The sauce stays bright and flavorful, not overcooked or reduced.
What really sets this apart from typical camping food is the complexity of flavors and textures you achieve. The contrast between the crispy crust and melted cheese, the way the toppings heat through without becoming overcooked, and that hint of outdoor smokiness make each bite interesting and satisfying.
The cooking method also preserves the individual character of your toppings—vegetables stay slightly crisp, meats warm through without becoming tough, and herbs maintain their aromatic qualities rather than becoming bitter from overcooking.
Tips & Variations
Dough Handling: If your dough keeps shrinking back when you stretch it, let it rest for 10-15 minutes and try again. Room temperature dough is much more cooperative. For extra flavor, brush the raw dough with garlic oil before the initial cooking.
Heat Management: Every Blackstone griddle runs a bit differently. Start with medium heat and adjust as needed. If the bottom browns too quickly, reduce the heat. If it’s taking too long to get crispy, increase the temperature slightly.
Topping Strategy: Pre-cook any raw meats before adding them to the pizza. Raw sausage or chicken won’t cook through in the short pizza cooking time. Vegetables with high water content like mushrooms or tomatoes should be patted dry to prevent soggy pizza.
Cheese Tips: A combination of mozzarella and Parmesan gives the best flavor and melting characteristics. Fresh mozzarella works but should be patted dry and torn into pieces rather than sliced.
Make-Ahead Options: You can stretch the dough and par-cook just the bottom earlier in the day. Store the par-cooked crusts covered and at room temperature, then add toppings and finish cooking when ready to eat.
Creative Toppings: Camping opens up unique topping possibilities—leftover grilled vegetables, that extra bacon from breakfast, or even s’mores ingredients for a dessert pizza. Canned ingredients work great: artichoke hearts, roasted red peppers, or quality canned tomatoes.
Size Variations: Instead of one large pizza, divide the dough into smaller individual pizzas. They’re easier to flip and everyone can customize their own. Mini pizzas also cook faster and more evenly.
Storage & Make-Ahead
Blackstone camping pizza is best eaten immediately while the crust is at its crispiest and the cheese is still gooey. However, leftover pizza can be wrapped and stored in a cooler for up to 2 days. Cold pizza has its own appeal, especially for breakfast after a night around the campfire.
To reheat leftover pizza, place it back on the griddle over low heat for 2-3 minutes until the bottom crisps up again. Cover with a dome for the last minute to warm the toppings through. This method restores much of the original texture, unlike microwaving which creates soggy crust.
For meal prep, you can make the pizza dough at home and bring it camping in an oiled container or zip-top bag. Store-bought dough from the refrigerator section works perfectly and eliminates the need to pack flour and other baking ingredients.
The sauce can be made ahead and stored in squeeze bottles for easy application. Pre-shredded cheese saves time and cleanup, though fresh cheese tastes better if you don’t mind the extra prep work.
Serving Suggestions
Camping pizza pairs beautifully with a simple salad if you’re feeling ambitious, but it’s substantial enough to stand alone as a complete meal. Cold beer is the traditional accompaniment, but lemonade, iced tea, or sodas work great for family camping trips.
For a complete outdoor feast, start with some grilled vegetables or a charcuterie board while the pizza cooks. The cooking process provides great entertainment—everyone likes to watch and offer opinions on the perfect doneness level.
Cut the pizza into squares rather than triangular slices for easier eating around the campfire. Provide extra napkins—outdoor pizza eating can get messy, but that’s part of the fun.
Consider making multiple pizzas with different topping combinations to please everyone in your camping group. The cooking process is quick enough that you can turn out several pizzas in about 30 minutes, and people enjoy the anticipation of waiting for their favorite combination.
FAQ
What if I don’t have a dome or cover for my pizza? You can use a large disposable aluminum pan turned upside down, a metal mixing bowl, or even a large pot lid. The key is creating an enclosed space that traps heat and melts the cheese. In a pinch, you can tent heavy-duty aluminum foil over the pizza, though this is less effective.
Can I use frozen pizza dough? Absolutely, just make sure it’s completely thawed and brought to room temperature before stretching. Frozen dough that’s not fully thawed will be difficult to work with and may cook unevenly. Plan to remove it from the freezer several hours before cooking.
How do I prevent the dough from sticking to the griddle? Make sure your griddle is properly seasoned and use enough oil. If dough starts to stick, it usually means the surface wasn’t oily enough or the heat was too high. A well-seasoned Blackstone should release the dough easily when it’s ready to flip.
What’s the best way to transport pizza ingredients while camping? Pack sauce in squeeze bottles or small containers, pre-shred cheese and store in zip-top bags, and prep toppings at home. Bring the dough in an oiled container to prevent sticking. A cooler with plenty of ice keeps everything fresh and safe.
Can I make dessert pizza on the Blackstone? Yes! Try spreading Nutella or peanut butter on the cooked crust, then adding sliced bananas, marshmallows, or even s’mores ingredients. Cook just long enough to warm the toppings—dessert pizzas need much less time than regular pizzas.
There’s something magical about creating restaurant-quality food in the great outdoors, and this Blackstone camping pizza delivers that satisfaction in spades. Once you master the basic technique, you’ll find yourself planning camping trips just for the excuse to make pizza under the stars. Don’t be surprised if this becomes the meal everyone requests on every camping adventure—it’s happened to more outdoor cooks than you might expect.