
Follow Me On Social Media!

Best Grilled Cheese Ever: The Secret Technique That Makes All the Difference.
There’s a moment when you bite into the perfect grilled cheese sandwich—that satisfying crunch as your teeth break through the golden crust, followed by the warm pull of melted cheese that stretches just enough before breaking cleanly. Most of us have been making grilled cheese since childhood, but somewhere along the way, we accepted mediocre results as normal: burnt bread with barely melted cheese, or soggy sandwiches with cheese that never quite reaches that perfect molten state.
This recipe for the best grilled cheese ever isn’t about fancy ingredients or complicated techniques. Instead, it focuses on perfecting the fundamentals that most people overlook. The game-changer is a simple method involving mayonnaise instead of butter on the outside, combined with a specific cheese blend and controlled heat that ensures even browning and complete cheese melting every single time.
I discovered this technique during a particularly frustrating week when I was testing grilled cheese recipes for a comfort food article. After burning countless sandwiches and dealing with cheese that refused to melt properly, I stumbled upon the mayonnaise method almost by accident. The results were so dramatically better that I’ve never gone back to the traditional butter approach.
What makes this the best grilled cheese recipe is the reliability factor. Whether you’re making lunch for yourself or trying to feed hungry kids, this method works consistently. The bread develops an even, golden-brown crust that’s crispy without being dry, while the cheese inside becomes perfectly molten and creamy. It’s the grilled cheese sandwich you remember from your best childhood memories, but better.
Ingredients
For the Sandwich:
- 8 slices good-quality white bread (like brioche or sourdough)
- 3 tablespoons mayonnaise
- 4 ounces sharp cheddar cheese, grated
- 2 ounces Gruyère cheese, grated
- 2 ounces cream cheese, softened and cut into small pieces
- 1/4 teaspoon garlic powder (optional)
- Freshly ground black pepper to taste
Optional Add-ins:
- 2 thin slices tomato per sandwich
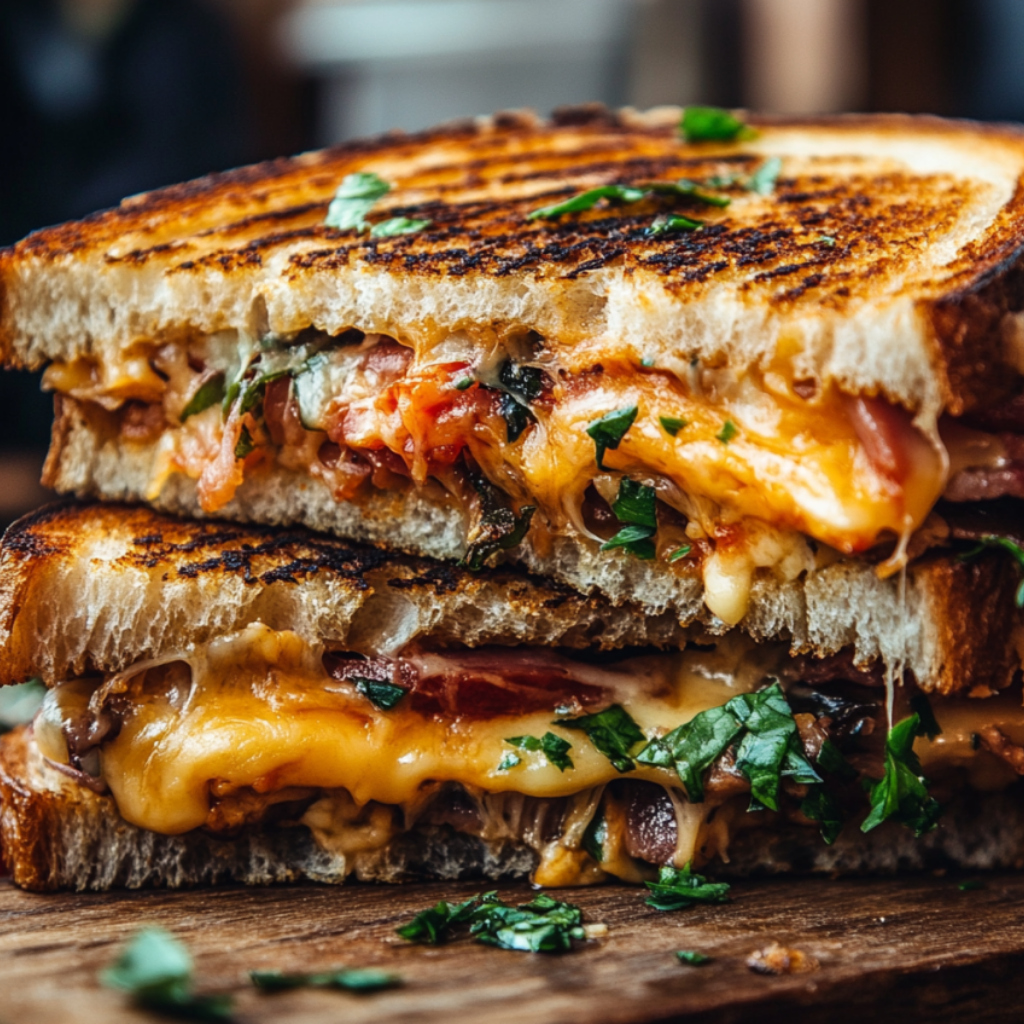
- 2-3 strips crispy bacon per sandwich
- 1 tablespoon caramelized onions per sandwich
- Fresh herbs like thyme or chives
Instructions
Start by grating your cheeses while they’re still cold from the refrigerator. Cold cheese grates more easily and melts more evenly than cheese that’s been sitting at room temperature. Combine the grated cheddar and Gruyère in a bowl, and break the cream cheese into small, pea-sized pieces. The cream cheese acts as a melting agent that helps create that perfect stretchy consistency we’re after.
Heat a heavy-bottomed skillet or cast-iron pan over medium-low heat. This is crucial—resist the temptation to crank up the heat thinking it will work faster. High heat will burn the outside before the cheese has time to melt properly. Medium-low heat allows the bread to brown gradually while the cheese inside gets completely molten.
While the pan heats, spread a thin, even layer of mayonnaise on one side of each bread slice. You want just enough to coat the surface—too much mayonnaise will make the sandwich greasy, while too little won’t give you that perfect golden crust. The mayonnaise should reach all the way to the edges to ensure even browning.
Place four slices of bread mayonnaise-side down in the heated pan. If your pan isn’t large enough for all four, work in batches. Immediately layer the cheese mixture on top of each slice, distributing it evenly and making sure to go right to the edges. The cheese will shrink slightly as it melts, so don’t be shy about covering the entire surface.
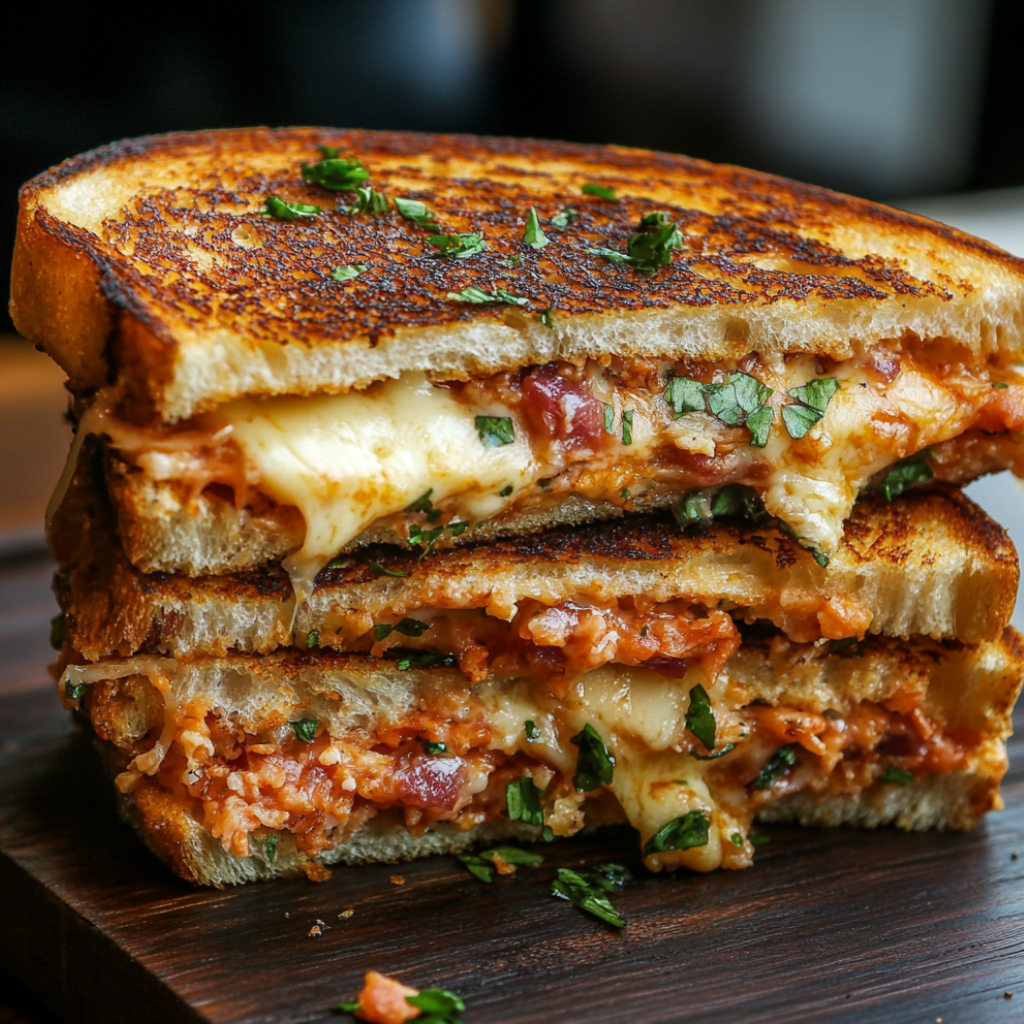
Add any optional ingredients like tomato slices or bacon on top of the cheese, then season lightly with garlic powder and black pepper if using. Top with the remaining bread slices, mayonnaise-side up. Press down gently with a spatula to help the sandwich hold together, but don’t flatten it completely—you want some space for the cheese to melt and expand.
Cook for 3-4 minutes without moving the sandwiches. You’ll hear a gentle sizzling sound, and the mayonnaise will start to turn golden brown. The key is patience—let the bottom get properly golden before attempting to flip. If you try to flip too early, the bread might stick to the pan or tear.
Using a wide spatula, carefully flip each sandwich. The bottom should be evenly golden brown with no burnt spots. If it’s browning too quickly, reduce the heat slightly. Cook for another 3-4 minutes on the second side, pressing down lightly with the spatula to ensure good contact with the pan.
You’ll know the grilled cheese is done when both sides are golden brown and you can see melted cheese just starting to peek out from the edges. The sandwich should feel slightly firm when you press it gently—if it feels squishy, the cheese needs more time to melt completely.
Remove from the pan and let the sandwiches rest for 1-2 minutes before cutting. This brief resting period allows the cheese to set slightly, preventing a molten cheese avalanche when you slice the sandwich. Cut diagonally with a sharp knife, wiping the blade between cuts to keep the slices clean.
Flavor & Texture Notes
This grilled cheese achieves the perfect balance between rich, savory flavor and contrasting textures that make each bite satisfying. The mayonnaise creates a golden, crispy crust that’s more complex and flavorful than butter alone—it has a subtle tanginess that complements rather than competes with the cheese.
The three-cheese blend provides layers of flavor and optimal melting properties. Sharp cheddar brings a classic grilled cheese taste with a slight bite, while Gruyère adds nutty, sophisticated notes that elevate the sandwich beyond basic comfort food. The cream cheese acts as the secret weapon, creating that perfect stretchy, creamy texture that makes the melted cheese cling to your spoon in long, satisfying ribbons.
The bread maintains its structure while developing a satisfying crunch that gives way to pillowy softness inside. Each bite delivers that satisfying contrast between the crispy exterior and the warm, gooey center that defines a perfect grilled cheese sandwich.
The overall flavor is rich and comforting without being overwhelming. It’s sophisticated enough for adults who want something more interesting than basic processed cheese, but familiar enough that kids will love it too.
Tips & Variations
Bread Selection: While white bread is classic, brioche creates an extra-rich sandwich with a slightly sweet flavor that pairs beautifully with cheese. Sourdough adds tangy complexity, while whole grain breads provide extra texture and nutrition. Whatever bread you choose, make sure it’s sturdy enough to hold the cheese without getting soggy.
Cheese Combinations: The three-cheese blend can be modified based on your preferences or what’s available. Try sharp white cheddar with fontina and a touch of cream cheese, or experiment with aged gouda, mild swiss, and cream cheese for a different flavor profile. Avoid pre-shredded cheese if possible—freshly grated cheese melts more smoothly.
Heat Control: Every stove is different, so adjust the heat as needed. If your sandwich is browning too quickly, reduce the heat and cover the pan with a lid to help the cheese melt more quickly. If it’s taking too long to brown, increase the heat slightly, but watch carefully to prevent burning.
Add-in Suggestions: Thin apple slices work beautifully with sharp cheddar, while caramelized onions complement Gruyère perfectly. For a gourmet touch, try a thin layer of fig jam or whole grain mustard. Crispy bacon or prosciutto adds savory richness, while fresh herbs like thyme or rosemary provide aromatic complexity.
Dietary Modifications: For a lighter version, use reduced-fat mayonnaise and lighter cheeses like part-skim mozzarella. Gluten-free bread works well with this method—just adjust the cooking time as needed since gluten-free breads can brown differently.
Batch Cooking: To make multiple sandwiches, use a large griddle or work in batches, keeping finished sandwiches warm in a 200°F oven while you finish the rest.
Storage & Make-Ahead
Grilled cheese sandwiches are best enjoyed immediately while the cheese is still molten and the bread is at its crispiest. However, if you need to make them ahead, you can prepare the sandwiches and refrigerate them for up to a day before cooking.
For meal prep, consider preparing the cheese mixture in advance and storing it in the refrigerator for up to three days. Having the cheese blend ready makes assembling the sandwiches much quicker when you’re ready to cook.
Leftover grilled cheese can be stored in the refrigerator for 2-3 days and reheated in a toaster oven or skillet over low heat. The microwave will make the bread soggy, so avoid that method if possible. To reheat in a skillet, cover the pan with a lid to help warm the center while recrisping the exterior.
For freezing, wrap cooled sandwiches individually in plastic wrap and freeze for up to one month. Reheat directly from frozen in a toaster oven, adding a few extra minutes to the cooking time.
Serving Suggestions
The classic pairing of grilled cheese with tomato soup remains unbeaten for good reason—the creamy richness of the sandwich balances perfectly with the bright acidity of the soup. Try a roasted tomato basil soup for extra depth of flavor, or a simple tomato soup with a splash of cream.
For a lighter accompaniment, serve with a crisp green salad dressed with lemon vinaigrette to cut through the richness. Pickles—dill spears, bread and butter chips, or cornichons—provide a tangy contrast that cleanses the palate between bites.
Consider elevating the presentation by cutting the sandwiches into triangles and serving them on a wooden board with small bowls of different mustards, a few pickles, and perhaps some fresh fruit like grapes or apple slices. This transforms a simple lunch into something that feels more substantial and thoughtful.
For beverages, classic milk is always perfect with grilled cheese, but consider iced tea, lemonade, or even a crisp white wine if you’re serving adults. The key is something that either complements the richness or provides a refreshing contrast.
FAQ
Why use mayonnaise instead of butter? Mayonnaise spreads more evenly than cold butter and contains eggs and oil that create superior browning and crisping. It also has a higher smoke point than butter, so it’s less likely to burn at the moderate temperatures needed for proper cheese melting. The result is more even, golden browning and a slightly tangy flavor that enhances rather than masks the cheese.
How do I know when the cheese is properly melted? Look for visual cues: you should see melted cheese just starting to peek out from the edges of the sandwich, and the sandwich should feel slightly firm but give slightly when pressed gently with a spatula. If the bread is golden but the sandwich feels squishy or you don’t see any melted cheese at the edges, reduce the heat and cook longer.
Can I make grilled cheese without mayonnaise? Absolutely. Butter works too, though you’ll need to let it soften to room temperature for even spreading, or melt it and brush it on. The results won’t be quite as even or golden, but it will still be delicious. Some people also use a light coating of olive oil, though this doesn’t provide the same browning benefits as mayonnaise.
My cheese isn’t melting evenly. What’s wrong? This usually happens when the heat is too high, the cheese pieces are too large, or the cheese is too cold when you start. Make sure to grate the cheese while cold, but let the assembled sandwich sit for a minute or two before cooking to take the chill off. Also, make sure your heat is at medium-low and be patient—proper melting takes time.
How can I prevent the sandwich from falling apart when I flip it? Use a wide, thin spatula and support the sandwich with your other hand (carefully) as you flip. Make sure the first side is properly set before attempting to flip—if the bread is still pale or feels soft, give it more time. Pressing down lightly with the spatula after flipping helps the sandwich hold together during the second cooking phase.
There’s something deeply satisfying about mastering a simple technique that transforms an everyday dish into something exceptional. This grilled cheese method might seem like a small thing, but it’s these kinds of improvements that make home cooking more enjoyable and successful. Once you experience the difference that proper technique makes, you’ll never go back to the old way. Whether you’re making a quick lunch for yourself or trying to impress someone with your sandwich skills, this recipe delivers that perfect combination of crispy, creamy, and comforting that defines the ideal grilled cheese sandwich.