Follow Me On Social Media!

Strawberry Chocolate Shell Cake – Glossy & Elegant.
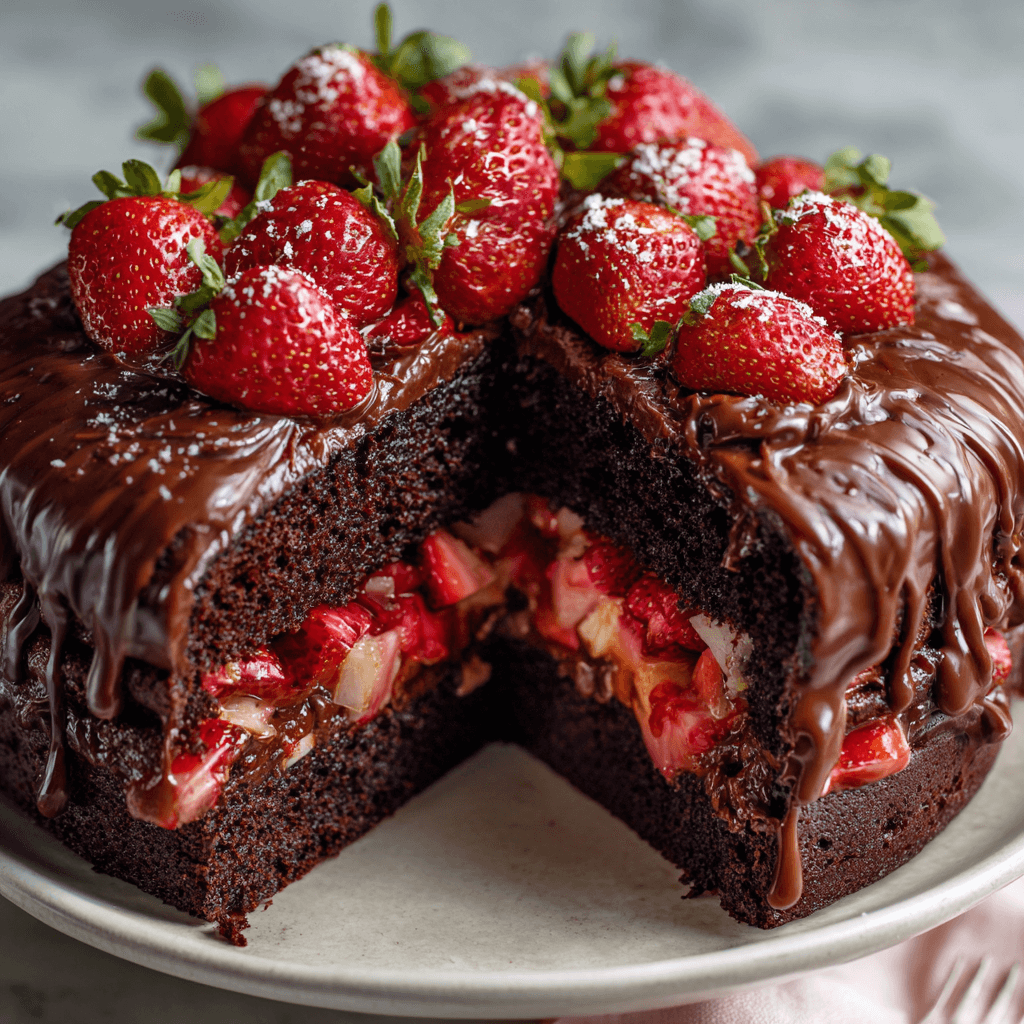
The Strawberry Chocolate Shell Cake is a study in texture and visual drama. It features a heart of light, airy strawberry mousse encased in a thin, snappy chocolate “shell” that yields with a satisfying crack when your fork hits it. The elegance comes from the contrast: the matte, vibrant red of fresh berries against a high-gloss, dark chocolate exterior.
The Sophisticated Contrast
This dessert relies on the interplay between the bright acidity of the fruit and the deep, earthy richness of the cocoa.
| Component | Flavor Profile | Texture |
| Chocolate Base | Intense & Bittersweet | Dense & Fudgy |
| Strawberry Mousse | Tart & Floral | Cloud-like & Airy |
| Chocolate Shell | Dark & Rich | Thin & Snappy |
| Fresh Topping | Bright & Sweet | Juicy & Crisp |
Ingredients
The Base & Mousse
- Chocolate Sponge or Biscuit: One 8-inch thin layer (store-bought or homemade).
- 2 cups Fresh Strawberries: Pureed and strained (to remove seeds).
- 1/2 cup Granulated Sugar.
- 1 tbsp Lemon Juice.
- 3 tsp Gelatin Powder + 2 tbsp Cold Water.
- 1 1/2 cups Heavy Whipping Cream: Cold.
The Glossy “Shell” (Mirror Glaze Style)
- 5 oz Dark Chocolate (60% cocoa): Chopped.
- 1/2 cup Sweetened Condensed Milk.
- 1/2 cup Granulated Sugar.
- 1/4 cup Water.
- 2 tsp Gelatin Powder + 2 tbsp Cold Water.
Instructions
1. The Strawberry Heart
Bloom the gelatin in cold water for 5 minutes.
- In a small saucepan, heat the strawberry puree and sugar until simmering. Stir in the bloomed gelatin until dissolved. Add the lemon juice. Let it cool to room temperature.
- Whip the heavy cream to medium peaks. Gently fold the cooled strawberry mixture into the cream.
- The Mold: Pour the mousse into a silicone mold (or a springform pan) over the chocolate base. Freeze for at least 6 hours (it must be rock-solid for the shell to set).
2. The Chocolate Shell
Bloom the second portion of gelatin in cold water.
- In a saucepan, bring the water, sugar, and condensed milk to a gentle boil. Remove from heat and stir in the gelatin.
- Pour the hot liquid over the chopped chocolate. Let sit for 1 minute, then whisk (or use an immersion blender submerged deeply) until perfectly smooth and glossy.
- The Temperature Window: Let the glaze cool to $32^\circ\text{C}$ ($90^\circ\text{F}$).
3. The “Lacquering”
Remove the frozen cake from the mold and place it on a cooling rack over a tray.
- Pour the glaze in a steady motion over the center, letting it flow down the sides to create a seamless, glossy shell.
- Let it drip for 5 minutes, then use a warm spatula to trim the “tails” at the bottom.
4. The Final Touch
Transfer the cake to a serving plate. Refrigerate for 2 hours to allow the mousse to thaw gently inside the shell. Decorate with fresh strawberries or edible gold leaf just before serving.
Culinary Tips for Success
- The Temperature Secret: If the glaze is too hot, it will melt the mousse; if it’s too cold, it will be lumpy. Use a digital thermometer to hit that $32^\circ\text{C}$ sweet spot.
- Seedless is Better: Always strain your strawberry puree. Bits of seed will ruin the “mirror” finish of the mousse and the shell.
- The “Magic” Shell Option: For a truly “snappy” shell rather than a mirror glaze, melt chocolate with 2 tbsp of coconut oil. Pour it over the frozen cake; it will harden instantly into a thin, crackable shell.
FAQ
Can I use frozen strawberries?
Yes. Thaw them completely and drain excess liquid before pureeing to ensure the mousse isn’t too watery.
How do I get the cake out of the mold perfectly?
If using a silicone mold, peel the edges back while the cake is still frozen solid. If using a metal springform pan, run a hot hair dryer around the outside for 30 seconds to release the seal.
How long does it stay glossy?
The mirror glaze will stay highly reflective for about 24 hours. After that, it becomes slightly more matte as it absorbs moisture.
Would you like me to find a recipe for a “Whipped White Chocolate Ganache” to pipe decorative borders around the base of this cake?