Follow Me On Social Media!

Homemade White Bread (Soft, Fluffy, Beginner-Friendly),.
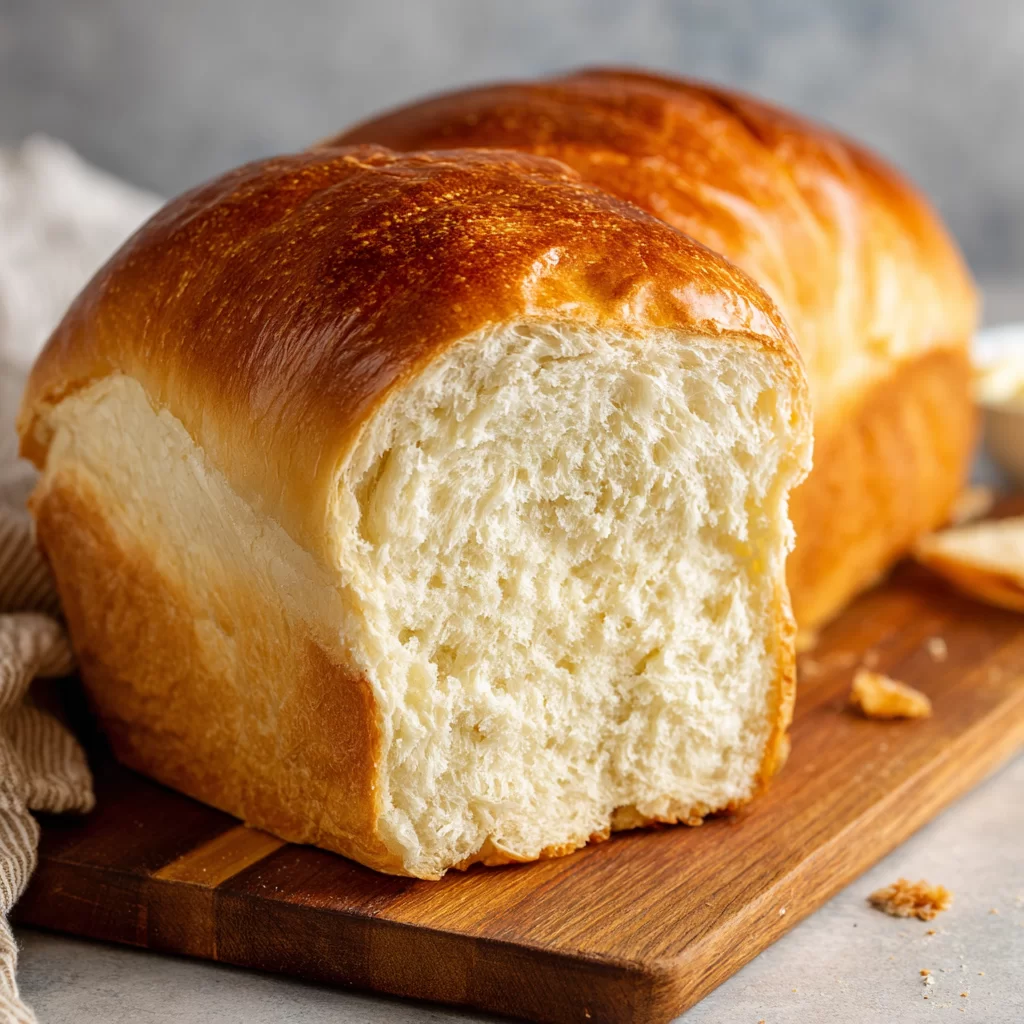
This recipe is designed for those who want that nostalgic, pillowy texture of store-bought “sandwich bread” but with the superior flavor of a home-baked loaf. The secret to a “beginner-friendly” loaf is a higher hydration level and the addition of a little fat (butter) and sugar, which makes the dough more forgiving and the crumb exceptionally soft.
Flour Choice: The Foundation
While you can use either, the choice of flour will affect the final structure of your bread.
| Flour Type | Protein Content | Result |
| All-Purpose | 10–12% | A softer, more tender crumb; perfect for sandwiches. |
| Bread Flour | 12–14% | A chewier, sturdier loaf that holds its shape better. |
Ingredients
- 1 cup Warm Water: (Target: 105°F–115°F / 40°C–45°C). Too hot will kill the yeast; too cold will delay the rise.
- 2 ¼ tsp Active Dry Yeast: (1 standard packet).
- 2 tbsp Granulated Sugar: Acts as fuel for the yeast and aids in browning.
- 1/4 cup Whole Milk: (Room temperature). Adds richness and softens the crust.
- 2 tbsp Unsalted Butter: Melted and slightly cooled.
- 3 to 3 ¼ cups All-Purpose Flour: Plus more for dusting.
- 1 ½ tsp Fine Salt: Controls the yeast and provides flavor.
Instructions
1. Bloom the Yeast
In a large bowl (or the bowl of a stand mixer), combine the warm water and sugar. Stir until dissolved, then sprinkle the yeast on top. Let it sit for 5–10 minutes.
- Success Check: If the mixture becomes foamy and smells like beer, your yeast is alive. If nothing happens, discard and start over with fresh yeast.
2. Mix the Dough
Add the milk, melted butter, salt, and 2 cups of flour.
- If using a stand mixer: Use the dough hook on low speed.
- If by hand: Use a sturdy wooden spoon.Gradually add the remaining flour 1/4 cup at a time until the dough pulls away from the sides of the bowl and feels slightly tacky but not sticky.
3. The Knead
- By Mixer: Knead on medium-low for 5–7 minutes.
- By Hand: Turn dough onto a floured surface. Fold, push, and turn for 8–10 minutes.
The Windowpane Test: To know if you’re done, pull off a small piece of dough and gently stretch it. If it stretches thin enough to see light through it without tearing, the gluten is developed.
4. The First Rise
Lightly oil a large bowl. Place the dough inside, turning once to coat. Cover with a damp cloth or plastic wrap. Place in a warm, draft-free spot for 1 to 1.5 hours, or until it has doubled in size.
5. Shape the Loaf
Gently punch the dough down to release the air. Turn it onto a lightly floured surface and pat it into an 8×12 inch rectangle.
- Starting from the short end, roll the dough tightly into a log. Pinch the seam and the ends to seal.
- Place the log seam-side down into a greased 9×5 inch loaf pan.
6. The Second Rise
Cover the pan and let the dough rise again for 30–45 minutes. It should rise about 1 inch above the rim of the pan. Preheat your oven to 350°F (175°C) during this time.
7. Bake and Cool
Bake for 30–35 minutes. The crust should be a deep golden brown.
- The Hollow Test: Carefully tip the loaf out of the pan and tap the bottom. If it sounds hollow, it is done.
- The Shine: Immediately brush the top of the hot bread with a little melted butter for a soft, shiny crust.
Culinary Tips for Success
- Don’t Rush the Cooling: You must wait at least 1 hour before slicing. If you cut into hot bread, the steam escapes too quickly, leaving the remaining loaf gummy and dry.
- The “Warm Spot”: If your house is cold, turn your oven on for exactly 1 minute, then turn it off. Place the bowl inside with the door closed—it creates a perfect proofer.
- Sifting Flour: If your bread feels too dense, you might be packing your flour. Use a spoon to scoop flour into your measuring cup rather than dipping the cup into the bag.
FAQ
Can I use Instant Yeast?
Yes! If using Instant (Rapid Rise) yeast, you can skip the “blooming” step and mix it directly with the dry ingredients. The rise times will be about 15–20 minutes faster.
Why did my bread collapse?
This usually happens during the second rise if it “over-proofs.” If the dough rises too high and then deflates when you put it in the oven, it means the yeast ran out of food. Aim for just 1 inch above the pan rim.
How do I store it?
Because this bread has no preservatives, it will stay fresh for about 3–4 days in an airtight bag. It freezes beautifully—slice it first so you can grab individual pieces for toast!
Would you like me to find a recipe for a “Homemade Whipped Honey Butter” to serve with your fresh loaf?