Follow Me On Social Media!

Loaded Caramel Magic Bars: Gooey, Crunchy, and Completely Over-the-Top Indulgence.
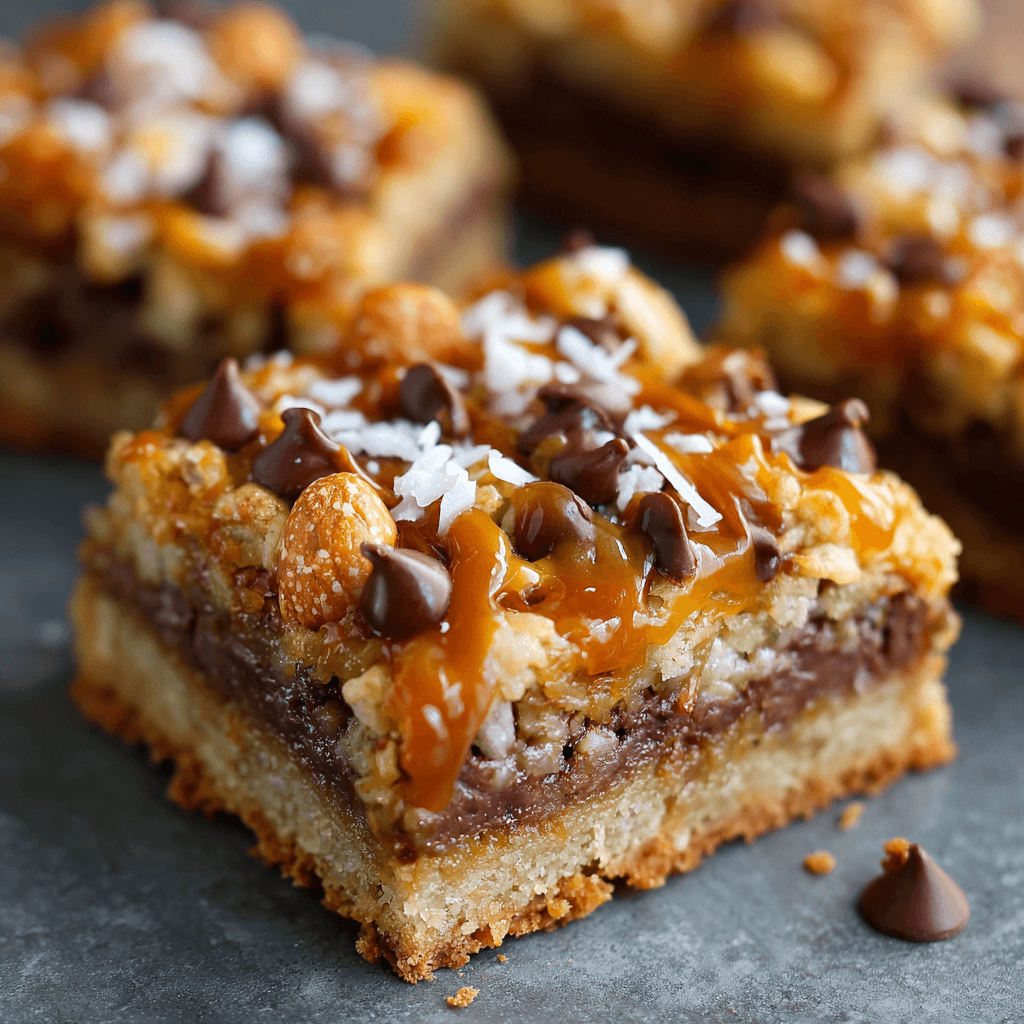
Some desserts are meant to be sophisticated, and others are meant to be pure, unadulterated comfort. These Loaded Caramel Magic Bars fall squarely into the latter category. They are a celebration of contrasting textures and deeply satisfying flavors—the kind of dessert that makes your eyes widen a little bit after the first bite.
The classic Magic Bar (or Seven Layer Bar) has been around for decades, beloved for its simplicity: a graham cracker crust topped with layers of sweet mix-ins and held together by sweetened condensed milk.1 But we’re taking that classic concept and turning the dial up to eleven. We’re upgrading the base, introducing a second layer of caramel flavor, and piling on mix-ins that guarantee a gooey, crunchy, and richly satisfying experience.
This recipe features a buttery graham cracker crust that holds up to the substantial toppings.2 The center is a combination of rich, velvety sweetened condensed milk and actual soft, chewy caramel pieces, which melt together to create pockets of true caramel bliss throughout the bar. Layered within this sticky mixture are pecans for crunch, white chocolate chips for a creamy counterpoint, and a touch of flake salt to perfectly balance the extreme sweetness.
This isn’t a delicate dessert. It’s thick, dense, and unapologetically rich. Whether you’re making them for a holiday party, a potluck, or just a weekend treat, these Caramel Magic Bars are easy to assemble, travel well, and are guaranteed to be the first thing to disappear from the dessert table. Prepare for an incredibly simple recipe that yields spectacularly over-the-top results.
🧈 Ingredients
Accuracy is important, but these bars are forgiving! Use a quality brand of condensed milk and fresh nuts for the best flavor.
For the Buttery Graham Cracker Crust
- 1 1/2 cups (180g) graham cracker crumbs (about 12 full sheets)3
- 1/4 cup (50g) packed light brown sugar
- 1/2 cup (1 stick or 113g) unsalted butter, melted4
For the Loaded Topping Layers
- 1 (14-ounce) can (400g) sweetened condensed milk: This is the “magic” binder.5
- 1 cup (170g) semi-sweet chocolate chips
- 1/2 cup (85g) white chocolate chips: The white chocolate offers a creamy contrast.6
- 1 cup (115g) chopped pecans (or walnuts): Toasted nuts add deeper flavor.7
- 1 cup (180g) soft caramel candies, unwrapped and roughly chopped: These will melt into gooey pockets.
- 1/2 cup (60g) shredded sweetened coconut (optional, but recommended): Adds texture and flavor depth.
- 1 teaspoon vanilla extract
- 1/2 teaspoon flake sea salt (like Maldon): For sprinkling on top, crucial for balancing the sweetness.
📝 Instructions
These bars are simple to assemble—it’s mostly layering! Pay attention to pressing the crust firmly.
1. Prepare the Crust
- Preheat and Prep: Preheat your oven to $350^{\circ}\text{F}$ ($175^{\circ}\text{C}$). Line a 9×13 inch baking pan with parchment paper, leaving an overhang on the two long sides to easily lift the bars out later. Lightly grease the parchment paper.
- Make the Crumb Mixture: In a medium bowl, combine the graham cracker crumbs and brown sugar. Pour in the melted butter and stir until the crumbs are evenly moistened and resemble wet sand.
- Press the Crust: Transfer the mixture to the prepared baking pan. Use the bottom of a glass or a measuring cup to press the crumbs firmly and evenly across the bottom of the pan. A very firm, level crust is key to a stable bar.
- Bake Briefly: Bake the crust for 8 minutes. This helps set the crust before the wet toppings are added. Remove from the oven and set aside.
2. Assemble the Layers
- Drizzle the Condensed Milk: In a small bowl, whisk the vanilla extract into the can of sweetened condensed milk. Pour about two-thirds of the mixture evenly over the warm, pre-baked crust. This ensures the bottom layer of toppings adheres well.
- Layer the Mix-ins: Start layering your crunchy and gooey ingredients:
- Sprinkle the semi-sweet chocolate chips evenly over the condensed milk.
- Follow with the white chocolate chips.
- Distribute the chopped pecans and the shredded coconut (if using).
- Scatter the roughly chopped soft caramel pieces evenly across the top.
- Drizzle the Rest: Pour the remaining sweetened condensed milk mixture over the top layer of mix-ins. Use a spatula to gently nudge the mixture into the gaps so the caramel binder can reach everything. Do not stir or mix the layers.
- Finish: Immediately sprinkle the entire top surface lightly with the flake sea salt.
3. Bake and Cool
- Bake: Place the loaded pan back into the $350^{\circ}\text{F}$ ($175^{\circ}\text{C}$) oven. Bake for 30–35 minutes.
- Check for Doneness: The bars are done when the edges are set and a deep golden brown, and the center is golden-brown and still slightly jiggly. The caramel should be visibly bubbling around the edges.
- Cool Completely (Crucial Step): Remove the pan from the oven and place it on a wire rack to cool completely at room temperature for at least 3 to 4 hours. For the cleanest cuts, you can chill the bars in the refrigerator for an hour after they have cooled to room temperature. Do not attempt to cut them warm, or the centers will run and the bars will fall apart.
4. Cut and Serve
- Cut: Once fully cooled and firm, use the parchment paper overhang to lift the entire slab of bars out of the pan and onto a cutting board.
- Slice: Use a large, sharp knife to cut the slab into 24 squares (4 rows by 6 rows). Clean the knife frequently between cuts to ensure neat edges.
Flavor & Texture Notes
These Loaded Caramel Magic Bars are a textural triumph. The base provides a sturdy, buttery crunch thanks to the baked graham cracker crust. The crust is just sweet enough to balance the brown sugar against the salt.
The filling is a chaotic, gooey mix of melted chocolate, softened condensed milk, and pockets of deeply rich, chewy caramel. The caramel candies soften and spread as they bake, creating an incredibly rich, concentrated caramel flavor that goes beyond what the condensed milk offers alone. The pecans and coconut provide necessary earthy crunch and structural integrity against all that gooeyness.
The entire experience is wonderfully sweet, dense, and complex. The small detail of sprinkling flake sea salt over the top is essential—it creates tiny bursts of salinity that cut through the richness and elevate the chocolate and caramel notes, preventing the bar from being overwhelmingly sugary.
💡 Tips & Variations
Tip 1: The Integrity of the Crust
Make sure your crust is pressed very firmly before baking. Because the topping is so heavy and wet, a loose crust will crumble when cut. Use a flat-bottomed measuring cup or glass to really pack the crumbs down into the pan.
Tip 2: Toasted Nuts
For an even better flavor, briefly toast your chopped pecans in a dry skillet over medium heat for 3–5 minutes until fragrant, or spread them on a baking sheet and bake for 6–8 minutes alongside the crust. This enhances their flavor and crunch, making a big difference in the final bar.
Variation 1: Different Crunch
Swap the pecans for sliced almonds, toasted hazelnuts, or even pretzels for a salty-sweet crunch.
Variation 2: Chocolate Upgrade
Use a blend of dark chocolate and milk chocolate chips. For a true luxury bar, use high-quality chopped baking chocolate instead of chips for better melting.
Variation 3: Cookie Dough Base
For an extra chewy base, replace the graham cracker crust with a layer of refrigerated sugar cookie or chocolate chip cookie dough. Press the dough into the pan and proceed with the topping steps.
❄️ Storage & Make-Ahead
These bars store beautifully, making them ideal for prepping ahead of time.
- Room Temperature (Best): Store the cooled, cut bars in an airtight container at room temperature for up to 4 days. Stacking them with a small piece of parchment paper between layers prevents sticking.
- Refrigeration: The bars will firm up significantly in the refrigerator. Store them this way for up to 7 days. Allow them to sit at room temperature for about 15–20 minutes before serving to let the caramel soften slightly for optimal chewiness.
- Freezing: These bars freeze exceptionally well. Cut the bars and freeze them in a single layer until solid. Transfer them to a freezer-safe bag or container, separating layers with parchment paper. Freeze for up to 3 months. Thaw overnight in the refrigerator or for a few hours at room temperature.
☕ Serving Suggestions
Given how rich and dense these bars are, they pair best with simple drinks and light sides.
- Dairy Contrast: Serve with a simple glass of cold milk or a dollop of unsweetened whipped cream to cut through the density and richness.
- Coffee Pairing: The caramel and chocolate flavors are perfect alongside a robust, hot cup of black coffee or an espresso drink. The bitterness of the coffee provides a necessary contrast to the sweetness of the bar.
- A La Mode: For an ultimate treat, gently warm a bar for 15 seconds in the microwave and serve it with a scoop of vanilla bean ice cream.
❓ FAQ: Baking Magic Bars
Q: Why did the center of my bars run out when I cut them?
A: This is the most common issue, and it means the bars were cut before they were completely set. The sweetened condensed milk and melted caramel are extremely hot and liquid when they come out of the oven. You must allow the bars to cool fully to room temperature (3–4 hours) and ideally firm up slightly in the fridge before cutting for neat, clean edges.
Q: Why did my graham cracker crust crumble?
A: The crust likely wasn’t pressed firmly enough into the pan. You need to really compact the mixture, almost forming a solid base, before baking. Also, make sure you used a full stick (1/2 cup) of melted butter, as the fat content is what binds the crumbs together.
Q: Can I use light coconut milk or evaporated milk instead of condensed milk?
A: No, absolutely not. Sweetened condensed milk is the “magic” ingredient because it is extremely thick and has a high sugar content, which allows it to thicken and create the sticky, caramel-like binding layer upon baking. Evaporated milk or coconut milk will not thicken sufficiently and will result in a watery, runny bar that won’t set.
Q: Why did the edges of my bar burn before the center was set?
A: Check two things: Your oven might be running hot, or your crust was too thin on the edges. If the edges are getting dark too quickly, cover the edges of the pan loosely with strips of aluminum foil halfway through the baking time to shield them from the heat, allowing the center to finish setting.
💖 The Ultimate Comfort Square
These Loaded Caramel Magic Bars are a perfect example of a dessert that needs no apology—it’s everything you want a homemade bar to be: comforting, complex, and full of flavor. The easy assembly means less time stressing and more time enjoying the incredible aroma filling your kitchen.
Whip up a batch, wait patiently for that crucial cooling time, and then slice into a piece of pure, gooey happiness. This bar will be a favorite for years to come.