Follow Me On Social Media!

Chocolate Dipped Meringue Cookies: Light, Crispy, and Naturally Gluten-Free.
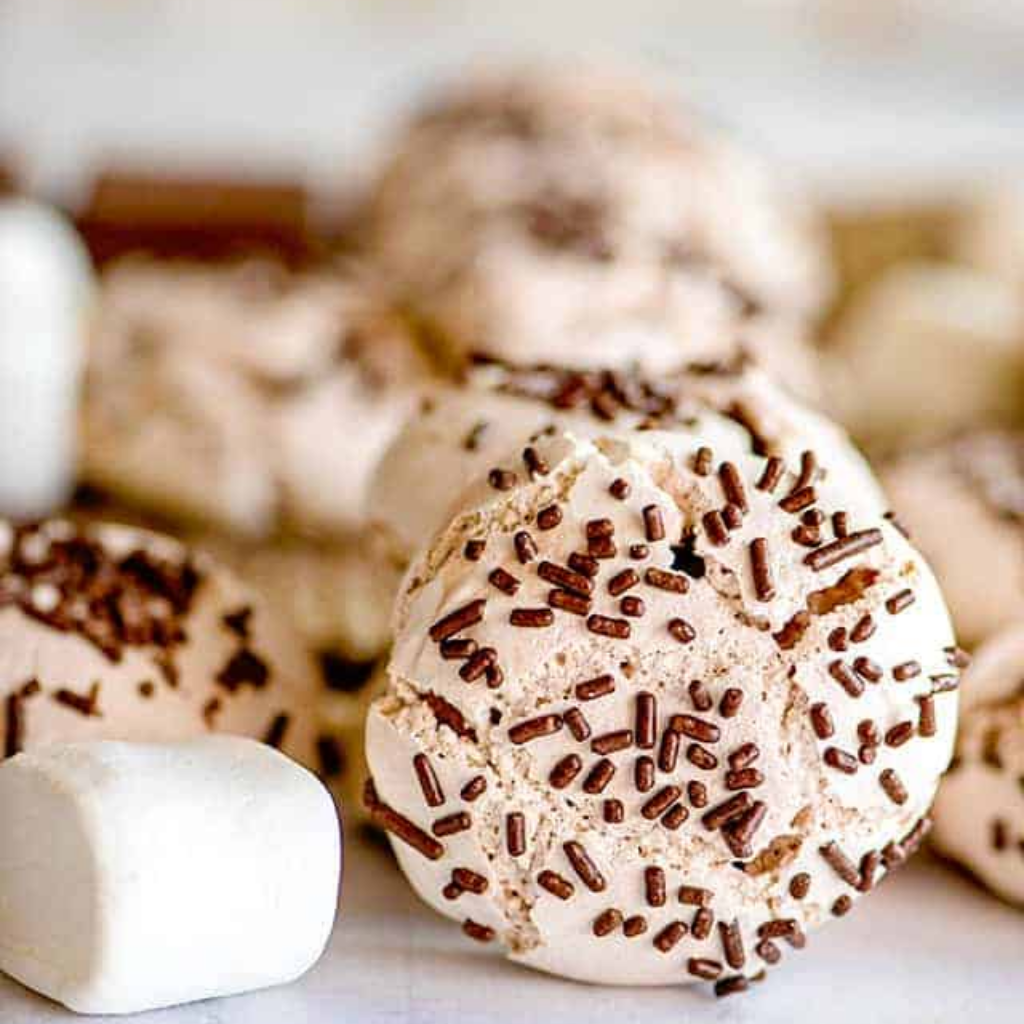
Meringue cookies have this magical quality where they seem impossibly light, almost like eating sweetened air. The first time I successfully made them, I felt like I’d unlocked some kind of baking secret—how could just egg whites and sugar transform into these crispy, melt-in-your-mouth treats? Then I discovered that dipping them in dark chocolate takes them from elegant to irresistible, adding just enough richness to balance the sweetness.
These chocolate dipped meringue cookies are perfect for anyone looking for a naturally gluten-free dessert that doesn’t taste like a compromise. They’re also surprisingly low in calories compared to traditional cookies, though you’d never know it from how satisfying they are. The contrast between the delicate, crispy meringue and the snap of dark chocolate creates a textural experience that keeps you reaching for another one.
What makes this meringue recipe reliable is the technique—it’s not difficult, but it does require patience and attention to a few key details. The process can’t be rushed, but once you understand the method, you’ll find yourself making these for holidays, dinner parties, or simply because you have extra egg whites to use up. They look impressive arranged on a platter, and people always assume they’re more complicated than they actually are.
The beauty of meringue cookies is their versatility. You can flavor them with extracts, add food coloring for special occasions, or keep them pure white and simple. The chocolate dip adds sophistication while making them feel more substantial—a perfect balance between ethereal and satisfying.
Ingredients
For the Meringue Cookies:
- 4 large egg whites, at room temperature
- 1/4 teaspoon cream of tartar
- 1/4 teaspoon salt
- 1 cup granulated sugar
- 1 teaspoon vanilla extract
- 1/4 teaspoon almond extract (optional)
For the Chocolate Coating:
- 8 ounces dark chocolate (60-70% cacao), chopped
- 1 tablespoon coconut oil or vegetable shortening (optional, for smoother coating)
- Flaky sea salt for sprinkling (optional)
- Chopped pistachios, crushed candy canes, or sprinkles (optional)
Equipment Note: You’ll need a stand mixer or hand mixer, parchment paper, and a piping bag with a large round or star tip (or a zip-top bag with the corner cut off).
Instructions
Start by ensuring everything that will touch your egg whites is completely clean and grease-free. Even a tiny bit of fat can prevent the egg whites from whipping properly. Wipe your mixing bowl and whisk attachment with a paper towel dampened with white vinegar or lemon juice to guarantee they’re spotless.
Preheat your oven to 200°F—yes, that low. Meringues are more dried than baked, and low temperature is crucial for achieving that crispy texture throughout without browning. Line two large baking sheets with parchment paper. Regular baking paper works better than silicone mats for meringues, as it allows better air circulation.
Separate your eggs carefully, making absolutely sure no yolk gets into the whites. Even a speck of yolk will prevent proper whipping. Let the egg whites sit at room temperature for about 30 minutes before starting—room temperature whites whip to greater volume than cold ones.
Place the egg whites, cream of tartar, and salt in your mixing bowl. Begin beating on medium speed until the mixture becomes foamy and opaque, about 1-2 minutes. The cream of tartar helps stabilize the egg whites and creates a more reliable meringue.
Increase the mixer speed to medium-high and start adding the sugar very gradually—about one tablespoon at a time. This is where patience matters. Adding sugar too quickly can deflate your meringue or prevent it from reaching stiff peaks. Wait about 10-15 seconds between each addition, making sure the sugar dissolves before adding more.
Once all the sugar is incorporated, increase the speed to high and continue beating for 5-7 minutes until the meringue forms stiff, glossy peaks. To test if it’s ready, stop the mixer and lift the whisk—the peaks should stand straight up without drooping. Rub a small amount between your fingers; it should feel completely smooth with no sugar graininess. If you still feel sugar crystals, keep beating.
Add the vanilla extract and almond extract if using, beating just until combined—about 10 seconds. The meringue should be thick, glossy, and hold its shape firmly.
Transfer the meringue to a piping bag fitted with your desired tip. If you don’t have a piping bag, a large zip-top bag with about 1/2 inch cut from one corner works perfectly. Pipe small rounds or swirls onto your prepared baking sheets, spacing them about 1 inch apart. They won’t spread, so you can fit quite a few on each sheet. Aim for cookies about 1.5 inches in diameter.
Bake for 2 hours without opening the oven door. After 2 hours, turn off the oven but leave the meringues inside to cool completely, preferably for another 1-2 hours or overnight. This slow drying process ensures crispy cookies without any chewiness in the center.
Once the meringues are completely cool and dry, prepare the chocolate coating. Place the chopped chocolate in a microwave-safe bowl with the coconut oil if using. Microwave in 30-second intervals, stirring between each, until smooth and fully melted. The coconut oil makes the chocolate easier to work with and gives it a nice shine, but it’s optional.
Dip each meringue about halfway into the chocolate, letting excess drip back into the bowl. Place the dipped cookies on a parchment-lined tray. If adding toppings like sea salt, pistachios, or sprinkles, do it immediately before the chocolate sets. Let the chocolate harden completely at room temperature, or speed up the process by refrigerating for 10-15 minutes.
Flavor & Texture Notes
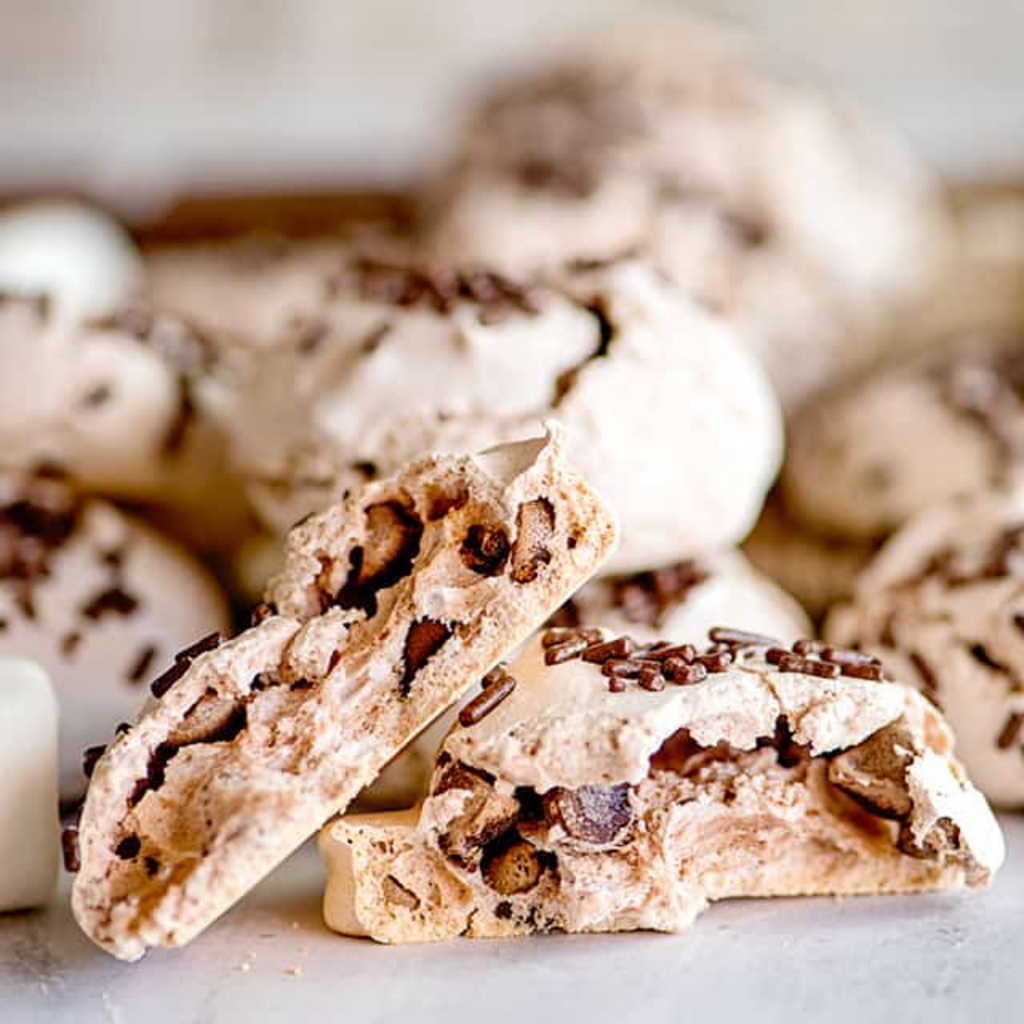
These meringue cookies deliver an incredibly light, crispy texture that dissolves almost instantly on your tongue. The exterior has a delicate crunch that gives way immediately, creating this wonderful sensation of eating something substantial that somehow weighs nothing. Each bite releases pure sweetness tempered by the vanilla, with a subtle complexity if you’ve added the almond extract.
The dark chocolate coating provides a sophisticated counterpoint to the sweet meringue. It adds a slight bitterness and deep cocoa flavor that prevents the cookies from being one-note sweet. The chocolate also contributes a satisfying snap when you bite through it, creating a textural contrast with the airy meringue.
The combination feels elegant and refined—not overly sweet despite the sugar content, and surprisingly balanced. The meringue’s lightness means you can enjoy several cookies without feeling weighed down, while the chocolate makes each one feel more substantial and complete.
If you add flaky sea salt on top of the chocolate, it enhances everything beautifully. The salt crystals provide little bursts of savory contrast that make the sweetness more pronounced and interesting, elevating these from simple cookies to something more sophisticated.
Tips & Variations
Weather Matters: Meringues are temperamental in humid weather. Moisture in the air can prevent them from drying properly or make them sticky. Try to make these on dry days, or use a dehumidifier in your kitchen if you live in a humid climate.
Sugar Options: While granulated sugar is standard, superfine or caster sugar dissolves faster and can create an even smoother meringue. You can make your own by pulsing regular sugar in a food processor for 30 seconds.
Flavor Variations: Replace the vanilla with peppermint extract for holiday cookies, or add 1-2 tablespoons of cocoa powder to create chocolate meringues. Citrus zest (finely grated) can be folded in at the end for a subtle brightness.
Coloring: Add gel food coloring after the meringue reaches stiff peaks. Liquid food coloring can affect the consistency. For swirled colors, add drops of different colors to the piping bag before filling it with white meringue.
Chocolate Choices: Dark chocolate works beautifully, but milk chocolate or white chocolate are also delicious. For a dairy-free option, use quality dark chocolate that’s naturally vegan.
Size Variations: Make tiny bite-sized meringues (increase yield to 60-80 pieces) for parties, or pipe larger cookies for a more substantial treat. Adjust baking time slightly—smaller cookies might need 1.5 hours, larger ones up to 2.5 hours.
Mix-Ins: Fold in 1/4 cup mini chocolate chips or finely chopped nuts after reaching stiff peaks for added texture and flavor throughout.
Storage & Make-Ahead
Store completely cooled meringue cookies in an airtight container at room temperature for up to 2 weeks. They must be completely dry before storing, and the container must seal tightly—any moisture exposure will make them sticky and chewy. Place parchment paper between layers to prevent sticking.
Do not refrigerate meringues, as the moisture in refrigerators will ruin their crispy texture. If you live in a very humid climate, you may need to add a silica gel packet to the storage container to absorb any ambient moisture.
The chocolate-dipped cookies keep well for about a week at room temperature in an airtight container. After that, the chocolate may begin to bloom (develop a white coating), though this doesn’t affect taste, just appearance.
Plain meringues (before dipping in chocolate) can be made several days ahead and stored in an airtight container until you’re ready to dip them. This makes them perfect for party prep—bake the meringues early in the week, then dip them the day before your event.
Freezing isn’t recommended for meringues as they can absorb moisture when thawing and lose their crispy texture.
Serving Suggestions
These chocolate dipped meringue cookies look stunning arranged on a white platter or cake stand, especially if you’ve varied the chocolate coverage or toppings. They’re perfect for holiday cookie platters, baby showers, bridal showers, or afternoon tea parties.
Serve them alongside coffee or espresso—the bitterness of coffee complements the sweet meringue beautifully. They also pair wonderfully with champagne or dessert wine for elegant entertaining.
For a more elaborate dessert, crumble meringue cookies over ice cream or use them to garnish panna cotta or mousse. They can also be layered with whipped cream and berries for a simple Eton mess-inspired dessert.
Package them in clear cellophane bags tied with ribbon for homemade gifts—they’re naturally beautiful and travel well since they’re not fragile like you might expect. Include a note mentioning they’re gluten-free, as many people will appreciate knowing.
For holiday variations, dip them in white chocolate and add crushed candy canes for Christmas, or use pastel-colored meringues with white chocolate for Easter or spring celebrations.
FAQ
Why didn’t my meringue form stiff peaks? This usually happens because of fat contamination (grease in the bowl or yolk in the whites), adding sugar too quickly, or not beating long enough. Make sure everything is spotlessly clean, add sugar gradually, and beat for the full time specified. Old egg whites also whip less successfully than fresh ones.
My meringues are chewy inside instead of crispy throughout. What went wrong? This typically means they weren’t baked long enough or the oven temperature was too high. Meringues need low heat (200°F) and long drying time. Also, make sure to leave them in the turned-off oven to cool completely. Humid weather can also contribute to chewiness.
Can I make meringues without cream of tartar? Yes, though cream of tartar helps stabilize the egg whites. You can substitute an equal amount of lemon juice or white vinegar. The meringue may be slightly less stable but will still work.
The chocolate coating is too thick/thin. How do I fix it? If too thick, add more coconut oil or shortening, one teaspoon at a time. If too thin, let it cool slightly before dipping—chocolate thickens as it cools. You can also add more melted chocolate to thicken the coating.
How do I know when meringues are done baking? They should be completely dry to the touch and lift easily from the parchment paper without sticking. The bottoms should be dry, not tacky. If you’re unsure, break one open—it should be uniformly crispy throughout with no soft center.
Can I use pasteurized egg whites from a carton? Fresh egg whites work best, but carton egg whites will work in a pinch. They may take longer to whip and might not achieve quite the same volume, but they’ll still produce good meringues. Make sure to measure 1/2 cup of carton whites to equal 4 large eggs.
Making meringue cookies might seem intimidating at first, but once you understand the process, you’ll find it’s more about patience than skill. These chocolate dipped meringues offer an elegant dessert option that happens to be naturally gluten-free and relatively light, proving that special treats don’t always need butter, flour, or complicated techniques. Whether you’re baking for a special occasion or simply want to try something new, these crispy, chocolate-kissed cookies deliver sophistication in every bite.