Follow Me On Social Media!

Red Velvet Cupcake Cookies – Soft, Chewy & Perfectly Sweet.
If you’ve ever found yourself torn between a batch of cupcakes and a tray of cookies, this recipe might just become your new favorite. These Red Velvet Cupcake Cookies combine everything we love about classic red velvet cake — the cocoa undertones, the vibrant color, and the subtle tang — and transform it into soft, chewy cookies topped with a smooth cream cheese frosting.
I created these cookies one Valentine’s Day when I didn’t want to deal with piping cupcake batter or lugging around a tray of frosted cupcakes to a party. Instead, I took my favorite red velvet cupcake base, tweaked it to hold its shape like a cookie, and topped each one with a swirl of cream cheese frosting. The result? A cookie that looks elegant, tastes nostalgic, and travels far better than a cupcake ever could.
Whether you’re baking for a holiday, a special occasion, or simply because you love red velvet, these cookies deliver that classic flavor in a fun, hand-held form.
Ingredients
For the Cookies
- 1½ cups all-purpose flour
- 2 tbsp unsweetened cocoa powder (natural or Dutch-processed)
- ½ tsp baking soda
- ¼ tsp salt
- ½ cup (1 stick) unsalted butter, softened
- ¾ cup granulated sugar
- ¼ cup light brown sugar, packed
- 1 large egg
- 1 tsp vanilla extract
- 1½ tsp red food coloring (gel or liquid, as needed for intensity)
- 1 tsp white vinegar
For the Cream Cheese Frosting
- 4 oz (½ block) cream cheese, softened
- 2 tbsp unsalted butter, softened
- 1½ cups powdered sugar, sifted
- ½ tsp vanilla extract
- Pinch of salt
Optional: Red sanding sugar, sprinkles, or mini chocolate chips for decoration
Instructions
Step 1: Preheat and Prep
Preheat your oven to 350°F (175°C). Line two baking sheets with parchment paper or silicone baking mats to prevent sticking and ensure even baking.
Step 2: Mix the Dry Ingredients
In a medium bowl, whisk together the flour, cocoa powder, baking soda, and salt. Set aside — this helps distribute the cocoa evenly and prevents overmixing later.
Step 3: Cream the Butter and Sugars
In a large mixing bowl (or the bowl of a stand mixer), beat the softened butter, granulated sugar, and brown sugar together on medium speed for 2–3 minutes, until light and fluffy. This step helps create a soft, tender cookie.
Step 4: Add the Wet Ingredients
Beat in the egg, vanilla extract, red food coloring, and vinegar until fully combined. Start with 1 teaspoon of food coloring and add more as needed to achieve that classic red velvet shade. The vinegar enhances the color and gives the dough that subtle tang red velvet is known for.
Step 5: Combine Wet and Dry
Gradually add the dry ingredients to the wet mixture, mixing on low until just combined. The dough should be soft but not sticky. If it feels too sticky, chill it for 10–15 minutes to make scooping easier.
Step 6: Scoop and Bake
Use a medium cookie scoop (about 1½ tablespoons) to portion out the dough onto the prepared baking sheets, leaving about 2 inches of space between cookies.
Bake for 9–11 minutes, or until the edges are set and the centers look slightly underbaked — they’ll firm up as they cool. Overbaking will make them cakey instead of soft and chewy, so keep a close eye toward the end.
Step 7: Cool Completely
Allow the cookies to cool on the baking sheets for 5 minutes before transferring them to a wire rack. Let them cool completely before frosting, or the icing will melt.
Step 8: Make the Cream Cheese Frosting
Beat the cream cheese and butter together until smooth and creamy. Add powdered sugar, vanilla, and a pinch of salt, then beat on low at first to avoid a sugar cloud. Once combined, beat on medium-high until fluffy and spreadable.
Step 9: Frost and Decorate
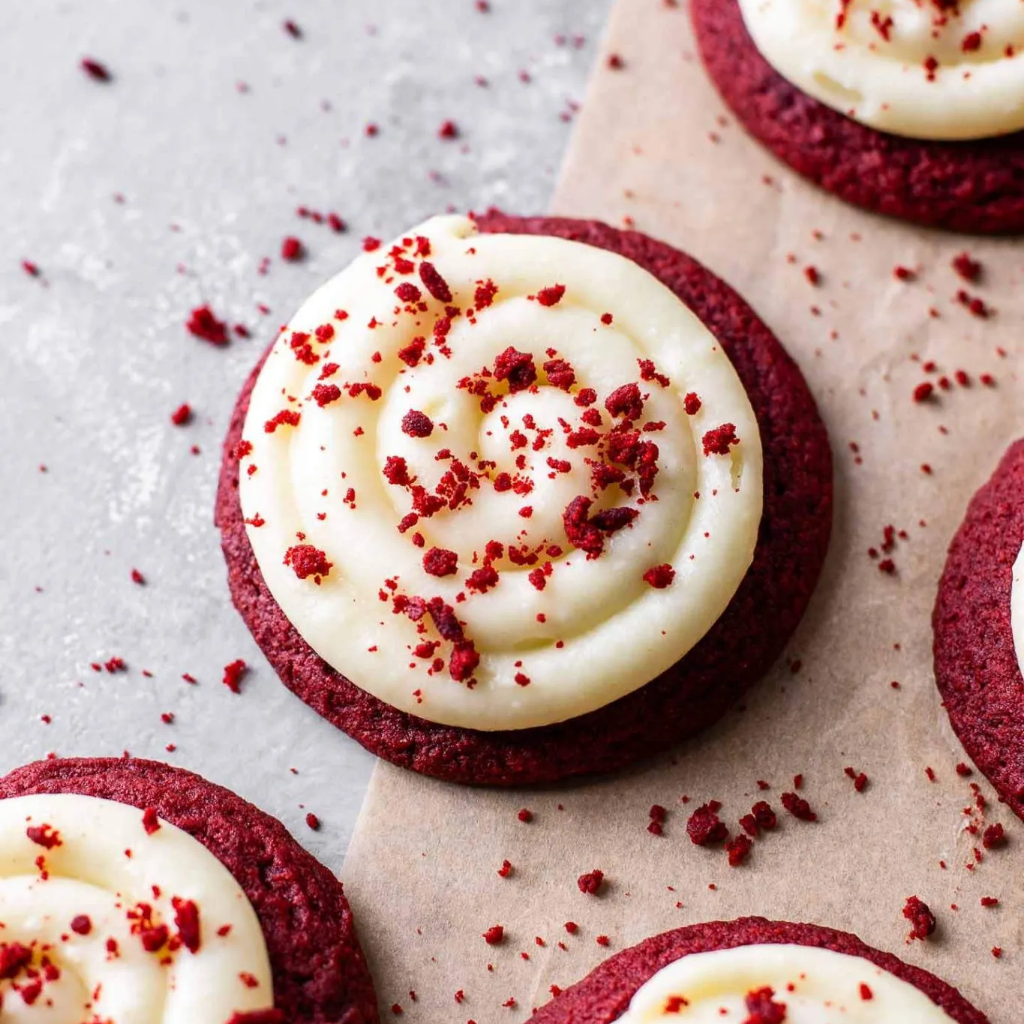
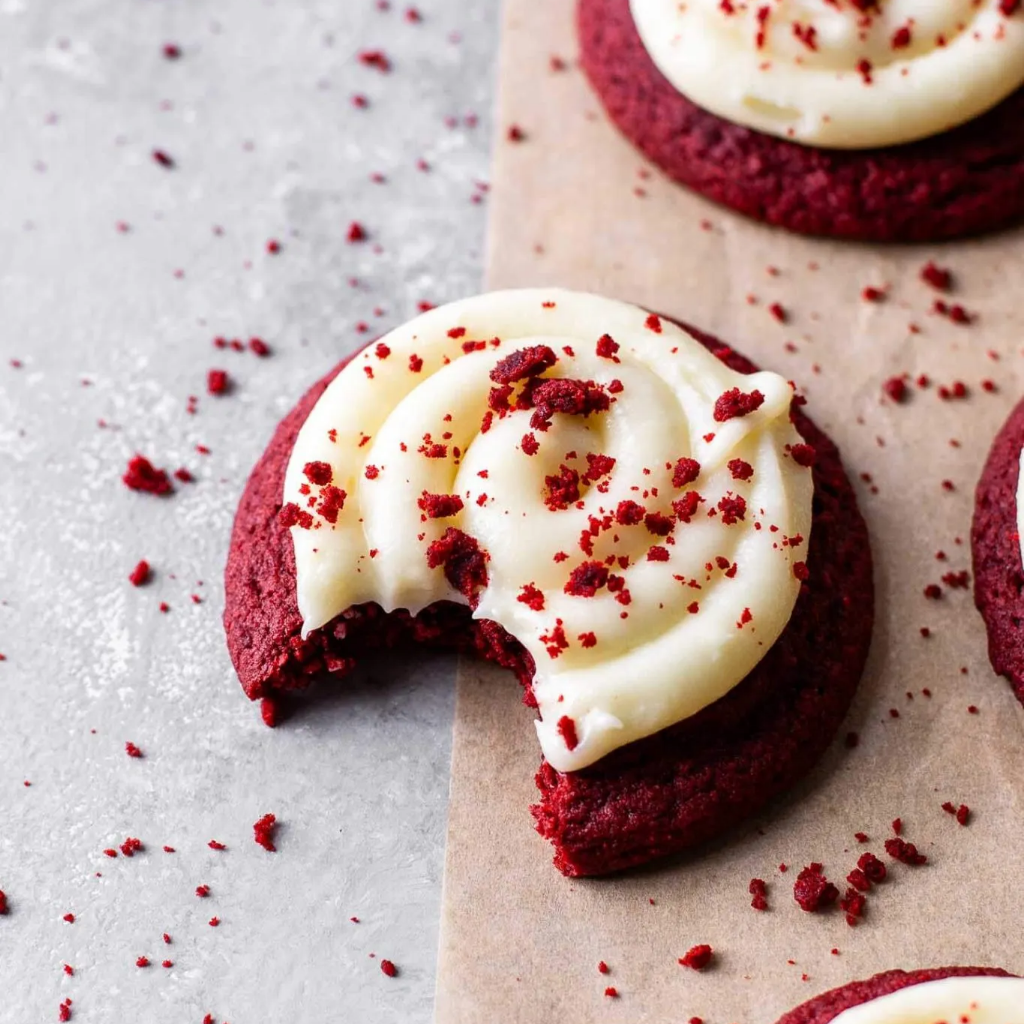
Spread or pipe a small swirl of cream cheese frosting onto each cooled cookie. For a bakery-style finish, use a piping bag fitted with a round or star tip. Top with red sugar, sprinkles, or mini chocolate chips if you like.
Flavor & Texture Notes
These Red Velvet Cupcake Cookies have the chewy edges of a cookie, the soft center of a cupcake, and the classic red velvet flavor that balances gentle cocoa notes with a touch of tang. The cream cheese frosting adds a creamy, slightly tart contrast that makes each bite taste like a perfectly frosted cupcake — without the need for liners or careful transporting.
The color is vibrant but elegant, and the texture is soft without being cakey. Think of them as the love child of a bakery-style cookie and a homemade cupcake.
Tips & Variations
- Food Coloring: Gel food coloring gives the most vivid red without watering down the dough. Liquid works too — just adjust as needed.
- No Mixer? You can make these by hand with a sturdy spatula, though creaming the butter and sugar will take a bit more effort.
- Chocolate Chips Inside: Stir in ½ cup white or dark chocolate chips for a little surprise inside the cookie.
- Mini Version: Make bite-sized cookies and pipe a tiny rosette of frosting on top for a beautiful party platter.
- Dairy-Free Frosting: Substitute vegan cream cheese and butter for a dairy-free option.
- Less Sweet Frosting: If you prefer less sweetness, reduce the powdered sugar by ¼ cup and add a teaspoon of lemon juice for brightness.
Storage & Make-Ahead
- Room Temperature: Unfrosted cookies can be stored in an airtight container at room temperature for up to 3 days.
- Fridge: Frosted cookies keep best in the refrigerator for up to 5 days. Let them sit at room temperature for 10–15 minutes before serving.
- Freezer: Freeze unfrosted cookies for up to 2 months. Thaw overnight in the fridge, then frost before serving.
- Make-Ahead Frosting: Cream cheese frosting can be made up to 3 days in advance and stored covered in the fridge. Bring to room temperature and rewhip before using.
Serving Suggestions
- For Parties: Arrange the frosted cookies on a tiered dessert stand for a striking display.
- Valentine’s Day Treat: Add heart-shaped sprinkles or drizzle white chocolate over the top for a romantic twist.
- Gift Boxes: These travel better than cupcakes — perfect for gifting in cookie tins or boxes.
- Mini Dessert Buffets: Pair with chocolate-dipped strawberries or small brownies for a red-and-white dessert theme.
FAQ
Can I make these without food coloring?
Yes — they’ll be light cocoa cookies with cream cheese frosting. The flavor stays the same, though they won’t have the signature red velvet color.
Why do red velvet recipes use vinegar?
Vinegar reacts with the cocoa powder and enhances the red hue while adding a subtle tang that balances the sweetness.
Can I pipe the dough like cupcake batter?
No — this dough is thicker than cupcake batter. Use a cookie scoop or spoon to portion it out for even shapes.
How do I keep the cookies soft after baking?
Store them in an airtight container with a small piece of bread. The cookies will absorb the moisture and stay soft for several days.
Can I double the recipe?
Absolutely. This recipe doubles beautifully — perfect for parties or gifting.
Conclusion
These Red Velvet Cupcake Cookies are everything you love about red velvet cake, reimagined as an easy-to-share, bakery-worthy cookie. They’re soft, chewy, and topped with that signature cream cheese frosting, making them perfect for holidays, parties, or whenever you want to bake something a little special.
They look beautiful on a dessert table, taste incredible fresh from the oven, and travel like a dream — no cupcake liners or wobbly frosting towers required. Once you try them, you may never go back to regular red velvet cupcakes again.