Follow Me On Social Media!

Blackberry Cheesecake Recipe: No-Bake Summer Dessert with Fresh Berry Swirl.
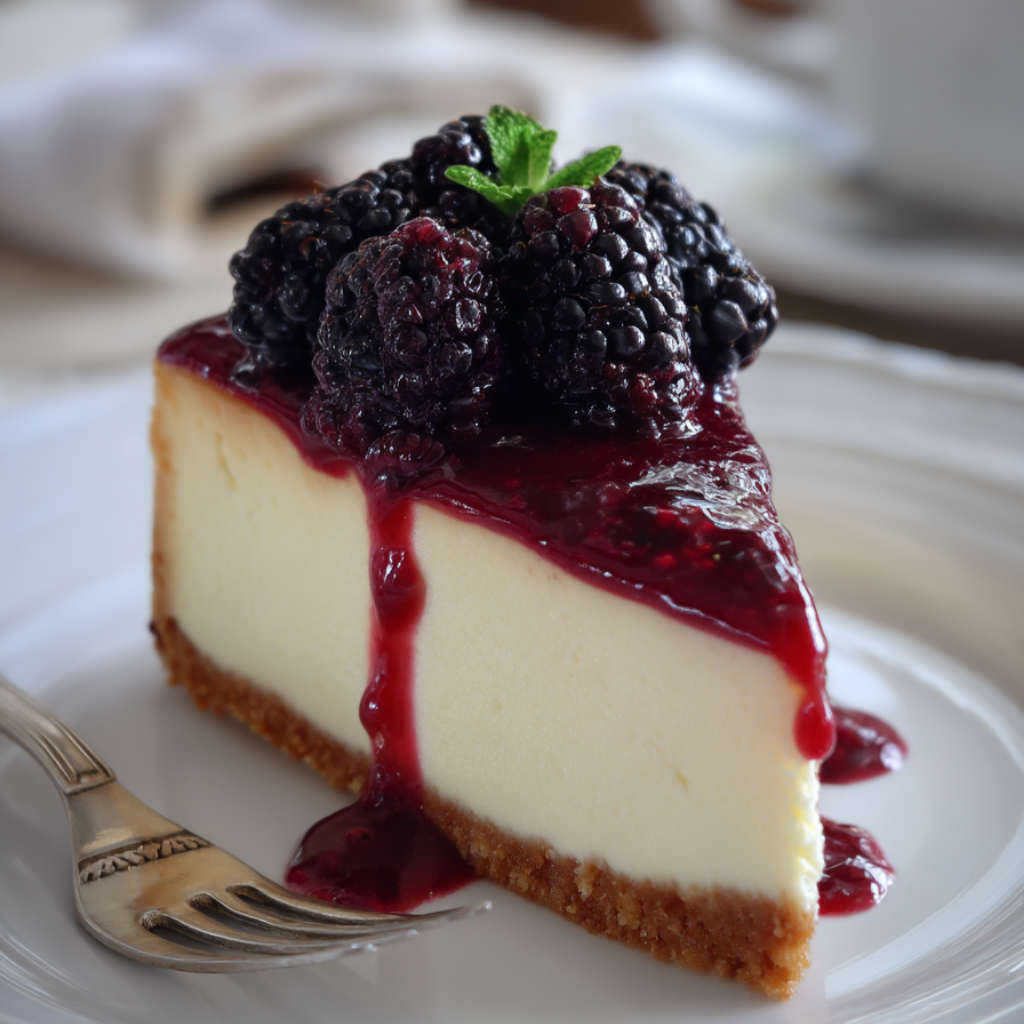
Summer blackberries have this way of staining your fingers purple and leaving you with that perfect balance of sweet and tart on your tongue. Last August, I found myself with nearly three pounds of these jewel-like berries from a morning of picking, and after eating my fill fresh and making jam, I still had enough left for something special. That’s when this blackberry cheesecake was born—a no-bake dessert that captures the essence of summer in every creamy, berry-swirled bite.
What makes this blackberry cheesecake different from your typical cheesecake is the technique of creating a fresh berry swirl that maintains distinct ribbons of flavor throughout the creamy filling. Instead of just mixing berries into the batter, this method preserves the bright, concentrated blackberry taste while creating a beautiful marbled appearance that looks as stunning as it tastes.
The no-bake approach might seem unconventional to cheesecake purists, but it actually allows the fresh blackberry flavor to shine without being dulled by heat. The result is lighter and more refreshing than traditional baked cheesecake, making it perfect for warm weather entertaining or when you want something impressive without turning on the oven.
This recipe strikes the perfect balance between tangy cream cheese richness and the natural sweetness of blackberries. The graham cracker crust provides a satisfying crunch that contrasts beautifully with the silky filling, while a hint of lemon brightens all the flavors. Whether you’re using fresh-picked berries or store-bought ones, this cheesecake transforms simple ingredients into something that feels decidedly special.
Ingredients
For the Graham Cracker Crust:
- 1 1/2 cups graham cracker crumbs (about 12 full crackers)
- 1/3 cup granulated sugar
- 6 tablespoons unsalted butter, melted
- 1/4 teaspoon salt
For the Blackberry Swirl:
- 2 cups fresh blackberries (or frozen, thawed)
- 1/3 cup granulated sugar
- 2 tablespoons fresh lemon juice
- 1 tablespoon cornstarch
- 1 tablespoon water
For the Cheesecake Filling:
- 24 ounces (3 packages) cream cheese, room temperature
- 3/4 cup granulated sugar
- 1 cup heavy whipping cream
- 2 teaspoons vanilla extract
- 1 tablespoon fresh lemon juice
- 1/4 teaspoon salt
- 2 tablespoons unflavored gelatin
- 1/4 cup warm water
For Garnish:
- 1 cup fresh blackberries
- Powdered sugar for dusting (optional)
- Fresh mint leaves (optional)
Instructions
Begin by preparing your 9-inch springform pan. This step is crucial for a clean release later—wrap the outside bottom of the pan with aluminum foil to prevent any potential leaks, then lightly grease the sides with butter or cooking spray.
For the crust, combine graham cracker crumbs, sugar, and salt in a medium bowl. Pour in the melted butter and mix until the mixture resembles wet sand and holds together when squeezed. Press this mixture firmly and evenly into the bottom of your prepared pan, using the bottom of a measuring cup to create a smooth, compact layer. Refrigerate while you prepare the other components.
Create the blackberry swirl by combining blackberries, sugar, and lemon juice in a medium saucepan over medium heat. Cook for about 5 minutes, stirring occasionally, until the berries break down and release their juices. The mixture should be bubbling and jammy. In a small bowl, whisk together cornstarch and water until smooth, then stir this slurry into the berry mixture. Cook for another 2-3 minutes until thickened. Remove from heat and let cool completely. For an ultra-smooth swirl, you can strain the mixture to remove seeds, but I prefer leaving them for texture and visual appeal.
While the berry mixture cools, prepare the gelatin. Sprinkle the unflavored gelatin over warm water in a small bowl and let it bloom for about 5 minutes. The gelatin will absorb the water and become spongy. After blooming, microwave for 10-15 seconds or until the gelatin dissolves completely into a clear liquid.
For the filling, beat the room-temperature cream cheese with an electric mixer until completely smooth and fluffy, about 3-4 minutes. Scrape down the sides of the bowl frequently to ensure no lumps remain. Gradually add the sugar and beat until well combined. Add vanilla, lemon juice, and salt, mixing until incorporated.
In a separate bowl, whip the heavy cream to soft peaks—it should hold its shape but still look slightly loose. Don’t over-whip, as you’ll be folding it into the cream cheese mixture. Add the dissolved gelatin to the cream cheese mixture and beat briefly to combine, then gently fold in the whipped cream using a large spoon or rubber spatula. Work quickly but gently to maintain the light, airy texture.
Pour about half of the cheesecake filling over the chilled crust. Dollop spoonfuls of the cooled blackberry mixture over the filling, then add the remaining cheesecake mixture. Use a knife to create swirls by dragging it through the layers in a figure-eight pattern. Don’t over-mix—you want distinct ribbons of berry and cream cheese rather than a uniform purple color.
Smooth the top gently with an offset spatula, then cover with plastic wrap and refrigerate for at least 4 hours, though overnight is even better. The gelatin needs time to set properly, and the flavors will meld beautifully during the chilling period.
Flavor & Texture Notes
This blackberry cheesecake offers a perfect study in contrasts that makes each bite interesting. The crust provides a satisfying crunch with hints of honey sweetness from the graham crackers, while the filling is luxuriously smooth and creamy. The texture is lighter than traditional baked cheesecake—more like a sophisticated mousse—thanks to the whipped cream and gelatin structure.
The blackberry swirl delivers intense bursts of berry flavor that are both sweet and tart. Fresh blackberries have a complexity that includes floral notes alongside their natural tartness, and cooking them concentrates these flavors while adding a jammy richness. The swirl maintains its distinct identity throughout the creamy base, creating pleasant surprises in every spoonful.
The cream cheese provides a rich, tangy foundation that balances the sweetness of the berries perfectly. A hint of lemon in both the filling and the berry swirl adds brightness that prevents the dessert from feeling heavy, while the vanilla rounds out all the flavors with its warm, familiar notes.
The overall experience is refreshing and sophisticated—rich enough to satisfy dessert cravings but light enough to end a heavy meal without overwhelming your guests.
Tips & Variations
Berry Substitutions: This technique works beautifully with other berries. Try raspberries, blueberries, or mixed berry combinations. Strawberries work too, though they may need a bit more cooking time to break down properly. Frozen berries can be substituted—just thaw them first and drain excess liquid.
Make It Lighter: For a lighter version, substitute half the cream cheese with Greek yogurt, though this will create a slightly tangier flavor and softer texture. You can also use light cream cheese, but avoid fat-free versions as they don’t create the proper texture.
Crust Variations: Try using gingersnap cookies, vanilla wafers, or even chocolate cookies for the crust. Crushed amaretti cookies create an almond flavor that pairs beautifully with berries. For a gluten-free version, use gluten-free graham crackers or ground nuts mixed with melted butter.
Flavor Additions: A tablespoon of blackberry liqueur (like Chambord) in either the filling or the berry swirl adds sophisticated depth. Lemon zest in the filling brightens all the flavors, while a touch of almond extract complements the berries beautifully.
Individual Portions: This recipe works well in individual glasses or ramekins for elegant single servings. Layer the components in clear glasses to show off the beautiful swirl pattern.
Seasonal Adaptations: In winter, try this with frozen berries or even berry jam thinned with a little lemon juice. The technique adapts well to seasonal fruit availability.
Storage & Make-Ahead
This cheesecake is actually better the next day, making it perfect for entertaining. The flavors have time to meld, and the texture becomes perfectly set. Store covered in the refrigerator for up to 5 days, though it’s best consumed within 3 days for optimal freshness.
The cheesecake can be made up to 2 days in advance. In fact, making it a day ahead ensures the best texture and allows you to focus on other meal preparation. Cover tightly with plastic wrap to prevent the surface from drying out or absorbing refrigerator odors.
For longer storage, this cheesecake freezes well for up to 1 month. Wrap tightly in plastic wrap, then aluminum foil. Thaw in the refrigerator overnight before serving. The texture may be slightly softer after freezing, but the flavor remains excellent.
Individual slices can be wrapped and frozen separately for convenient single servings. This is particularly useful if you’re serving a small household but want to make the full recipe.
Serving Suggestions
Remove the cheesecake from the refrigerator about 15 minutes before serving to allow it to soften slightly for easier slicing. Run a thin knife around the edges before releasing the springform pan sides for the cleanest presentation.
For clean slices, wipe your knife with a damp cloth between cuts. This prevents the creamy filling from dragging and ensures each piece looks pristine on the plate.
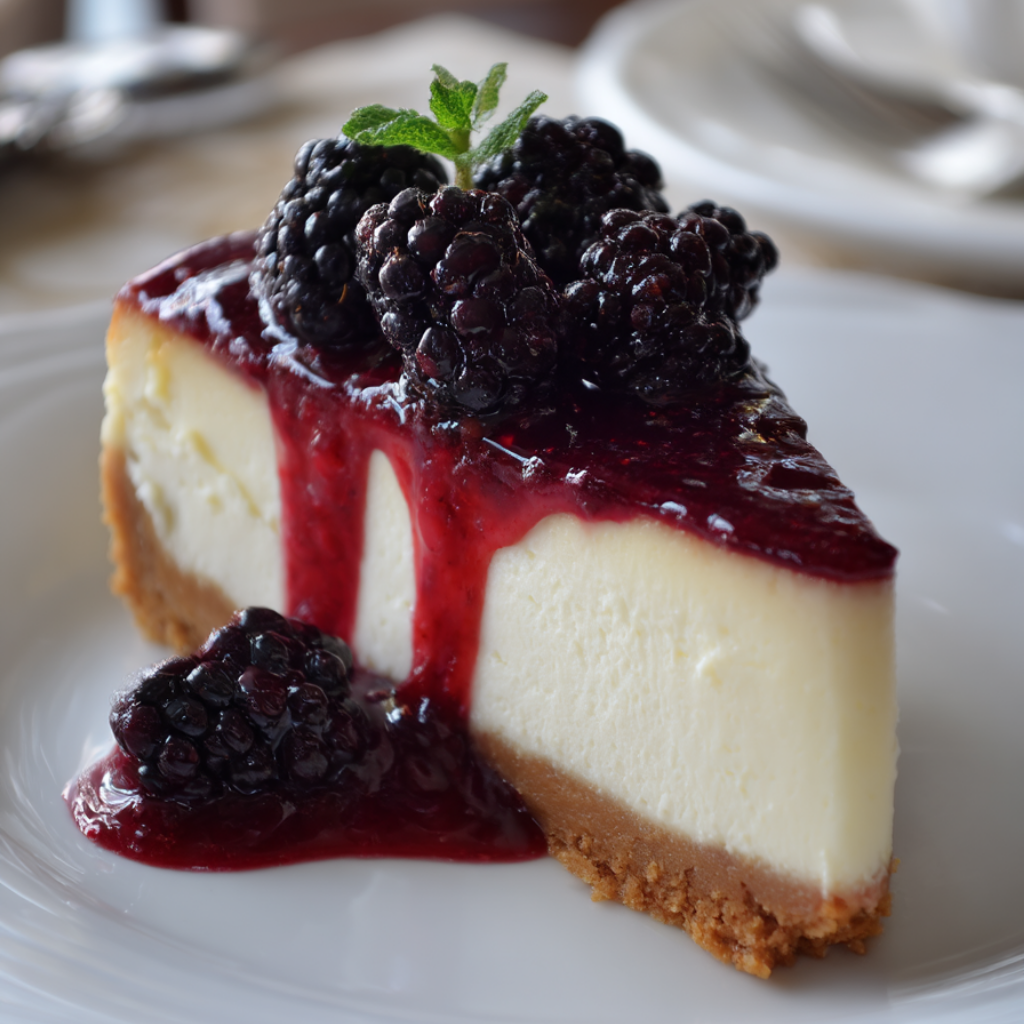
Garnish each slice with fresh blackberries and a light dusting of powdered sugar for an elegant presentation. A small sprig of fresh mint adds color and a subtle aromatic note that complements the berries beautifully.
This cheesecake pairs wonderfully with a glass of dessert wine, champagne, or even a cup of strong coffee. The richness balances well with the acidity in wine or the bitterness in coffee.
For special occasions, consider drizzling individual plates with additional berry sauce or a simple berry coulis made by pureeing fresh berries with a touch of sugar and lemon juice.
FAQ
Why didn’t my cheesecake set properly? The most common cause is not allowing enough chilling time—this dessert really needs at least 4 hours, preferably overnight. Also, make sure your gelatin dissolved completely and that your cream cheese was at room temperature before mixing. If the cream cheese is too cold, it won’t incorporate smoothly and can affect the setting.
Can I make this without gelatin? While gelatin provides the best texture for a no-bake cheesecake, you can try substituting with agar powder (use about half the amount) for a vegetarian option. The texture will be slightly different but still pleasant. Without any setting agent, the cheesecake will be much softer and more like a mousse.
My berry swirl is too runny. How do I fix it? If your berry mixture seems thin after adding the cornstarch, cook it a bit longer until it coats the back of a spoon. Remember it will thicken more as it cools. If it’s already in the cheesecake, don’t worry—it will still taste great, just with a less defined swirl pattern.
How do I prevent cracks in my cheesecake? Since this is a no-bake cheesecake, cracking isn’t usually an issue like it is with baked versions. However, if you see small cracks forming on the surface, it might be from temperature changes. Make sure to chill gradually and keep covered to prevent the surface from drying out.
Can I use frozen blackberries? Absolutely. Thaw them completely and drain excess liquid before cooking. Frozen berries often break down more quickly than fresh ones, so you may need slightly less cooking time. The flavor will be just as good, though the texture might be a bit softer.
There’s something magical about creating a dessert that looks as stunning as it tastes, especially when it comes together without any complicated techniques or special equipment. This blackberry cheesecake proves that some of the most impressive desserts are also the most approachable. The combination of creamy, tangy filling with those beautiful ribbons of berry swirl creates something that feels both nostalgic and elegant—perfect for celebrating summer’s bounty or bringing a taste of sunshine to any season. Make it once, and it’s guaranteed to become your go-to impressive dessert that actually lets you enjoy your own party.