Follow Me On Social Media!

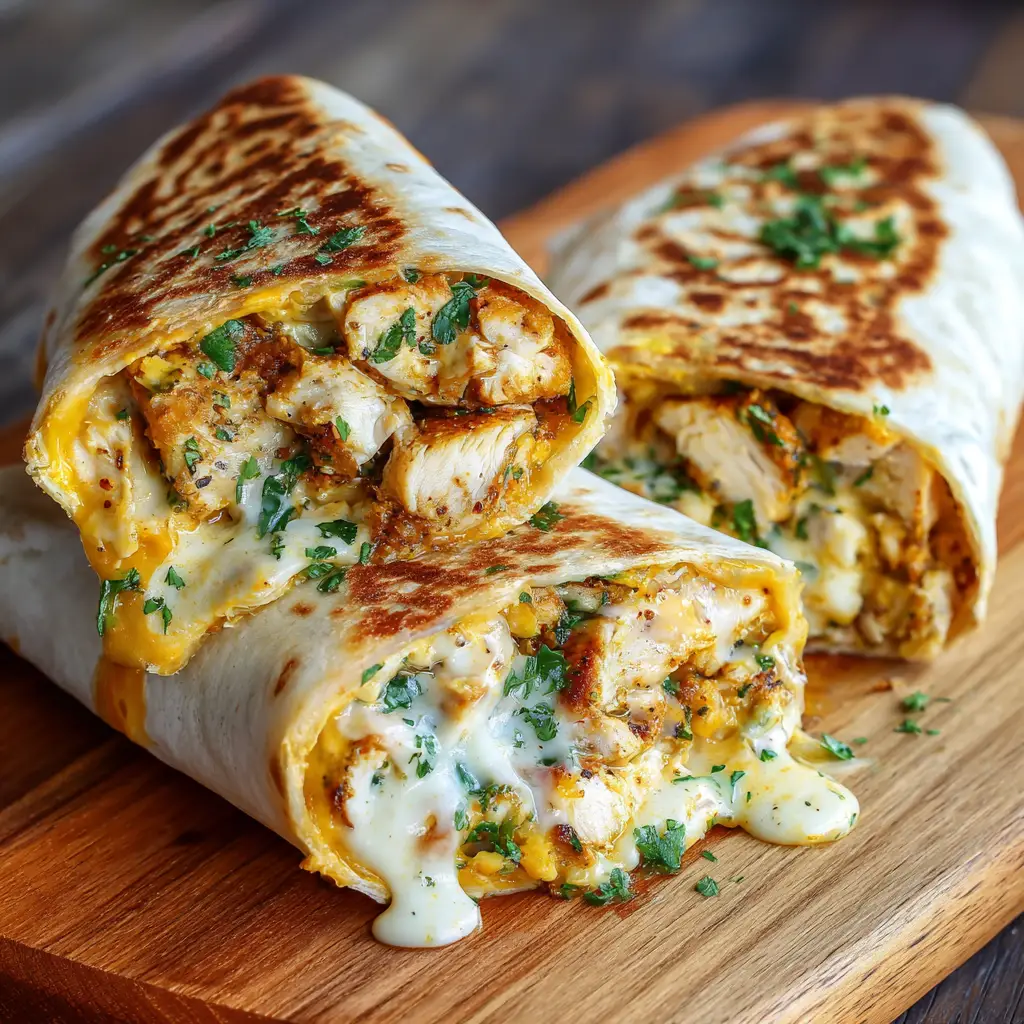
Cheesy Garlic Chicken Wraps: The 15-Minute Meal That Beats Any Drive-Through.
Sometimes the best recipes come from pure desperation. It was a Tuesday night, I had forgotten to plan dinner (again), and the only things in my fridge were some leftover rotisserie chicken, a few tortillas, and the usual condiment suspects. What started as a “let’s see what happens” experiment turned into these cheesy garlic chicken wraps that my family now requests at least twice a week.
These aren’t your average chicken wraps. The secret lies in the garlic-herb cream cheese mixture that acts as both a spread and a binding agent, keeping everything together while adding incredible flavor. Combined with perfectly seasoned chicken, melted cheese, and fresh vegetables wrapped in a golden, crispy tortilla, these wraps deliver restaurant-quality taste in less time than it takes to decide what to order for takeout.
What makes these chicken wraps special is how they solve the eternal dinner dilemma: they’re quick enough for busy weeknights, satisfying enough to keep everyone happy, and versatile enough to work with whatever you have on hand. The garlic cream cheese base can be made ahead of time, and the wraps come together so quickly that you can have dinner on the table faster than most delivery apps can get to your door.
The combination of textures—creamy, cheesy interior wrapped in a crispy, golden exterior—creates something that feels indulgent while still being relatively light. Plus, they’re handheld, which automatically makes them more fun to eat and easier for families with kids who are always on the go.
Ingredients
For the Garlic Cream Cheese Spread:
- 4 ounces cream cheese, softened to room temperature
- 2 cloves garlic, minced
- 2 tablespoons fresh chives, finely chopped (or 2 teaspoons dried)
- 1 teaspoon dried oregano
- 1/2 teaspoon onion powder
- Salt and freshly ground black pepper to taste
For the Wraps:
- 4 large flour tortillas (10-inch size works best)
- 2 cups cooked chicken, shredded or diced (rotisserie chicken works perfectly)
- 1 1/2 cups shredded cheese (cheddar, Monterey Jack, or Mexican blend)
- 1 medium bell pepper, thinly sliced
- 1/2 red onion, thinly sliced
- 2 cups fresh spinach leaves or lettuce
- 2 tablespoons olive oil or butter for cooking
Optional Add-ins:
- 2 strips bacon, cooked and crumbled
- 1/4 cup sun-dried tomatoes, chopped
- 1 avocado, sliced
- 2 tablespoons ranch dressing or hot sauce
Instructions
Start by making the garlic cream cheese spread, which is the flavor foundation of these wraps. In a medium bowl, combine the softened cream cheese with minced garlic, chives, oregano, and onion powder. Mix thoroughly until everything is well combined and the mixture is smooth and spreadable. If your cream cheese is too firm, let it sit at room temperature for 15 minutes, or give it a quick 10-second zap in the microwave. Season with salt and pepper to taste—this spread should be flavorful on its own since it’s doing a lot of heavy lifting in the final dish.
Lay your tortillas on a clean work surface and spread about 2 tablespoons of the garlic cream cheese mixture on each tortilla, leaving about an inch border around the edges. This border is crucial for proper wrapping and prevents the filling from leaking out when you roll them up.
Distribute the shredded chicken evenly among the tortillas, placing it in a line across the center of each tortilla rather than spreading it all the way to the edges. Season the chicken lightly with salt and pepper if it needs extra flavor—this depends on how well-seasoned your chicken is to begin with.
Add the shredded cheese on top of the chicken, followed by the sliced bell pepper and red onion. The vegetables add crunch and freshness that balances the richness of the cheese and cream cheese spread. Finally, add a handful of spinach or lettuce to each wrap.
Now comes the wrapping technique, which makes the difference between a messy sandwich and a perfectly contained wrap. Fold in the sides of the tortilla first, then roll from the bottom up, keeping the filling tightly packed as you go. The cream cheese spread will help everything stick together, but don’t overfill the wraps or they’ll be impossible to close properly.
Heat a large skillet or griddle over medium heat and add a tablespoon of olive oil or butter. Place the wraps seam-side down in the pan—this helps seal them closed while they cook. Cook for 2-3 minutes until the bottom is golden brown and crispy, then carefully flip and cook for another 2-3 minutes on the other side.
The wraps are done when they’re golden brown and crispy on both sides, and the cheese inside has melted. You should be able to see some melted cheese just starting to ooze out at the edges—that’s your visual cue that everything inside is perfectly heated through.
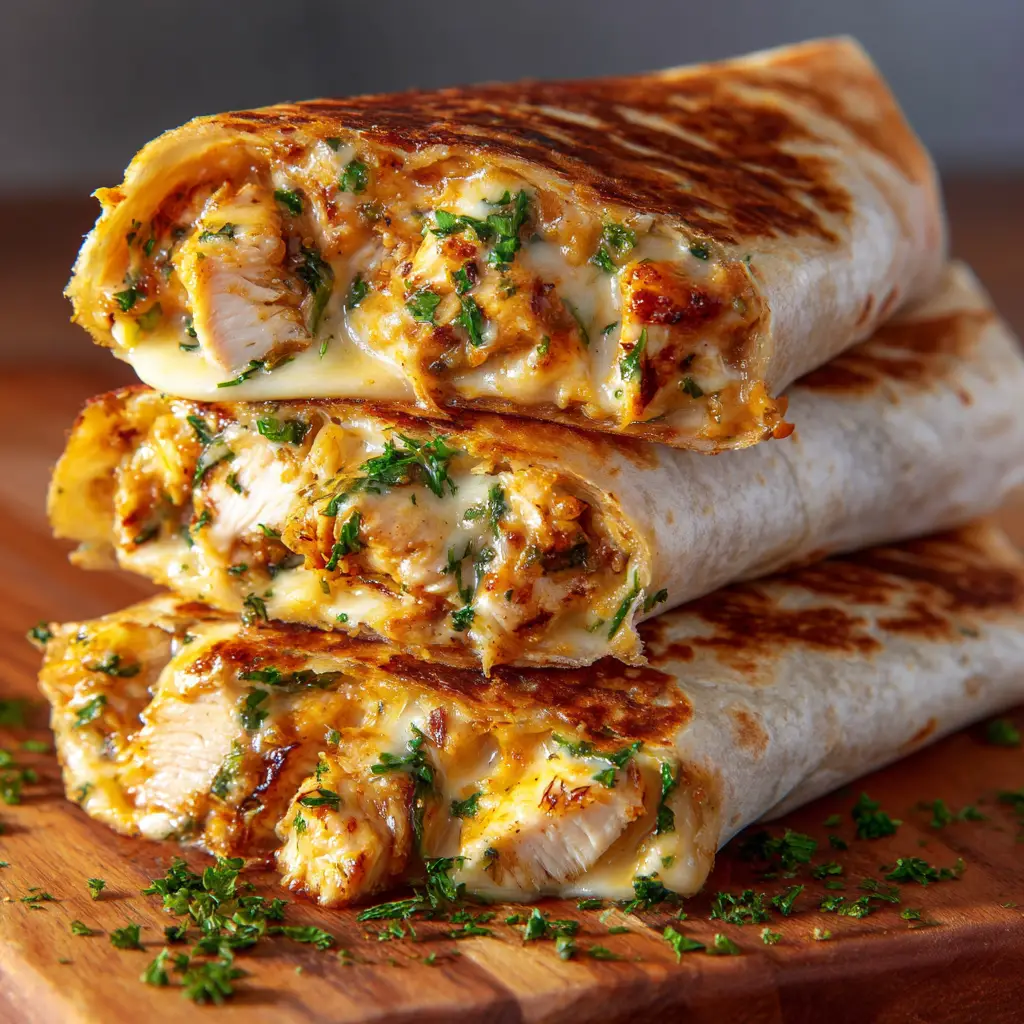
Let the wraps rest for a minute or two before cutting them in half diagonally. This brief resting period allows the cheese to set slightly, making them easier to cut and eat without everything falling out.
Flavor & Texture Notes
These cheesy garlic chicken wraps deliver a perfect balance of flavors and textures that make every bite satisfying. The garlic cream cheese spread provides a rich, savory foundation with a pleasant tang that complements rather than overwhelms the other ingredients. The garlic flavor is present but not aggressive—just enough to add depth and interest.
The chicken remains tender and juicy inside the crispy exterior, while the melted cheese creates creamy pockets throughout the wrap. The vegetables add essential freshness and crunch that prevents the wraps from feeling too heavy or one-dimensional. Bell peppers provide sweetness and a satisfying snap, while the red onion adds a subtle bite that cuts through the richness.
The exterior tortilla becomes golden and slightly crispy from pan-frying, creating a textural contrast with the soft, warm interior. There’s something deeply satisfying about biting through that crispy shell to reach the melted cheese and tender chicken inside.
The overall flavor profile is comforting and familiar—like an elevated version of a grilled cheese sandwich combined with the best parts of a chicken quesadilla. It’s rich enough to feel special but not so heavy that you feel sluggish afterward.
Tips & Variations
Chicken Preparation: Rotisserie chicken is the ultimate time-saver for this recipe, but you can also use leftover grilled chicken, baked chicken breasts, or even chicken thighs. If cooking chicken specifically for this recipe, season it well with garlic powder, paprika, and herbs to complement the garlic cream cheese spread.
Cheese Choices: While cheddar and Monterey Jack work beautifully, don’t be afraid to experiment. Pepper Jack adds heat, Swiss provides nuttiness, and Mexican cheese blends bring complexity. For a more sophisticated flavor, try a combination of sharp cheddar and cream cheese.
Vegetable Swaps: Almost any vegetable works in these wraps. Try mushrooms, zucchini, tomatoes, or roasted peppers. Just make sure to pat wet vegetables dry to prevent soggy wraps. Leftover roasted vegetables from other meals work wonderfully here.
Heat Level: Add sliced jalapeños, hot sauce in the cream cheese mixture, or use pepper Jack cheese for heat. For milder palates, stick with sweet bell peppers and mild cheeses.
Make Them Lighter: Use Greek yogurt mixed with a little mayonnaise instead of all cream cheese in the spread. You can also use low-fat cheese and add extra vegetables to bulk up the filling without adding calories.
Breakfast Version: Replace the herbs in the cream cheese with everything bagel seasoning, add scrambled eggs and bacon, and you’ve got an incredible breakfast wrap.
Storage & Make-Ahead
The garlic cream cheese spread can be made up to 3 days in advance and stored covered in the refrigerator. In fact, it tastes even better after the flavors have had time to meld together. Bring it to room temperature before using for easier spreading.
Assembled wraps are best cooked immediately for the crispiest exterior, but you can prepare them up to 4 hours ahead and store them covered in the refrigerator before cooking. If you do this, let them come to room temperature for 10 minutes before pan-frying to ensure even heating.
Cooked wraps can be stored in the refrigerator for up to 2 days, though the exterior won’t be as crispy when reheated. To reheat, place them in a dry skillet over medium-low heat for 2-3 minutes per side, or wrap in foil and warm in a 350°F oven for 10 minutes.
For longer storage, wrap the uncooked assembled wraps individually in plastic wrap and freeze for up to 1 month. Cook them directly from frozen, adding a few extra minutes to each side and covering the pan to help them heat through evenly.
Serving Suggestions
These wraps are substantial enough to serve as a complete meal, especially when paired with a simple side salad or some fresh fruit. For a more substantial meal, serve with baked sweet potato fries, a cup of tomato soup, or a light coleslaw.
The wraps look beautiful when cut diagonally and arranged on a platter, especially if you use different colored tortillas or vegetables to create visual variety. A small bowl of extra garlic cream cheese spread or ranch dressing for dipping elevates the presentation and gives people the option for extra flavor.
For parties or casual entertaining, these wraps can be cut into pinwheels for appetizers. Skip the pan-frying step and simply slice the rolled wraps into 1-inch rounds. They’re perfect for game day or potluck gatherings.
Consider serving with pickle spears or olives on the side for a classic deli-style presentation. The acidity cuts through the richness of the cheese and adds another textural element to the meal.
FAQ
Can I bake these wraps instead of pan-frying them? Yes, though the texture will be different. Place the assembled wraps seam-side down on a baking sheet and brush lightly with oil or melted butter. Bake at 400°F for 10-12 minutes, flipping once halfway through, until golden brown and crispy.
Why do my wraps fall apart when I try to roll them? This usually happens when the tortillas are too cold or the filling is overpacked. Warm the tortillas slightly in the microwave (10-15 seconds) to make them more pliable, and don’t be afraid to use less filling—you can always make more wraps if needed.
Can I make these wraps dairy-free? Absolutely. Use dairy-free cream cheese and shredded cheese alternatives. Nutritional yeast mixed with dairy-free cream cheese can provide a cheesy flavor, or you can substitute the cream cheese spread entirely with hummus or avocado.
What’s the best way to prevent the wraps from getting soggy? Pat any wet ingredients (like tomatoes or fresh vegetables) dry before adding them to the wrap. The cream cheese spread acts as a barrier, but excess moisture can still seep through. Also, don’t overfill the wraps, as this can cause them to break and leak.
Can I use corn tortillas instead of flour tortillas? Corn tortillas work, but they’re more fragile and have a different flavor profile. Warm them thoroughly before filling to make them more pliable, and use slightly less filling since they can’t hold as much as flour tortillas.
There’s something magical about a recipe that transforms simple ingredients into something that feels special and satisfying. These cheesy garlic chicken wraps prove that comfort food doesn’t have to be complicated or time-consuming. Whether you’re feeding a hungry family on a busy weeknight or looking for a satisfying lunch that won’t leave you reaching for snacks an hour later, these wraps deliver on both convenience and flavor. The best part? Once you master the basic technique, you can customize them endlessly based on your preferences and what’s in your fridge. Give them a try, and don’t be surprised if they become your new go-to solution for the eternal “what’s for dinner?” question.