Follow Me On Social Media!

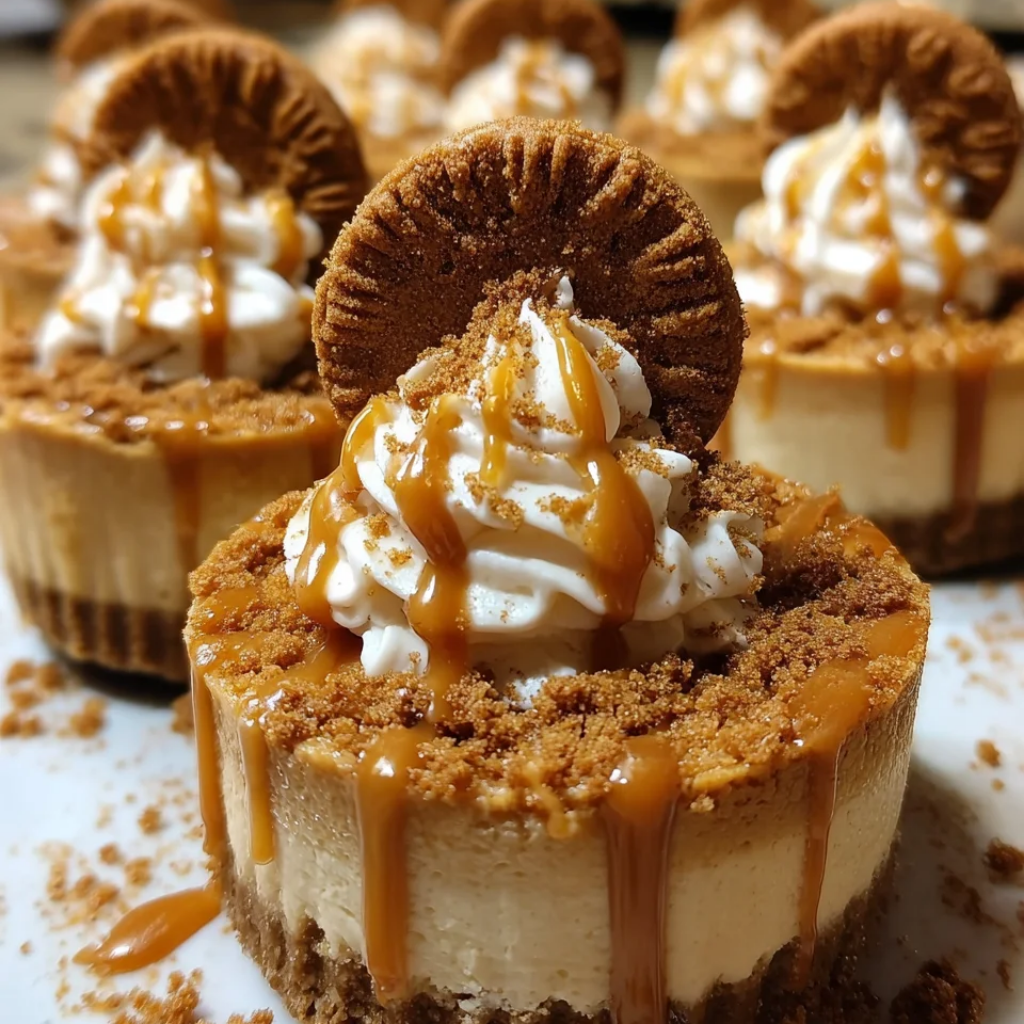
Mini Biscoff Cheesecakes with Cookie Butter Swirl.
There’s something magical about the way Biscoff cookies crumble between your fingers, releasing that warm spice aroma that instantly transports you to a cozy café. I first discovered these caramelized European cookies during a layover in Brussels, and I’ve been obsessed ever since. When Biscoff cookie butter hit the American market, I knew I had to find a way to transform that distinctive cinnamon-spiced flavor into something even more special.
These mini Biscoff cheesecakes capture everything I love about those iconic cookies and amplify it into rich, creamy individual desserts. The beauty of making mini cheesecakes lies in their perfect portion control and elegant presentation, plus they’re much easier to manage than a full-sized cheesecake. Each bite delivers layers of flavor: a crunchy Biscoff cookie crust, silky cream cheese filling infused with cookie butter, and a gorgeous swirl that creates beautiful marbled patterns on top.
What makes this recipe particularly appealing is how it transforms an everyday pantry staple into something that looks professionally crafted. The combination of textures—from the firm cookie base to the smooth, dense filling—creates a dessert that feels both familiar and sophisticated. Whether you’re hosting a dinner party or simply treating yourself to something special, these mini cheesecakes deliver maximum impact with surprisingly manageable effort.
Ingredients
For the Biscoff Cookie Crust:
- 20 Biscoff cookies (about 5 oz)
- 3 tablespoons unsalted butter, melted
- 1 tablespoon granulated sugar
- Pinch of salt
For the Cheesecake Filling:
- 16 oz cream cheese, room temperature
- 1/2 cup granulated sugar
- 1/4 cup Biscoff cookie butter, smooth
- 2 large eggs, room temperature
- 1/4 cup sour cream
- 1 teaspoon vanilla extract
- 1/4 teaspoon ground cinnamon
- 1/8 teaspoon salt
For the Cookie Butter Swirl:
- 3 tablespoons Biscoff cookie butter, smooth
- 2 tablespoons heavy cream
- 1 tablespoon powdered sugar
For Garnish (Optional):
- 6 Biscoff cookies, roughly chopped
- Whipped cream
- Caramel sauce
Instructions
Start by preheating your oven to 325°F and lining a 12-cup muffin tin with paper liners. This temperature is crucial for mini cheesecakes—too hot and they’ll crack, too cool and they won’t set properly.
Begin with the crust by placing the Biscoff cookies in a food processor and pulsing until you achieve fine, even crumbs. You want the texture to resemble coarse breadcrumbs with no large chunks remaining. Transfer the crumbs to a mixing bowl and stir in the melted butter, sugar, and salt until the mixture holds together when pressed. The consistency should be similar to wet sand that clumps when squeezed.
Divide the cookie mixture evenly among the lined muffin cups, using about 2 tablespoons per cup. Press the mixture firmly into the bottom of each liner using the back of a spoon or a small measuring cup. You want a compact, even layer that will hold up under the weight of the filling. Place the muffin tin in the refrigerator while you prepare the filling.
For the cheesecake filling, ensure your cream cheese is completely softened to room temperature—this prevents lumps and creates a silky smooth texture. In a large bowl, beat the cream cheese with an electric mixer on medium speed until fluffy and smooth, about 2 minutes. Gradually add the sugar, beating until well combined and the mixture lightens in color.
Add the 1/4 cup of cookie butter and beat until fully incorporated. The mixture should be uniform in color with no streaks. Next, add the eggs one at a time, beating on low speed just until combined after each addition. Overmixing at this stage can incorporate too much air, leading to cracks during baking.
Fold in the sour cream, vanilla extract, cinnamon, and salt using a spatula or mixing on the lowest speed. The filling should be completely smooth and have a rich, tan color from the cookie butter and cinnamon.
Remove the muffin tin from the refrigerator and divide the filling evenly among the cups, filling each about 3/4 full. This allows room for the cheesecakes to rise slightly without overflowing.
For the swirl, whisk together the remaining cookie butter, heavy cream, and powdered sugar until smooth. The mixture should be pourable but not too thin. Drop small dollops of this mixture onto the surface of each cheesecake, then use a toothpick or knife tip to create gentle swirl patterns. Don’t overwork the swirls—a few simple movements create the most elegant effect.
Bake for 18-22 minutes, or until the centers are almost set but still have a slight jiggle when gently shaken. The tops should look matte rather than shiny, and the edges might be very lightly golden. Mini cheesecakes continue cooking from residual heat, so slight underbaking ensures they won’t become dense or rubbery.
Allow the cheesecakes to cool in the pan for 30 minutes, then transfer to the refrigerator to chill for at least 3 hours before serving. This chilling time is essential for achieving the proper firm yet creamy texture that makes cheesecake so satisfying.

Flavor & Texture Notes
These mini cheesecakes offer a complex flavor profile that unfolds with each bite. The initial taste hits you with the warm, caramelized sweetness of Biscoff cookies, followed by the rich tanginess of cream cheese that balances the sweetness perfectly. The cinnamon adds a subtle warmth that enhances the cookie butter without overwhelming it, while the cookie crust provides a satisfying textural contrast.
The texture is where these really shine. The filling achieves that perfect cheesecake consistency—dense enough to feel substantial but light enough to feel refined. It’s firm when chilled but melts smoothly on your tongue, releasing layers of flavor as it warms slightly in your mouth. The cookie butter swirl creates pockets of intense Biscoff flavor that provide delightful surprises throughout each serving.
The crust maintains its structure without being hard or difficult to cut through, offering just enough crunch to complement the smooth filling. When eaten together, each component enhances the others, creating a harmonious dessert that tastes much more complex than its simple ingredient list might suggest.
Tips & Variations
Room temperature ingredients are absolutely critical for smooth cheesecake filling. If you forget to take your cream cheese and eggs out ahead of time, you can soften cream cheese quickly by cutting it into cubes and microwaving in 15-second intervals, stirring between each interval. For eggs, place them in a bowl of warm water for 10 minutes.
If you can’t find Biscoff cookies, graham crackers make an acceptable substitute for the crust, though you’ll lose that distinctive spiced flavor. Gingersnaps or speculoos cookies work beautifully as alternatives that maintain a similar flavor profile. For the cookie butter, you can substitute with smooth peanut butter or almond butter, though the flavor will obviously change significantly.
For a dairy-free version, use vegan cream cheese and coconut cream in place of dairy ingredients. The texture will be slightly different but still quite good. Make sure your vegan cream cheese is specifically designed for baking, as some varieties don’t set properly when heated.
Want to amp up the Biscoff flavor even more? Replace half the sour cream with additional cookie butter, or fold crushed Biscoff cookies directly into the filling before baking. You can also brush the baked and cooled cheesecakes with melted cookie butter for an extra glossy finish.
For chocolate lovers, try adding 2 tablespoons of cocoa powder to the filling for Chocolate Biscoff Cheesecakes. The combination of chocolate and spiced cookie flavors creates something reminiscent of European bakery treats.
Storage & Make-Ahead
These mini cheesecakes store beautifully in the refrigerator for up to 5 days when covered with plastic wrap or stored in an airtight container. The flavors actually improve after the first day as everything melds together, making them perfect for entertaining since you can prepare them completely in advance.
For longer storage, these freeze exceptionally well for up to 3 months. Wrap each cheesecake individually in plastic wrap, then place them in a freezer-safe container. To serve, thaw them in the refrigerator for 4-6 hours or overnight. The texture remains remarkably close to fresh, with no noticeable change in flavor.
If you’re planning to serve these at a party, you can make them up to 3 days ahead and add any garnishes just before serving. This actually works in your favor since chilled cheesecakes are easier to remove from their paper liners and handle for presentation.
Serving Suggestions
These mini cheesecakes are elegant enough to serve as-is, but a few simple additions can elevate them for special occasions. A dollop of freshly whipped cream and a sprinkle of crushed Biscoff cookies creates a beautiful presentation that echoes the flavors within.
For a more dramatic presentation, drizzle each cheesecake with warm caramel sauce and top with a whole Biscoff cookie standing upright in the center. The contrast between the warm sauce and cold cheesecake is particularly appealing.
Coffee lovers will appreciate these served alongside a strong espresso or cappuccino—the coffee enhances the caramelized notes in the cookie butter. For wine pairings, try a late-harvest Riesling or a tawny port, both of which complement the spiced, sweet flavors beautifully.
During fall and winter months, consider serving these with a small scoop of vanilla ice cream and a light dusting of cinnamon. The temperature contrast and additional vanilla notes create a dessert that feels both comforting and refined.
FAQ
Can I make these without a food processor for the crust? Yes, though it requires more effort. Place the cookies in a sealed plastic bag and crush them with a rolling pin until fine. This method takes longer and requires more attention to achieve even crumbs, but it works perfectly fine if you don’t have a food processor.
Why are my cheesecakes cracking on top? Cracking usually results from overbaking or temperature shock. Make sure your oven temperature is accurate using an oven thermometer, and avoid opening the oven door during baking. If cracks do appear, they’ll often be hidden once you add the cookie butter swirl, so don’t worry too much about minor surface imperfections.
Can I use crunchy cookie butter instead of smooth? Absolutely, and many people prefer the added texture. Crunchy cookie butter adds small pieces of cookie throughout the filling, creating additional textural interest. Just make sure to mix it thoroughly into the cream cheese base to distribute the pieces evenly.
How do I know when they’re done baking? The centers should still have a slight jiggle when you gently shake the pan, and the tops should look set rather than shiny. They’ll continue cooking from residual heat as they cool. An instantly-read thermometer should read about 150°F in the center if you want to be precise.
Can I double this recipe? Yes, this recipe doubles perfectly. You’ll need two muffin tins or you can bake in batches using the same tin. Keep the unbaked portions in the refrigerator while the first batch bakes. The baking time remains the same since the individual portion sizes don’t change.
These mini Biscoff cheesecakes represent everything I love about baking—they’re impressive enough for special occasions yet simple enough for a weekend treat. The combination of familiar flavors presented in an elegant format never fails to make people smile. There’s something deeply satisfying about creating restaurant-quality desserts in your own kitchen, especially when they’re this manageable and forgiving.
The best part about this recipe is how it brings people together. I’ve served these at book clubs, birthday parties, and quiet family dinners, and they always spark conversations about favorite cookies, travel memories, and the simple pleasure of a perfectly balanced dessert. When you pull these from the oven and see those beautiful swirled tops, you’ll feel that same sense of accomplishment that keeps us coming back to the kitchen again and again.